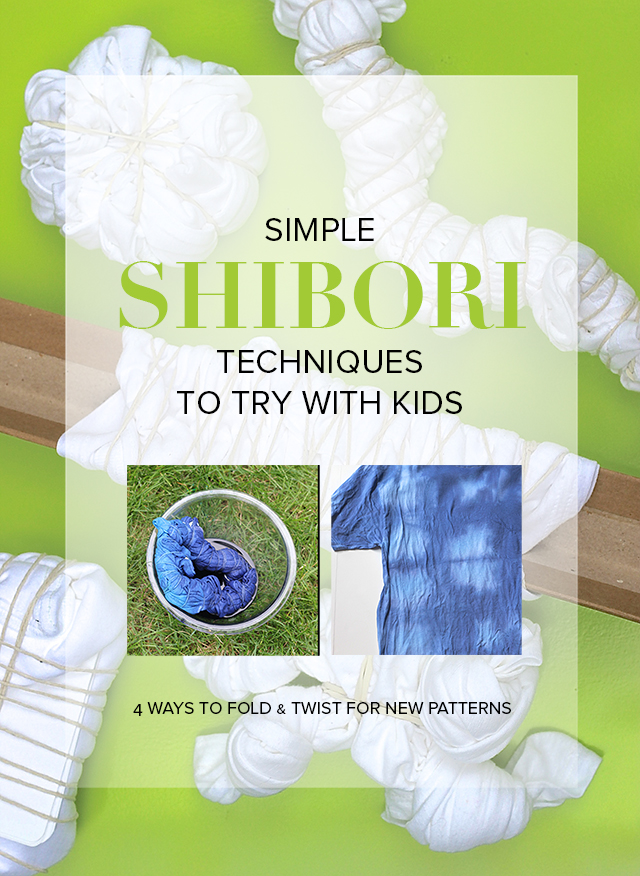
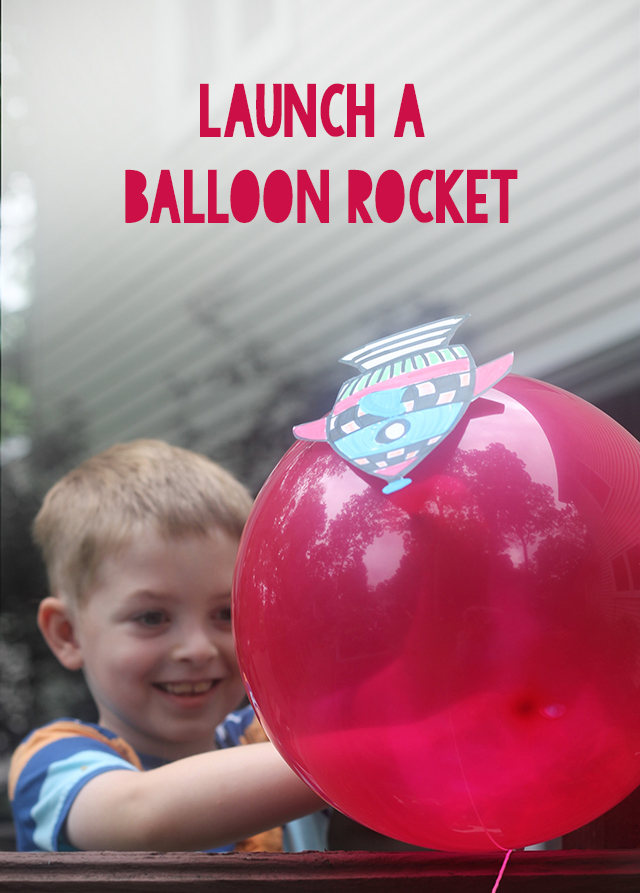
Add a touch of fall color to your front porch with this pumpkin wreath!
Pumpkins are the iconic image of Halloween for me, and I can't get enough of them right now! We made some jack o'lanterns from foam balls and orange yarn last week, and, as projects some time go, we got hooked in the process. The half sphere makes an easy, mountable pumpkin for any craft. These pumpkin magnets make me smile every time I pass by them.
Have you ever kept going with a process even after a project is complete because the process itself brings joy? My friend, Emily Jeffords, talks about the enjoyment of the process in her work as a painter and entrepreneur, and it resonates with me. On a more basic level, in this process of crafting, I found the rhythm of slicing the foam balls, the meditative nature of wrapping the yarn, and the assembling of mounds of bright-colored pumpkins totally satisfying.
DIY Yarn Pumpkin Wreath from Pars Caeli
So, I kept going. And made dozens and dozens of yarn pumpkins. Now we have a vibrant pumpkin wreath to add to our front door.
DIY Yarn Pumpkin Wreath from Pars Caeli
Make one for your home, too! Here's what you need:
- Wreath form
- Foam balls, halved
- Orange yarn (I used three shades of orange to make the composition more interesting)
- Glue (craft or hot glue)
- Scissors

DIY Yarn Pumpkin Wreath from Pars Caeli
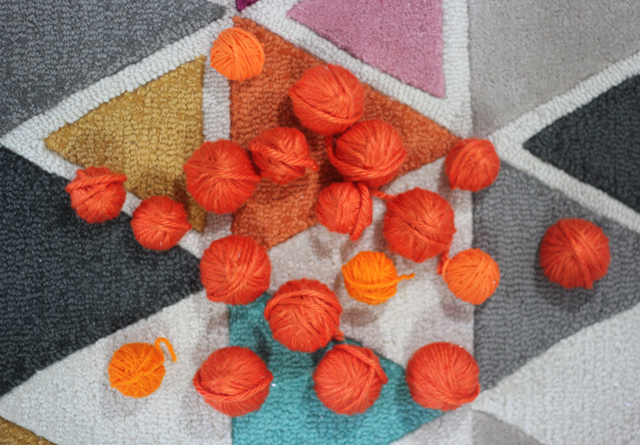
With the half spheres, wrap yarn around and around like you're creating a ball of yarn. Make sure that you cover all of the white foam as you wrap. Glue the end of the yarn on the back of the pumpkin.

DIY Yarn Pumpkin Wreath from Pars Caeli
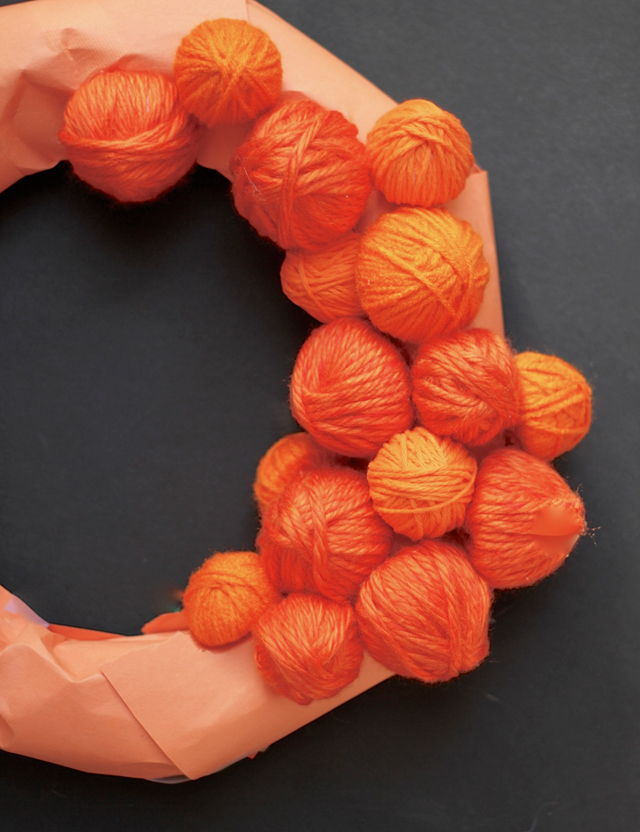
Once you have a few dozen ready, you can get to wreath making. The amount of pumpkins you need depends on the size of your wreath, as well as the size of the foam balls. I had 3" and 4" sized to help cover a 10" wreath.
TIP: Cover the white surface of the wreath with orange paper so that the gaps between pumpkins aren't so apparent at first glance.
DIY Yarn Pumpkin Wreath from Pars Caeli
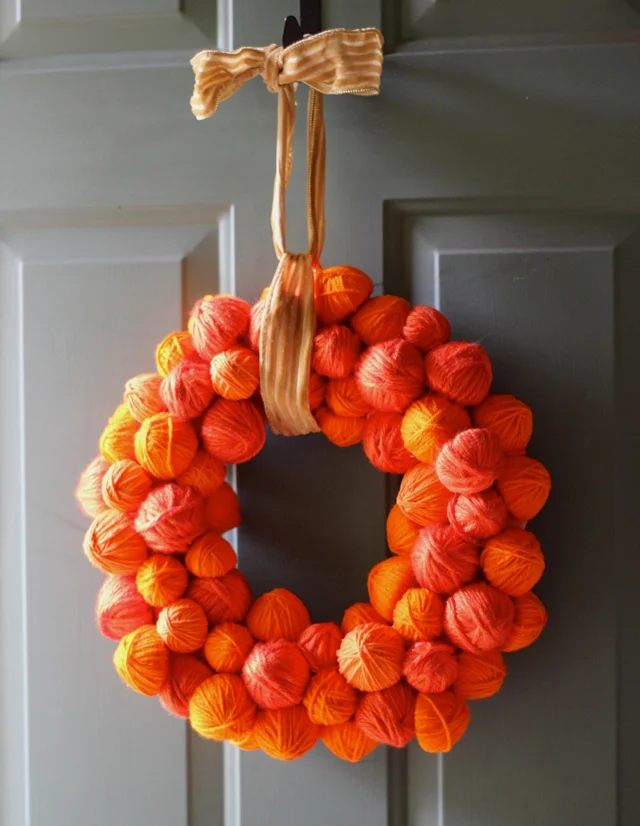
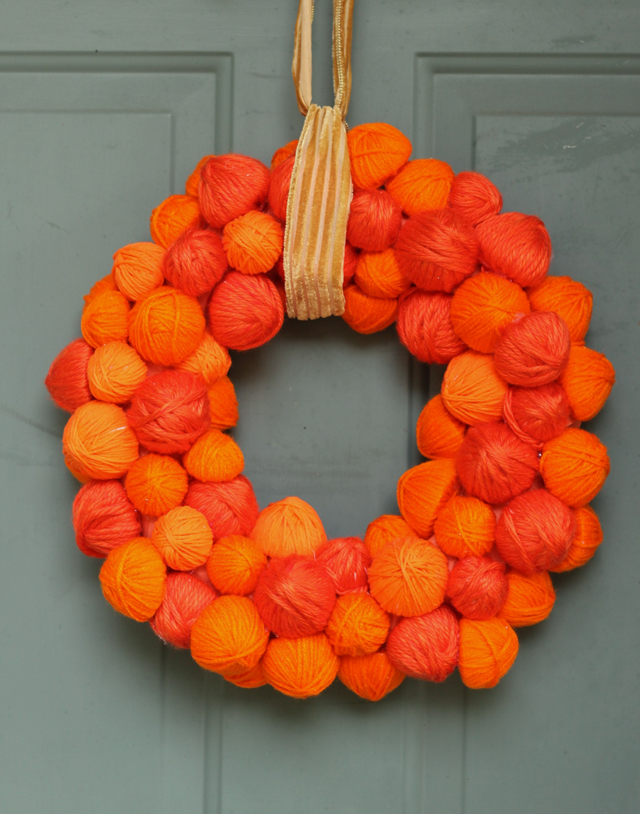
As you add each pumpkin, you'll see the wreath come to life! My son's favorite color is orange, and he is a big fan of the project. I love the impact that the color statement makes with simple forms. You could add faces to each pumpkin or a select few if you want more of a specifically-Halloween feel.
DIY Yarn Pumpkin Wreath from Pars Caeli
As you glue on each pumpkin, be sure to vary the shades of orange so that you end up with a cheerful mixing of the tones. I'm a big fan of how ours pops right off the slate green door! Happy fall!!
DIY Yarn Pumpkin Wreath from Pars Caeli
Remember this project I did with tiny balls of yarn? It's a quick alternative to the larger wreath, with the same process!
Happy making!