An Open Letter to Momtrepreneurs & Side Hustlers

Warning: this is a long post that's been marinating for a while. Thanks for sticking with me to the end.

To anyone who considers themselves a momtrepreneur, a side hustler, or a juggler of more than one main focus: a must read.

To anyone who considers themselves a momtrepreneur, a side hustler, or a juggler of more than one main focus: a must read.

Let's get down to the nitty gritty for a sweet minute, friends. To all of you balancing a full-time job/part-time job/relationship/child(ren)/pets/major projects and something else (likely another one of those things just mentioned), you are doing great work. Your efforts are worthy and noticed and, dare I say, appreciated.

All of the things you want might not be in balance, in fact, you might not be in balance, but you are making progress. You are getting something done, you are adding to the world. 

And the YOU of it all is more important than the final WHATEVER. I feel so confident in that statement that I'm going to make it a big old generalization.

Take care of you. You matter. If the you of you is not here, the whatever is not going to happen or to happen as well as it would with you.

I'm not trying to be cryptic here. Let me say more.

A few things you may or may not know about me:

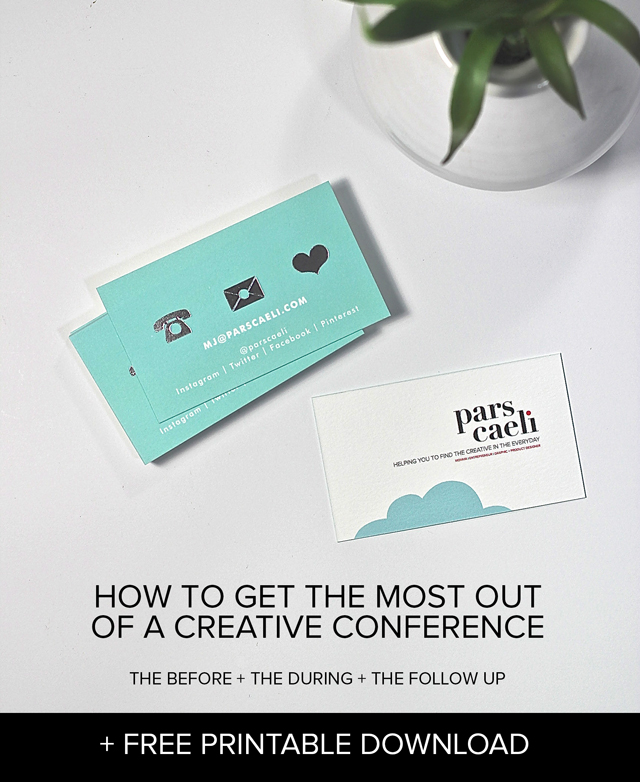
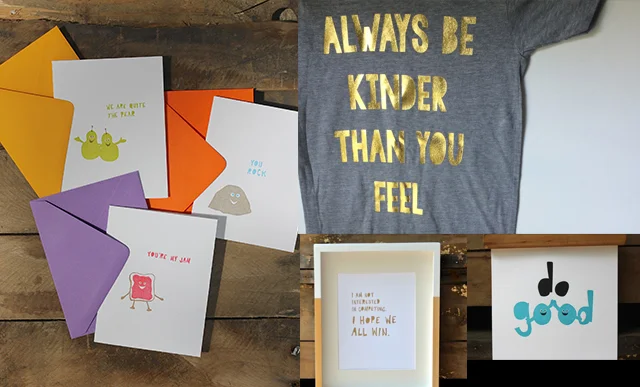
  1. I've been blogging, designing, networking, project-ing, and shop owning here for almost four years (Hi blogger peeps!) on the side (AKA: side hustle/entrepreneur) which means in real life I create the world of Pars Caeli in the wee small hours of the night, on the weekends, and in the early mornings.  
  2. I have three incredible children (10, 8, and 6), and a husband who refers to me as Beautiful and means it (awesome everywhere but some public settings).
  3. I have a great full-time job as a graphic designer and social media specialist. (Hi coworkers!)

Like many of you, the mix of those three aspects of my life fills me up creatively, spiritually, and emotionally. And like many of you, the combination of those exhausts me, gives me many a sleepless night, and leaves me more prone to any sickness floating around. 

For me, this blog turned business is not a necessity; it doesn't generate sufficient income to do much. It's not a quick fix for my creativity. It's not a portfolio of my talent. 

It is a ton of work. Hours and hours and hours. Most of which are likely to have been better spent in REM sleep, exercise, hobbies (what?), and relaxation (and what the what?). There are many days that I am tired. There are many more days that I wonder how I will find time to do the next thing. There are days when I create a great post on parenting, and I'm a horrible mother. There are days that I create nothing, and I have a good read on my kid's lives. And there are those ever-so-rare days when all the planets (even Pluto that isn't really a planet any more) align and the projects are gorgeous, my kids are content and growing, and I'm a successful employee. I might be able to count those on my fingers.

So, why do it, right? Why have the job and the business? Or the kids and the job? Or whatever your list is.... It's not for the steady blood pressure or minimal aggravation. It's likely not for the fame or the fortune or the record books either.

People have asked me why I started a blog, and I find myself answering that question differently now than I did four years ago. I'm not sure if I'm rewriting history or getting to know myself better, but I thought I started to blog to have a space where I could create whatever I wanted, as well as hold myself accountable to do the activities and projects I wanted to do with my kids and my home.

And it has been that - on many occasions.

I also started to blog to be "in the room" with remarkable, capable, talented, and determined creators. I wanted to challenge myself to do more. And I wanted to challenge myself to learn from people outside of my direct circles, but still incredibly like me. For good or bad, I'm the kind of person who observes a crowd of people, notices dynamics, senses personalities, finds charismatic individuals, and says to myself, "I want to be that person's friend." The energizer, the empathizer, the artist, the satirist, the deep intellectual, the misunderstood, the genuine giver. All of these archetypes have fallen into my must-meet-and-befriend circle.

And I am so, so grateful that I now have a whole gang of people that I admire and I love because of this blog, this after-hours jumbo project. We are in the room together, and somehow over these four years, I've done enough and been enough that I finally feel that I have proven to myself that I am their peer.

Which leads me to why I think I really started this blog.

I needed a space to remind me who I am.

I needed a space to remind me who I want to be.

When I think through and peruse the hundreds of posts I've created through the years, each post seems to fall into one of two categories: a diatribe of who I am or a projection (via project) of who I want to be. 

I had a local friend tell me that she felt intimidated to read my blog. "How do you do all of those things? And have a job? And have a family? I could never do that." To which I responded something typical of me, "No worries. I don't really do it all that well. And feel welcome not to read the blog. I totally won't be offended." And she said,

"No, no. I keep coming back to it because I need to have something in my life to aspire to."

And I recall looking away (something I rarely do in conversation) because she put into words a feeling that I had not been able to.

I blog because I want something to aspire to. I blog because I want to be the me that I aspire to. And this process and hard work and creativity and networking and curating lead me to that person. Legitimately. I have seen it and I know this to be true.

It's ok to stop. It's ok to quit.It's ok to slow down or reduce or shut off.

It's ok to stop. It's ok to quit.

It's ok to slow down or reduce or shut off.

BUT, let me circle back here - I promise this will make sense...

There are times, perhaps more than I care to acknowledge, that all of the hustle, the emails, the support, and everything else drain me... Maybe they drain you. And let's just call it as it is - it's a LOT. The content creation, the idea editing, the project research, the making, the lighting, the photography and photo editing, the writing and the rewriting, the promoting and repromoting, the reaching out and the responding, the updating and the disclosing.

And the spark of accomplishment can be exciting and sparkly and awesome enough to propel us forward. I am an idea junkie! A great idea can sustain me for days. Keep going, keep going, keep going.

"You've got to keep up, don't slouch on those pins, stay in touch with your audience, when was the last time you posted? Send her an email, rework that content, you should be doing more this..."

And I/we can mistake the spark of accomplishment for good health or wellbeing.

And if the spark even slightly wanes, the truth shows herself.

And she can be angry, dehydrated, hungry, tired, anxious, sad, out of shape, lonely, or the whole mix together.

Because momtrepreneurs and side hustler friends, we can't function on the spark alone. And I feel weird that this is even a thing. But it is for me, and it might be for you. That passion and that desire is oh so sexy and exciting, and we convince ourselves that we can. We can do it all with one more hour, one more post, one more...

I recently talked to someone (entrepreneur) who is uber successful, incredibly gifted, and well on her way to making the profit she deserves for the endless hours she's invested in her business. But she has had such sole focus and drive on her blog/business, that she's forgotten to eat for a day, not left her home for weeks on end, and now finds herself in the hospital for a small health issue that blew up into a larger one because she was so focused on the drive and the business alone.

You matter. If the you of you is not here, the whatever is not going to happen or to happen as well as it would with you. (Fill in your words here.)

We think, I think, we have to push through everything to keep slogging away, perhaps to the detriment of THE REST OF OUR LIVES, entrepreneurs. But we have to have the rest of our lives; we can't forget about the people who love us, the nutrition and the rest that we need, the real life moments we want to experience in real life.

And so I say this from my four years of drive and from the softest spot in my kindred spirit heart:

It's ok to stop.

It's ok to quit.

It's ok to slow down or reduce or shut off.

It's all ok. Whatever that end goal that you're so passionate about is... it is not worth you. Your health, your personality, your smile, your integrity, your zest. 

This is a great big world of the internet, and people love the immediate and the now and the whenever-they-want-it, but if you're not there to supply the content, those people can find what they need elsewhere. It doesn't have to be you working tirelessly. It doesn't have to be you sacrificing yourself for the sake of something that might not really be your goal any more.

And I want you to know that your time and your energy is enough. It doesn't have to be what someone else's was/is. It was yours, and it was solid. And if it ends tomorrow, that does not detract from the inherent goodness of what you have done.

But please know, too, I might be sad, and I might miss you. Because the time that you have spent has meant the world to me and so many others. Because I can see the power of what you create far better than you will ever be able to.

But what you have given is so good that it is enough. Right as it is. Right now.

It is more important in the real world for you to take care of you. Don't let small issues become big ones in your relationships and in your health and in your family because you have been so focused on the other things. You give it your all. And you certainly have all the permissions to take weekends off, to be fully present with your kids, to watch TV, to daydream, to walk the mall, to fast from social media, to do whatever it is you need.

You see, the internet will still be here. The people who need to read and to hear and to aspire to these same things will still be here. Likely, I'll still be here - unless, I too find the need to need to break off and to mend. And for that, I'll have to reread this post a dozen times to convince myself that it's ok...

So I first write it to you.

Thank you for all of your creating, your time, your moments that none of us even know that have been sacrificed to move closer to your aspiration. That journey and all of its by products has enriched our lives and the common good.

Take care of you. You matter.

xoxo, MJ

Holiday Traditions to Try with Your Family
Holidays traditions that add more meaning and more fun into this year's celebrations. Build and fill this charming paper village from The Land of Nod as you countdown to Christmas.

Holidays traditions that add more meaning and more fun into this year's celebrations. Build and fill this charming paper village from The Land of Nod as you countdown to Christmas.

I'm a big fan of traditions. For me, they provide something to look forward to and a memory that gets richer with layers. Right now is prime time for me to hog wild (maybe just a little over the top!) and inject the giving spirit into our home.

When you think about it, there's just a little over a month of time between Thanksgiving and the ball dropping on New Year's Eve. So we have a lot of fun to pack into a short timespan. 

But also, I have no interest in exhausting me or my family so we pick and choose how to squeeze the best moments from our time together. Here are our current favorite holiday traditions - and I'm always looking to add more!

1. All the Christmas tree-ing together

Whether your tree is real or fake, prepping it and decking it out in all of its finery is a fabulous family tradition. We pack up the entire family, drive an hour in the minivan to arrive at a tree nursery we've really grown to love. They have a great selection of varieties, and we all vote on which tree we want. Then, grabbing a saw from the tool shed, we wander through beautiful rows of tress and decide on the perfect match for our home. We each take turns sawing the tree trunk - it's amazing what a challenge that is!! While the tree is bundled and wrapped, we enjoy a cup of hot cocoa and the rich smell of pine. 

Holiday traditions to start with your family!! With a few reserved for parents and extended family.

Holiday traditions to start with your family!! With a few reserved for parents and extended family.

2. Gratitude stars

All of our Thanksgiving guests have a little homework to do before they arrive for the party. They receive an email with a printable page of stars upon which they write one person/experience/item for which they are thankful. Each person comes with 3-4 (as well as their names and year on the back) and while the meal prep is going on, we attach ribbons to the paper stars and read one another's as we place these first ornaments on the Christmas tree. Only the white lights and white gratitude stars fill the tree for the first week of Christmas to remind us what really matters in the season.

In a black, leather bound binder, I keep the stars through the years, and I love looking through them and remembering the guests and gifts of years past and seeing how many remain throughout the seasons.

3. Books around the tree

I've been collecting Christmas picture books since I was a girl. So, without having to do the math, let's just say we have dozens of beautifully illustrated holiday stories. Nothing goes under our tree except for these books!! And my children often prop themselves next to the tree, and flip through the magical stories. On the night before Christmas, we read the famous tale, and reading through our favorite stories has become a treasured holiday memory

4. St. Nicholas Day

Do you know the tradition of leaving your shoes out for St. Nicholas to fill? On the evening of Dec. 5, all five of us put out a pair of our shoes by the fire. Why? As the legend of St. Nicholas is told, on his feast day (Dec. 6), he visits all the children of the world, for whom he had great affection, and leaves them surprises in their shoes! I've heard of gold chocolate coins and silly socks being some of the most popular presents in his sack.

Advent calendars, Christmas tree chopping, and date night shopping. Pin it!! All kinds of holiday traditions.

Advent calendars, Christmas tree chopping, and date night shopping. Pin it!! All kinds of holiday traditions.

5. Advent calendars and countdowns

The great waiting until Christmas dat is all part of the fun! We use Advent calendars to build up the drama and to prepare our hearts. We have chocolate calendars to eat our way through the season as well as a calendar with jokes for each day! The printable village box calendar featured above from The Land of Nod is our latest, and it's just the right size for a small and special treats each day.

6. Light tours and hot cocoa

Do you have a park with a special light display or a neighborhood that has channeled the spirit of Clark Griswold? Make an event of it. We have a few neighborhoods that join together to put on a light show worth driving through. We stop off for hot cocoa and cookies at a local restaurant, and we dedicate an hour of one evening to pumping up the volume onChristmas carols and driving slowly through the streets. We began when our oldest daughter was in the backward facing baby seat, and we now have all three children ooohing and ahhing from their big kid chairs (sob, sob). What flicks make your list?

7. Invest big in the holiday movie

What a better time of year to be cozy inside watching the great Christmas movies? Around here, it's bitter cold and always snowy so we warm up the fireplace and snuggle under the covers for our list of must sees. For us that includes, Rudolph the Red-Nosed Reindeer, Elf, Polar Express, and the original How the Grinch Stole Christmas. And once the kids have gone to bed, my husband and I break out It's a Wonderful Life, and I still cry every time George Bailey returns back to Bedford Falls.

8. Nativity helpers

We are a house of many Nativity sets, our largest is near life-size! Next to that set we keep a carved, heart-shaped bowl, filled with red and green string for our children to use to make a cozy manger. When family members are helpful and especially kind to one another, we put a string in Jesus's manger to keep him warm and soften his rest. We began this tradition when the children were toddlers and have kept it up. Sweet and simple.

Nativity sets can have all kinds of character. Use the Advent season and your manger to prepare your family for Christ's birth.

Nativity sets can have all kinds of character. Use the Advent season and your manger to prepare your family for Christ's birth.

9. Late night date night shopping

I saved my favorite for last!! Here's a secret tradition of mine. I put off Christmas shopping until the last minute - intentionally!

Three years ago, Christmas snuck up on us. I know, it's the same time every year, but we were so immersed in the daily stuff that planning for something even two weeks away seemed luxurious and frankly, impractical.

My husband and I had our social and professional calendars booked. When were we going to have time to shop for Christmas? In exhausted exasperation, we added a date for shopping after his office Christmas party. 

On the evening of the office party, we donned our holiday duds (and even smelled good!) and we whisked off together, wonderful babysitter safely watching over the den for the duration. At the cocktail reception, we mingled with couple after couple, making conversation about one another's holiday plans. "Are you ready for Christmas?" we were asked over and over. 

Funny enough, whether we were caught by surprise or not, it was coming - Christmas was coming. In the din of jovial conversations, I remembered the wonder of the season. I was struck by the silly and temporal nature of my worries as I explained over and over that we were behind on our preparations. You know how sometimes hearing yourself say something makes you realize just how ridiculous you are?

That we hadn't (gasp!) shopped for Christmas.

And although I was stressed by all that I had to do, I felt a glimmer of hope that no matter what was still left in boxes or unchecked off the list, Christmas was still coming. Christ's birth would still be celebrated - and in full force at our house.

I watched my husband explain to his colleagues, in good humor, how we were going out AFTER the party to begin our Christmas shopping. 

We left the party, laughing together. 

At 9pm, we were the best dressed shoppers. With barely a soul around, you could hear our heels and dress shoes, as we meandered the aisles - he pushing the cart and me with my arm wrapped through his - strolling and talking about our life together, our children, and the joy of the season.

It was that moment right before you turn over the snow globe, when everything stands still just for a little while. We slowed down the world and remembered the family we have built and the love that we share.

All the gifts were purchased. Checklists completed.

And Christmas did in fact come.

What makes your holidays season magical? Add your traditions in the comments section!!

xoxo, MJ


DIY Teeny Tiny Tic-Tac-Toe Game

This post is sponsored by Sprout by HP. The project and ideas are all mine. Thank you for your support of the brands that support Pars Caeli.

Shrink a classic toy down to its miniature for a new game of Tic-Tac-Toe. 

Shrink a classic toy down to its miniature for a new game of Tic-Tac-Toe. 

We love to make things around here, and when I can get my children involved in the making, the joy multiplies quickly. From looming to sculpture, watercolors to oil pastels, our creations fill the walls and shelves of our home.

And now our creations even fill our game cabinet. Or, at least, a teeny tiny portion of it.

Using 3D scanning technology, create a miniature tic-tac-toe set! #sproutbyhp

Using 3D scanning technology, create a miniature tic-tac-toe set! #sproutbyhp

Using our Sprout, we decided to transform my "vintage" Little People figure into a micro version of its former self. What is it about making things small that triples their adorable factor?

Since the Sprout has an integrated desktop 3D scanner, it was easy to experiment with our sizing for the game. We want as tiny as their hands could hold comfortably. Using a small piece of putty to hold the toy to the tabletop scanner, the kids and I scanned the figure from all angles.

Watch our quick movie below to see the creation is progress (my 6-year old was blown away by the scanning/pattern process - ah, so was I). 

Printing the 2.5" figure as a 1/2" copy took approximately four minutes from pressing print. This was my first experience with 3D printing and gazing at the layering process of each tiny figure was mesmerizing!!

As you can see below, the object is created layer upon layer to produce a finished "fine wire" texture. My children likened it to the grain of wood.

Have you tried 3D scanning? The results will surprise you. 

Have you tried 3D scanning? The results will surprise you. 

We printed ten tiny people in an hour! To get these ready for a fierce, yet small game of tic-tac-toe, I painted them two different colors. Using Sharpie paint markers, coloring the figures was fast and easy. Using a small piece of birch, I scraped the hashtag gameboard in the wood, and we're off on our first game.

These miniatures make a fun, new take on the traditional tic-tac-toe game. Put them in a tiny giftbox, and you're set for any restaurant wait.

These miniatures make a fun, new take on the traditional tic-tac-toe game. Put them in a tiny giftbox, and you're set for any restaurant wait.

The teeny tiny tic-tac-toe game adds its own level of new challenges! If you knock over your own player or someone else's you lose your turn. So the obvious moves and strategy you typically employ for the game are now turned on their head!!

After this experience of taking something right from our life and making it into something new and different, I can't believe how close we are to printing and to creating our own worlds! 

What would you create with a Sprout?  See more creations using the Sprout or find a retailer to buy one near you.

xoxo, MJ


7 ways to help a friend take great selfies

This post is sponsored by Svens Clogs. Thanks to Svens, I get to send one pair of clogs to a lucky winner. Enter on Instagram from now until Sunday, Oct. 25, for your chance to win! Look for the red clogs on my feed and tag a friend! And thank you for supporting the sweet companies that keep Pars Caeli running and clogging!

Feel awkward in front of the camera? Ask a friend to capture you in action and use these 7 tips to take great photos!

Feel awkward in front of the camera? Ask a friend to capture you in action and use these 7 tips to take great photos!

I am at best cheeky and cheesy in front of a camera. Those dramatic, styled fashion shots you see of bloggers? I'm not in a one. I grin too big, sit too casually, and break out into a funny face right as the shutter closes. However, since I am a big part of my brand, and I love connecting with readers/mommas/designers, I know that people need to see me, my face, and me involved in the work that I do. So it seems it's time I figured this out.

I asked two talents, also my roommates for The Hello Sessions, to give me all their knowledge. Jeran of Oleander and Palm can photo style a home like no one else I know, and PJ of A Girl Named PJ has all the best sense for easy and chic fashion.

And, lucky you, I think some of their genius rubbed off. I'm sharing with you the 7 ways that you can help a friend take great selfies. I suppose these are more self portraits or headshots, but you get where I'm going with this. . . photos of you. . . that are usable, beautiful, and ones you'll be proud to share.

7 ways to help a friend take great selfies. Guidelines to try, even if you're awkward in front of the camera!

7 ways to help a friend take great selfies. Guidelines to try, even if you're awkward in front of the camera!

1. LET YOUR LOCATION WORK FOR YOU.

The ladies and I were strategic with our choice of hotels. We selected The ACE Hotel in Portland which we knew has its own cool, well lit, urban vibe. Basically every nook and cranny in the place is editorial and photographable. We stayed in a triple that was on trend and without a bathroom. Priorities.

Takeaway: Find a location that makes you feel good. It should have its own vibe but not distract from you.

2. Pick a good time of day.

We all wanted to look fresh but not just washed so we had our coffee and conversation before we decided to start taking some pictures. This was a huge help to me, giving me time to relax and ease into poses.

Mid morning works well for daylight, too, depending on your location. Consider a later afternoon sunlight as well. We thought we'd walk all over the city to find the right location for lighting, and it turned out that the hallway right outside our room was the perfect filter.

Takeaway: Photograph mid morning or late afternoon and give yourself time to ease into the setting and relax.

3. GET THE GIGGLES OUT.

When I'm in the company of friends, I laugh. A lot. Sometimes that makes for a great photo. Sometimes it's too much. Give your friend time to laugh, stretch, dance (we clogged quite a bit), and move in whatever way she needs. The more natural expressions are on their way once you work your way through some of the discomfort. Don't give up.

Takeaway: Don't hold back. You're with friends. Let out all the laughter and awkwardness. Some great photos might be in that release or some great ones might be right around the corner.

4. HELP HER FIND HER POSE.

Some of us are very gifted in the knowledge of where our limbs end. Me? Not so much. I'm not always aware of how my face looks when I'm doing certain activities or which way my feet are turned or hands positioned.

Having people who could help me turn towards light, angle my body, move my shoes was invaluable. And once they helped me figure it out 3-4 times, I began to understand how to do it myself. Lean forward from the hips, pull my neck out a little more, reach down with my hand, sit up straight, shoulders down.

And friends are the best at bringing you the back of the camera to review. Is this one you like? How do you feel about this composition? 

Takeaway: Help your friend look her best in her posing. If she's not getting your verbal direction, gently move her into the right posture (she'll thank you later). And show her what you've taken so that she can begin to learn what look she wants to project.

Jeran and PJ are incredible photographers. See all seven tips I picked up from them in our styled photo shoot with Svens Clogs.

Jeran and PJ are incredible photographers. See all seven tips I picked up from them in our styled photo shoot with Svens Clogs.

5. Throw out lots of compliments

Jeran and PJ rocked this one. Be effusive in your praise! Tell your friend everything that looks awesome and skip all the mentions of elements that are not awesome. Build confidence and comfort as you take photographs.

Takeaway: There is an element of vulnerability inherent in having your photograph taken. Be the friend that is super positive, telling her she looks beautiful and that you have so many great photographs. Keep the good vibes going.

6. Take a ton, a boatload of pictures

Yeeeeaaahh! We are in the digital age, and likely you are photographing on a digital camera or phone. So, don't worry about burning through film. Keep all the possibilities open and capture many, many images. Sometimes a strategic crop or a brightened image can be the money photo. I took well over a hundred photos of the three of us by the window, walking around, posing with our feet in the air, sitting on the couch, and (yes, yes!!) in the bathtub. Some I'm saving for our next friend reunion (insert wicked laugh).

7 ways to help a friend take great selfies

7 ways to help a friend take great selfies

7. Help your friend try something new

This is the biggest gift I think you can give. Perhaps she is used to making that same face in front of the lens or always putting her hand on her hip. Switch it up! Have her pick up her purse or lay across a couch. Ask her to hang upside down or go down the stairs. Sometimes the caught-in-the-middle pose is a fresh of breath air. Encourage props - keep the coffee in the photo and put on your glasses. Help her see herself in new ways through these images.

One more shout out to my ladies, Jeran and PJ, who had us in and out of all kinds of sillyness. It's not everyone that could get me to sit in front of a giant cat mural. But I'm kind of in love with the final image. Kudos, PJ.

Takeaway: Keep the possibilities open and challenge your friend to move differently and interact with the space in new ways! Surprise!! You might find the awesome photo in the unusual.

What did I miss? What do you do to take great photographs of friends? Share, please. I could use all the help I can get!!

xoxo, MJ


Don't forget all of our amazing clogs featured here can be yours!! Svens Clogs has a range of material, color, and style choices. Look for my red clogs over here and be sure to enter to win by tagging a friend now until Sunday, Oct. 25.

HOW TO GET THE MOST OUT OF A CREATIVE CONFERENCE
Thank you to my friends at Minted for these beautiful business cards! Check out their gorgeous range of cards, suited for every kind of creative business. Remember that most can be customized by converting your logo to a high resolution picture file and adding it to the "back" of a Minted design.
Your complete - free printable - checklist for everything you need to know before, during, and after a creative conference to get the most out of it!

Your complete - free printable - checklist for everything you need to know before, during, and after a creative conference to get the most out of it!

Have you taken the leap and attended a creative conference? Putting yourself out there and meeting other professionals who do the same can be a real life-changing and business-broadening experience.

It can also be totally intimidating.

As a semi-veteran and host at a number of conferences, I'm breaking it down for you - to assuage your fears (they will still be there, but we're going to put them over to the side, out of the spotlight) and help you feel ready to get the most out of your (likely) pricey conference ticket.

Have you made the leap and signed up for a creative conference? How to get yourself ready and get the most out of the experience.

Have you made the leap and signed up for a creative conference? How to get yourself ready and get the most out of the experience.

On the whole, I'm not a big conference proponent. They can be expensive and irrelevant. However, from my experience with creative conferences, if you find the right conference for your niche, you can quickly build community, find your tribe of people, form clever collaborations, connect and gain sponsorship from brands, have a grand old time, and get all the boost you need to keep your creative juices flowing for months to follow.

Grab your free printable checklist that includes everything you need before + during + follow up for attending a creative conferences.

Grab your free printable checklist that includes everything you need before + during + follow up for attending a creative conferences.

The key is two steps: to find the right creative conference and to make sure you have your act together. How can you do that?

1. Finding the right one - Talk to friends in your sphere (blogging, writing, crafting, etc.) and listen to what they've found valuable. If you don't yet have friends in your arena, follow some relevant hashtags on social media and research the conference pages. Review what speakers have attended, conference locations and fees, and take a look at their mission to see if it applies to you.

And if none of that makes sense, make your own conference!! Well, don't do that yet. BUT, I just returned from my friends' conference called The Hello Sessions. It's a brand new conference held in Portland, Oregon that began as a dream of Melissa and Joy. They wanted something different from what they were experiencing. Sometimes you make your own niche!

2. Make sure you have your act together - When you're in the decision-making dilemma, trying to decide if you press purchase on that ticket, take a deep breath. Are you ready to present yourself and your business to a broader community? If you have even an inkling of a shy yes in there, you're already on your way.

How can you feel more confident and prepared? What do you do when you're at the conference to get the most out of it? How do you return home and hit the ground running?

I've got your complete checklist for the before, the during, and the follow up for a creative conference! You can download it below, or grab it anytime from our sidebar. It's all you need on one paper!!! Grab it now, and share your thoughts on what you feel you still need to do to make that commitment to join in a conference. We'll help you out!

Podcasts In the Spotlight: Hear Motherhood
Podcasts in the Spotlight: Hear Motherhood. An interview about the new and noteworthy podcast that answers the question, "Can creativity and motherhood coexist?"

Podcasts in the Spotlight: Hear Motherhood. An interview about the new and noteworthy podcast that answers the question, "Can creativity and motherhood coexist?"

Podcasts are sweeping the nation. From the pop cultural phenomena that Serial became to the proliferation of TED talks and NPR favorites. We want to use our time to and fro engaged in learning or listening in a new and fresh way that goes beyond the traditional radio talk show or audio book.

For creatives, podcasts have become another tool in the kit to share brilliance. Should I have a YouTube channel? Should I have a podcast? Should I be on Instagram?

Paige Ray, author of the still lovely Approaching Joy blog, has turned her artistic endeavors to podcasting in the fresh and approachable show called Hear Motherhood. These conversations are set up to answer the question, "Can motherhood and creativity coexist?" If you've been a reader here for more than one post, you know my answer is a big, "Oh, yeeeaaaah!" to this one. Paige warmly captures a mother's struggles and relatable triumphs as each works to answer that question in their daily priorities.

I think you'll find her endearing Arkansas charm and positive tone one that will highlight your listening experience. Mommy Confessions as well as a Creative Momma Tip are a part of every show, too! 

An interview with Paige Ray is the voice and heart behind the New and Noteworthy podcast entitled: Hear Motherhood. 

An interview with Paige Ray is the voice and heart behind the New and Noteworthy podcast entitled: Hear Motherhood. 

Tell us how you came to be Hear Motherhood?

I am a brand new mom to a beautiful 5-month old boy. This time last year I was convinced that creative life as I knew it was over. In my mind, motherhood was a job so big that it encompassed all of your life. Luckily I soon realized I was surrounded by creative moms who were making both happen beautifully.


What turned this into a podcast instead of a blog or a kicking Instagram feed?

I immediately wanted to talk to those women I admired who were successfully being "creative mamas". It was selfish. I wanted to know their secrets. Then I realized that if I could record those conversations I could help other moms and moms-to-be who had the same questions.


Why do you think so many are turning or returning to a listening medium like podcasts?

I lost my grandmother this spring right before both my son and this project were born. And though, obviously in different ways, I think she would have been a fan of both. 

Women in her time knew about the power of story and spoken word because the Internet, instant messaging, and even television didn't exist. In our faces paced society it's easy to see why people are looking back to those older mediums... Even if it is through using today's technology. 


Tell us what you listen to.

  • I listen to my baby sing when he wakes up at 6am. 
  • I listen to a lot of questionable pop music from the mid 90's. 
  • I listen to audio books and it's the only way most anything gets "read" in my life. 
  • I listen to loads of podcasts.

(Want to hear which podcasts Paige listens to?

Grab the printable list right here.)


What can we look forward to for Hear Motherhood?

More interviews from successful creative women who are willing to pull back the social media curtain and share parts of their real lives. 

More solo shows where I share my heart about the intersection of motherhood and creativity.  

And big dream? I want to be back in a year or so telling what it's like to write for O magazine as well and later put together a retreat for creative moms.  


If you're new to podcasts, take a look at Paige's sidebar as she simply explains the super easy process of subscribing. Give yourself the gift of listening in on the conversations over at Hear Motherhood, and let me know what you think!

4 Frame Projects Worth Making
Frames worth making! These four ideas are easy with great final results.

Frames worth making! These four ideas are easy with great final results.

Between the prints in Shop Pars Caeli, my favorite family and Instagram photos, and my children's prolific artistic creations, I feel like I cannot own enough frames! Gallery walls in every room, anyone?

Easels and photo blocks are my go-to for shelves and tables, but I need some solutions for wall spaces, too. I turned to some of my favorite makers to see how to get it done with style, simplicity, and affordability.

Easels and blocks are great for shelves. For the walls? 4 fabulous DIY solutions.

Easels and blocks are great for shelves. For the walls? 4 fabulous DIY solutions.

1. MAKE WASHI YOUR FRIEND

If you have not run with wild abandon onto the washi tape train, now is the time, friends!! Maiko created these whimsical frames and geometrics to highlight her fabulous prints. These serve the aesthetic as well as easing any concern over new wall holes or a permanency you might not be ready for.

2. DIP IT FRESH

Have a dingy frame hanging around that needs new life? I love the dipped look just for this reason! Paint half or a diagonal in a fresh color, like white, and it's like a brand new piece. Check out how Nalle created hers.

3. PUT SOME GOLD ON IT

Gold leaf all the things. Even the clipboards! Did you see this DIY on Lovely Indeed? Clipboards are a modern take on the contained frame. These gold ones work especially well in a studio or office space but could brighten even the most buttoned-up living rooms.

Gorgeous free printable and frame DIY from Oleander + Palm.

Gorgeous free printable and frame DIY from Oleander + Palm.

4. POSTER FRAMES FOR GROWN UPS

This idea is on my must-try list! I love the simplicity and functionality of a great hanging poster frame. Jeran of Oleander and Palm created an amazing alphabet printable as well as a fantastic frame that blends so well with the whole concept. I could see larger prints looking incredible in this style! Even jumbo children's work could reach a new level of sophistication with this DIY.

Have you created any of these styles? Have tips to share?

How do you display all that you want to see?

xoxo, MJ

A parent's role in a growth mindset: Helping children embrace challenges
The ways we praise our children affect how they see their own strengths and weaknesses. Get on the growth mindset train with this free printable.

The ways we praise our children affect how they see their own strengths and weaknesses. Get on the growth mindset train with this free printable.

I think I can.

I think I can.

I think I can.

What if the Little Train had more genius to it than we ever imagined? What if the true belief that you CAN moves you closer--significantly closer--to that possibility?

As a former educator and a mom who fancies herself a lifetime learner, I've been looking into how I can incorporate the idea of a growth mindset with my children. Have you heard of this concept? It was developed by Carol Dweck, a famed psychologist and researcher, who identified two motivations of the intellect: a fixed mindset and a growth mindset. Dr. Dweck explained these two ways of thinking like this:

"In a fixed mindset students believe their basic abilities, their intelligence, their talents, are just fixed traits. They have a certain amount and that's that, and then their goal becomes to look smart all the time and never look dumb. In a growth mindset students understand that their talents and abilities can be developed through effort, good teaching and persistence. They don't necessarily think everyone's the same or anyone can be Einstein, but they believe everyone can get smarter if they work at it."
Strategies for parents: easy ways to help your children embrace challenge! Free printable reminders.

Strategies for parents: easy ways to help your children embrace challenge! Free printable reminders.

In my family, I'm the youngest of three, the baby to two brilliant siblings. Growing up, I often compared myself to my sister (with the photographic memory) and my brother (with the immense capacity for knowledge). I believed that I was born with less than they were. Somewhere the thought occurred, "did my parents run out of all the good genes by the time I was born?" Through a variety of influences, including unassuming teachers and mentors who told me I was smart and talented, I came to the childhood/adolescent conclusion that I was this smart, with these talents, and could therefore do these things.

And then my world--neat, pre-determined, and a little sad--was knocked off its orbit by the asteroid of art. In the great quest for pubescent self-discovery, I decided that my niche would be art. This talent was also already taken by my siblings, but, nevertheless, I was determined that I could be a better artist than I had been. Somehow the subjective bandwidth in art broke down my fixed mindset, little by little, making way for new discoveries into how I could and I was progressing and always building upon my own talents.

Quite naturally (and beautifully) this idea that I could get better, learn from my mistakes and build upon them, and grow with hard work permeated into other areas of my life. I had once viewed myself a poor, slow reader, and I was now reading and comprehending stacks of books, and enjoying them. Moreover, I began to understand that despite whatever perceived struggles or limitations I might have in any area, with effort and determination (a key here), I could and did improve.

You might be thinking, "hello, obvious, how are you?" But let's take this idea a step further into parenting.

When was the last time you told your child (in an effort to be a supportive, loving parent), how smart she/he is? Or mentioned how talented she/he is?

Do you have a growth mindset for yourself? Take the simple quiz here.

Subtle adjustments to our parenting talk (and our internal dialogues) can make enormous changes in the ways our children perceive, achieve, and embrace challenge. Gah!

Let me retype that.

Changing the comment from "You are such a smart girl!" to "You worked so hard and look what you achieved!" can alter how our children perceive their own abilities. Encompassing a growth mindset instead of a fixed one, helping them to strive for progress and growth instead of an unachievable (and therefore ultimately disappointing) finite goal can all be a part of our parenting conversations and the family environment that we cultivate.

Get the free printable guideline on how to talk with your children in ways that will help them grow and embrace challenge.

Get the free printable guideline on how to talk with your children in ways that will help them grow and embrace challenge.

Most stunning to me is how easy this is to implement. 

Consider the brain as a muscle that gets stronger with use, and the more challenge we give it, the more opportunity we have to grow.

Consider next time when your child comes running to show you the great grade on a math test, how will you respond?

"You are brilliant. Look how smart you are at math!" or

"You worked so hard, and it paid off.  It's great to see your determination." 

Are you ready to help your child move to a growth mindset? Or ready to adopt one for yourself? I've made this easy guide to keep handy to get you on track quickly and easily. Click the yellow box below to get it and more Pars Caeli goodies!

Sign up and get our free and totally helpful, one-page simple guide!

xoxo, MJ


Yarn Pumpkin Wreath
Add a touch of fall color to your front porch with this pumpkin wreath!

Add a touch of fall color to your front porch with this pumpkin wreath!

Pumpkins are the iconic image of Halloween for me, and I can't get enough of them right now! We made some jack o'lanterns from foam balls and orange yarn last week, and, as projects some time go, we got hooked in the process. The half sphere makes an easy, mountable pumpkin for any craft. These pumpkin magnets make me smile every time I pass by them.

Have you ever kept going with a process even after a project is complete because the process itself brings joy? My friend, Emily Jeffords, talks about the enjoyment of the process in her work as a painter and entrepreneur, and it resonates with me. On a more basic level, in this process of crafting, I found the rhythm of slicing the foam balls, the meditative nature of wrapping the yarn, and the assembling of mounds of bright-colored pumpkins totally satisfying.

DIY Yarn Pumpkin Wreath from Pars Caeli

DIY Yarn Pumpkin Wreath from Pars Caeli

So, I kept going. And made dozens and dozens of yarn pumpkins. Now we have a vibrant pumpkin wreath to add to our front door. 

DIY Yarn Pumpkin Wreath from Pars Caeli

DIY Yarn Pumpkin Wreath from Pars Caeli

Make one for your home, too! Here's what you need: 

  • Wreath form
  • Foam balls, halved
  • Orange yarn (I used three shades of orange to make the composition more interesting)
  • Glue (craft or hot glue)
  • Scissors
DIY Yarn Pumpkin Wreath from Pars Caeli

DIY Yarn Pumpkin Wreath from Pars Caeli

With the half spheres, wrap yarn around and around like you're creating a ball of yarn. Make sure that you cover all of the white foam as you wrap. Glue the end of the yarn on the back of the pumpkin.

DIY Yarn Pumpkin Wreath from Pars Caeli

DIY Yarn Pumpkin Wreath from Pars Caeli

Once you have a few dozen ready, you can get to wreath making. The amount of pumpkins you need depends on the size of your wreath, as well as the size of the foam balls. I had 3" and 4" sized to help cover a 10" wreath.

TIP: Cover the white surface of the wreath with orange paper so that the gaps between pumpkins aren't so apparent at first glance.

DIY Yarn Pumpkin Wreath from Pars Caeli

DIY Yarn Pumpkin Wreath from Pars Caeli

As you add each pumpkin, you'll see the wreath come to life! My son's favorite color is orange, and he is a big fan of the project. I love the impact that the color statement makes with simple forms. You could add faces to each pumpkin or a select few if you want more of a specifically-Halloween feel.

DIY Yarn Pumpkin Wreath from Pars Caeli

DIY Yarn Pumpkin Wreath from Pars Caeli

As you glue on each pumpkin, be sure to vary the shades of orange so that you end up with a cheerful mixing of the tones. I'm a big fan of how ours pops right off the slate green door! Happy fall!!

DIY Yarn Pumpkin Wreath from Pars Caeli

DIY Yarn Pumpkin Wreath from Pars Caeli

Remember this project I did with tiny balls of yarn? It's a quick alternative to the larger wreath, with the same process!

Happy making!

xoxo, MJ

How to Add Stylish Back to School Organization

*This post is sponsored by Minted. All opinions expressed are my own. Thank you for showing love to the brands that support Pars Caeli!

We're a few weeks into school now. Can you believe it? My 5th, 3rd, and Kindergartener are humming along with their daily schedules and evening activities. And in order for me not to completely use my mind, we have our systems in place. I still find that I lose my phone or forget someone's library book way more than my wishful, maximizing self would like it.

How can we make our days smoother? Less forgetful? Happier? I'm always analyzing and wondering if we could set up our home or our schedule differently to make our days better. So many organizational systems and DIYs are out there (SO, so many, dear Pinterest). However, most of them are not the kind that I want to put in my home. Organization doesn't have to be ugly! Take those cute Minted labels (see above photo) that are saving me many trips to the Lost & Found box. 

An organized school year is a happy one! Of course, no one wants to skimp on style for the sake of tidy. Here's how to add stylish back to school organization to your home.

An organized school year is a happy one! Of course, no one wants to skimp on style for the sake of tidy. Here's how to add stylish back to school organization to your home.

Inspired by the combo of style and organization, I'm putting these fabulous projects on my fall to do list. They not only make lives more efficient but make (or keep) your home super styling, too. Win!!

1.  GIANT MAGNETIC BOARD

I swoon over this one! We have a chalkboard wall in our kitchen, and I feel like this magnetic board would be the Gandalf version. Michelle of 4Men1Lady has created this command center that's chic, textural, and completely multipurpose.

2. CLIPBOARD HANGER

Clipboards as frames or easels? Bring it on. Why couldn't schedules, calendars, classroom projects be displayed so beautifully? Amy of Delineate Your Dwelling created this piece to hang clipboards, and it's brilliant and sweet on the eyes.

3. FOLDER HOLDER

The papers that need to be kept for reference throughout the school year? Where should those go? We put ours in a folder holder, mounted right next to our exit door (by the garage) and are easy for people of every height. :) I think the way Summer of Simple Stylings beautified hers is perfect. Who wouldn't want to add to this lovely?

4. ORGANIZATION TO VIEW

The passwords, phone numbers, permission slips, special tickets - they also need a home and often one where they can be seen! Laurel of A Bubbly Life has this chic geometric board idea that I think would fit right in.

5. TAKING IT TO THE COFFEE

This project from Lindsay of Shrimp Salad Circus is perfect for the grown ups. Keep your supplies in check, too!! And make the morning rush a breezy, chic moment. Why not keep all your coffee/tea supplies on a gorgeous tray? It's enough to make you feel special and cared for even in the early AM.

What's your favorite way to incorporate organization into your home design?

XOXO, MJ


Simple Shibori for Kids
Bring fresh pattern and process to tie dying with your children through the ancient art of Shibori! A simplified process that's fun to follow.

Bring fresh pattern and process to tie dying with your children through the ancient art of Shibori! A simplified process that's fun to follow.

Every once in a while (pretty close to once a year), I work up the momma guts to brave the world of fabric dye with my children. My excitable young artists are drawn like happy moths to the flame of the permanent, color-rich saturation that only a dye can create. My thought this year? Let's go all in. Enter the beauty and variation of shibori.

Have you heard of shibori? I was first introduced in this post, and I recall admiring the beautiful results of folding, wrinkling, and twisting. Shibori dates back into ancient Japanese art forms of the 8th century using indigo powder to design patterns.

Shibori is an ancient Japanese technique used to dye and create patterns on fabric. Take the basic process and simplify it for a fun outdoor craft with the kids!

Shibori is an ancient Japanese technique used to dye and create patterns on fabric. Take the basic process and simplify it for a fun outdoor craft with the kids!

Using the basic concepts of shibori and capitalizing on modern liquid fabric dyes, my kids and I made some simple and modern shibori shirts. To give this a go, make sure you have these supplies:

  • White cotton shirts
  • Fabric dyes (squirt bottle versions work really well for kids)
  • Rubber bands
  • Cardboard tubes and squares
  • Twine/rope
  • Gloves and clothes you don't mind also dyeing
  • Glass bowls 

I highly recommend using an outdoor space to create when possible. We chose a sunny, warm day in our backyard, and we definitely dyed our grass!!  So be prepared that when you're working with kids (or clumsy parents, eh hem), you'll have permanent spills.

We tried four different techniques to find very different results. Hover over each photo to peek into the process. Follow the instructions on your fabric dye to ensure the desired effect. For all of our patterns, once the dye was fully applied, we wrapped the entire shirt (plus the tube in one case) in plastic wrap and set it aside for 24 hours. After a full day we unwrapped the shirt, rinsed and untied the shirt until water ran clear through it. We then hung them over a drop cloth to drip dry. Be sure that you wash these shirt separately, at least initially to avoid color bleeding.

Wrap t-shirt on a diagonal around a cardboard tube. Secure twine in a criss cross fashion all the way down the tube. Scrunch shirt as you go. 

Wrap t-shirt on a diagonal around a cardboard tube. Secure twine in a criss cross fashion all the way down the tube. Scrunch shirt as you go. 

THE WRAPPED TUBE

My 5-yo used two different dyes (one starting on each end) to make a very cool and unintentional ombre effect. The wrapping and folding of the shirt allowed the color to saturate on the edges and form stripes. This technique was a great one for young hands. With just a thin layer of material around the tube, my son could see and saturate the fabric as he wanted to. No mystery involved there, and it made for one happy camper in the end.

Bring fresh pattern and process to tie dying with your children through the ancient art of Shibori! A simplified process that's fun to follow.

Bring fresh pattern and process to tie dying with your children through the ancient art of Shibori! A simplified process that's fun to follow.

THE TWIST AND TIE

This is a fun design for the more adventurous soul because the unpredictability brings its own magic. To create this feel you tie the four corners of the shirt and twist each until they meet in the middle. Since the bound shirt is pretty thick be sure to saturate this one in dye for a while.

Take each corner of the shirt and tie a knot. Once you have all four knots, twist each knot until they meet up in the center. Keep the bundle tight together with overlapping rubber bands.

Take each corner of the shirt and tie a knot. Once you have all four knots, twist each knot until they meet up in the center. Keep the bundle tight together with overlapping rubber bands.

THE FLAT FOLD

Create a square from cardboard. We made ours 4 inches and then folded the entire shirt around it. We then bound the bundle with crosshatching rubber bands for a truly unique final product!

Create a square from cardboard. We made ours 4 inches and then folded the entire shirt around it. We then bound the bundle with crosshatching rubber bands

Create a square from cardboard. We made ours 4 inches and then folded the entire shirt around it. We then bound the bundle with crosshatching rubber bands

SPIRAL ROUND

This one is hippy tie dye meets shibori. This is a classic tie dye technique that works particularly well for adding a rainbow of colors. My 8-yo could easily see the sections that she wanted to color and could put them in the order she wanted them to spin. The spiral round becomes a large ball of thickness so be sure to soak the shirt thoroughly with dye for a bright finished product.

The classic tie-dye pattern derived from shibori methods. Find your center point, and twist the entire shirt to create a spiral-galaxy-like bundle. Section off areas to focus dye by adding 2-4 rubber bands.

The classic tie-dye pattern derived from shibori methods. Find your center point, and twist the entire shirt to create a spiral-galaxy-like bundle. Section off areas to focus dye by adding 2-4 rubber bands.

We all loved exploring the varieties of possibilities these new methods offered! Having you given Shibori techniques a try? I'd love to see what you created!

xoxo, MJ

Graphic Tees: 5 Ways to Add Them to Your Look
You can make a graphic tee work in just about any setting. 5 ways to add one to your look!

You can make a graphic tee work in just about any setting. 5 ways to add one to your look!

Images via 1. 2. 3. 4. 5. 6. 7. 8. 9.

My first graphic tee had a giant, glittery Minnie head on it, and I adored it - so much so that I paired it with everything in my kid wardrobe. And much to my great happiness, the graphic tee trend seems to be back to stay (hip hip hooray!).

In my years as a graphic designer and with my long-time love of sparkly Minnie heads, I've fallen for graphic tees. They give me the freedom to wear exactly what I want to say. And in opening Shop Pars Caeli I've had a ton of fun creating and seeing how you style our designs!

These fresh tees can add interest to a subtle work look as well as express all the feelings for a fun date night. Try these five ways to add them into your wardrobe:

Do the fancy graphic tee.

Do the fancy graphic tee.

Images via 1. 2. 3. 

1. Pair it with fancy.

The contrast of the ultra-feminine with the sporty casual is so much fun. Consider glamming it all the way with bright heels or a full skirt. Add a statement necklace on top. A skinny maxi is a fab addition for the fall.

2. Make it a cozy layer.

Our graphic tees are all kinds of comfy. They make a great first layer for the chill of winter or even a breezy afternoon at the beach. A graphic tee with some fit look great under cardies, blazers, breezy kimonos.

Add a foiled graphic tee to your favorite jeans for cozy + awesome. These from Shop Pars Caeli.

Add a foiled graphic tee to your favorite jeans for cozy + awesome. These from Shop Pars Caeli.

Image via 1. 2. 3.

3. Top off the best pair of jeans.

Perhaps the most classic way to style a great shirt is with a favorite pair of jeans. From a sweet pair of skinny jeans to the torn pairs that are all over the runways to a celebratory, colorful set of jeggings, the relaxed, sometimes-witty (and always entertaining) nature of graphic t-shirts make them a sweet companion. 

4. Show off some texture.

Chunky scarves show off against a slick graphic tee. A glossy statement necklace really shines against the backdrop of a matte or even foiled tee. Even loose or textured braids stand out nicely against the simplicity of the classic shirt.

5. Take it to the office. 

Saving my favorite for last, I love wearing my graphic tees to work. I've topped maxis and capris, and added the tops to slim shorts and layered them with blazers. Graphic tees bring your personality to the professional arena!  Making too much of a statement with yours? Add a scarf and military jacket and keep the extra special goodness to yourself!


How do you style your favorite tee? I'm always looking for more ideas! Bring them on.

xoxo, MJ


Don't Quit Your Daydream: From Doodles to Product

"Those lunchbox cards are helping me feel like a great mom and giving me the opportunity to communicate with (my children) mid-day which I really really like. Thank you."

Don't quit your daydream! How one mom took her lunchbox notes from paper bags to product launch.

Don't quit your daydream! How one mom took her lunchbox notes from paper bags to product launch.

This summer was a whirlwind. A major dream came true (with a whole lot of work behind it), and I opened my online shop. I also spent focused time creating precious childhood memories with my three kids in something I called the 18 Summers Challenge (we really only get 18 summers with our kids!! Weep). And something even better than my wildest dreams came to life. In collaboration with The Land of Nod, I created launched my first product - a collection of lunchbox jokes! I present the Lunchtime LOL Notes.

When my oldest daughter went off to full-day Kindergarten, I, like so many parents, added a note to her lunch. After hearing from my daughter about quiet lunch times, I decided to add a joke and doodle to my messages. Teachers and lunch helpers would read them to the table, and everyone got a kick out the silly pictures and corny jokes.

As I searched daily to find something sweet to draw, I wondered if other parents would find it helpful to have an easy way to add something extra to their child's lunch like I was. I started sharing these notes on Instagram and hearing from other moms and teachers who would reuse them with their kids! And it was so exciting to see where in the world and in what ways these notes were used! I loved the idea that I could help other parents connect (in the middle of the day or on a long drive or in a doctor’s office) with their children.

As more and more people commented and shared these illustrated jokes, I began to wonder if I could take them to the next level. Should I produce these on my site? Or furthermore, find a brand who might want to bring this idea to their audience.

I first mapped out what I wanted the lunchbox notes to be: an entire pack ready for 180 days of the school year for parents, cards that had a blank back for parent's personal notes, and special jokes for certain holidays and times of the year.

How do you make your daydream a reality? A story of one mom entrepreneur and her pack of lunchbox jokes, now sold at The Land of Nod.

How do you make your daydream a reality? A story of one mom entrepreneur and her pack of lunchbox jokes, now sold at The Land of Nod.

With these parameters in mind, I thought through my pie-in-the-sky favorite paper, children's, and card companies. Which ones best fit my own aesthetic and hope for these fun notes?

The Land of Nod kept coming to the top of my list. I've purchased many pieces from their collections throughout the years for my children, and I find their products smart, well made, and the right mix of whimsy and art. Blogging throughout the years, I had developed a mother-designer friendship with Danielle, Creative Director for the company. I worked up my biggest entrepreneurial boost of confidence and sent her an email to pitch the idea of lunchbox notes.

And she didn't say no. In fact, she said yes.

And months later I found myself illustrating for not only a brand that I love, but for people who help me make other moms and dads feel awesome. And handle my creation with the kind of positivity and wit that I'd hoped. And it's kind of awesome.

This is not the norm for product creation or working with brands, but every once in a while the heavens align and dreams come true. And there's just no reason why the same couldn't happen to you. Keep dreaming and taking big girl leaps to make those dreams come true.

And get yourself some Lunchtime LOL Notes! They've already sold out once so get your order in soon!!

xoxo, MJ


Your Checklist for Opening a Shop (with free printable)
Do you think you might be ready to open your own shop? Grab this free printable checklist from Pars Caeli.

Do you think you might be ready to open your own shop? Grab this free printable checklist from Pars Caeli.

A dream came true for me this summer. Well, maybe two dreams (I did even imagine number two! More details on that tomorrow).

I opened my very own shop!!

I know that I've been posting on all of my social networks about it so this is not a surprise to many of you. Shop Pars Caeli is open and excited to welcome you through the doors (for reals, go click over). It has been my little girl dream brought to life through my own little girl and brought to the worldwide webs. My eldest daughter is my inspiration and muse and dictator (in the most loving way), and we discuss what would sell well, and what we love. 

In the shop you'll find letterpress greeting cards and prints as well as children's and women's tees all focused on putting a little more fun and a whole lot more goodness into your life. The shop is a direct extension of my art, my sense of humor, and my 3 years of projects and conversations here on the blog. As a graphic designer, I wanted to letterpress prints and cards on the best paper and finest inks, and I simply couldn't resist a little foiling on t-shirts, too.

And our DO GOOD shirts and prints do real good in the world, too! A portion of the profits from every sale support The Sweet Pea Foundation, a non-profit to help children and families in local hospitals.

I've been so amazed to see the reaction the shop has received in just the first two months!!

Thank you, thank you to all of you who've been buying and loving on social media. And I'm so glad that I finally did it - I planned it out, budgeted, and through and through our customers have been delighted with what they receive!!

But, behind the scenes here, I've also had a few missteps, listened way too long to my inner critic, and still have a whole world of people I want to reach. Opening an online shop is both incredibly easy (e.g.: just press activate the link if you're on Squarespace) and simultaneously complicated with branding and shipping and taxes and inventory and tigers and bears. Oh my.

If you're thinking about opening a shop, selling a product, or know someone who is, I want to help!

Because there's just no sense in us both making the same mistakes, I put together this checklist of things I've done and added in things I should have done so that you get the full spectrum of helpfulness.

Pin this one now and use it as a checklist to get your online shop started!

Pin this one now and use it as a checklist to get your online shop started!

Above is a super quick checklist to think through as you're considering operating and selling a shop. It's a little deceiving since every step requires research, creation, and a real commitment to your passion! But, you can do it - I did!

I've also created an extended printable for you to keep right on your desk (or shoved into your notebook of ideas). Print the checklist here.

Tomorrow I'll be sharing with you that second dream that came true - my very own product with a company I love, The Land of Nod!! The story behind Lunchtime LOL Notes and ideas for you on taking your idea from notebook to reality.

Emoji and checklists to help you open the most fabulous online shop! Grab the free printable, too.

Emoji and checklists to help you open the most fabulous online shop! Grab the free printable, too.

Have you ever thought of opening a shop or done it already? What would you add to help the dreamers?

xoxo, MJ

7 Ways to Get Back to You in Back to School Season
All opinions expressed are all mine. Thanks for supporting the brands that support Pars Caeli.
Back to school season can be the perfect time to return to you! Try these seven ways to refresh.

Back to school season can be the perfect time to return to you! Try these seven ways to refresh.

We've put a pretty bow around the end of the first week of school here! The final rush for school clothes, supplies, extra sleep, and final hoorahs came to an abrupt end to make way for backpacks, planners, extracurriculars. And though my children were not exhausted after their first day, I was!!

I love back to school season, don't get me wrong. As a former teacher, I get so excited for the year ahead. And as a mom, I love the return to order and a little predictability.

So, now that the kids are happily settled into school, and I've had a few nights of sleep to recover from the back to school prep, I am ready to get back to me a bit. The beauty of having all three in school for the first time is that, although I am still busy with work and the business, I have a little wiggle room for self care and a recharge of spirit.

Maybe this season is a great time for you to get back to you, too! Perhaps you aren't affected by the start of the school year or maybe you're only sending one or two off to school. It doesn't matter. This transition to fall might be just what you need to kick back in to gear. Here are 7 ways to go back to school and back to you:

1. GIVE TIME:

As someone who doesn't go through transitions quickly (or easily), I can safely attest to the need for patience with yourself. A sharp change in schedule or an adjustment to people moving in and out of our lives can cause more disrupt to our day-to-day than we might expect. Give yourself some time to adjust. 

2. Get yourself moving:

Whether you have a wealth of time on your hands now or just a few moments to spare, use them to get yourself up and about. It is oh so tempting to fill our time with more coffee dates or TV or blog reading. But the benefits that come from exercise and being in a new surrounding will redouble their effect on your well-being.

So pair the podcasts and binge watching with a walk, a run, or a yoga class with friends. I've been running during lunch, getting myself out into the fresh air. Do something that makes sense for you.

3. Invest in some beautiful office supplies for you:

Students don't have to be the only ones to get organized! Grab yourself a new organizational tool or a chic daily planner to inspire your commitment to take care of yourself and put your priorities in place.

Wire baskets are a new love of mine, for catching all that doesn't look wonderful sitting in piles and corners of my house.

4. Get your learn on:

Dig in and take on that e-course you've been thinking about! Take a trip to the library or local bookstore and feed your mind with possibilities. Start a new journal or notebook. Spend a few moments where you can in active learning.

5. Take time to laugh with people you love:

Who knows you better than your loved ones? Make a date with your girlfriends, your mom, or your favorite couple and get laughing until your sides hurt. Somehow in the midst of happy tears, I always find myself.

6. Be still:

I have been craving stillness lately. Some of us need it more than others, and I know I seek it after a busy period. We had a packed summer, full of fun but still full, and now I'm ready to downshift for a while and recharge in the normal. At the times when I might have worked alongside music, I'm now giving myself an open window and bird noises to minimize the noise and allow myself to be still.

7. Celebrate the new phase:

If we can make national holidays for hot dogs or lemonade, you can certainly create a reason to celebrate you. You might not know what the next phase holds so maybe you celebrate the unknown. Give yourself something special to mark the occasion of restarting. 

What is there worth celebrating? Over here I'm excited to grab a morning coffee every so often with the hubs! 

How will you make the most of this season? How do you get back to you?

xoxo, MJ


Top Tips for a WILDLY SUCCESSFUL Newsletter
Write an online newsletter? This one's a must read.

Write an online newsletter? This one's a must read.

Get cozy with your coffee, friends. I have a treat for you today!! I've asked my favorite (and very different) newsletter writers to give me the scoop on how to make content really come alive via email newsletter. And their ideas are OH SO GOOD. I hope you'll take a gander and subscribe to all of these newsletters as well as learn for your own writing and digesting of content. Want to know what these stars say are total newsletter no no's? Well, you'll have to subscribe (right over there-->) to the Pars Caeli newsletter to make sure you get those, too! 

First up, Little Farm Media. Subscribe here if you want to take your blog, idea, or business to take off! It's incredible all that Caitlin gives away FREE! Here's Caitlin's advice on the why/what/how of newsletters:

Ready to take your ideas to the next level? Caitlin, the lady boss of Little Farm Media, will take you from zero to 100 simply through following her FREE newsletter. Get on that. 

Ready to take your ideas to the next level? Caitlin, the lady boss of Little Farm Media, will take you from zero to 100 simply through following her FREE newsletter. Get on that. 

WHY?

"Since beginning my newsletter, I have seen a huge increase in sales and my social media following. I attribute this to increased trust. The more value I offer my subscribers, the more they trust me. I give away as much free content as I can to show my audience that I am an expert in the field of social media. Why would anyone by my e-course if I didn't show them that I know what I'm talking about? The more free content I create, the more money I make."

essentials for a great newsletter?

  1. A freebie - Create something your audience wants to entice them to sign up. Anyone who signs up to my newsletter gets my FREE eBook: "How I Gained 1,000 Pinterest Followers In One Month," instant access to my FREE private Facebook group: Creative Biz Owners, and FREE access to a library of downloadable worksheets, checklists, and templates. 
  2. Branding - Include your logo and keep your color palette consistent. Use a voice that is consistent with your blog and social media.Social Media - Include links to your social media accounts. Give people a reason to follow you. For example, I have photo styling ideas and blogging tips on my Pinterest account, and social media tips on my Instagram.
  3. Social media - Include links and give people a reason to follow you!
Follow away, friends!  LITTLE FARM MEDIA gives fabulous social media tips on INSTAGRAM as well as photo styling ideas and blogging tips on their PINTEREST boards..

Next up, The Hello Sessions newsletter is a beautiful blend of everything the knowledgeable entrepreneur should know with a mix of best friends chatting over coffee that will make you want to hit reply to a newsletter! Subscribe here.

Smart, funny, and always warm, The Hello Sessions newsletter will brighten your day as well as give you action items to improve your business.

Smart, funny, and always warm, The Hello Sessions newsletter will brighten your day as well as give you action items to improve your business.

Why?

"With our newsletter, we have the breathing room to dive deeper into our themes and news. It's helped people to relate to us, and it's also been really useful in shaping the voice of our brand."

HOW DO YOU MAKE A NEWSLETTER REALLY AWESOME?

"It's so important to give your readers a reason to open your newsletter, whether it's because of your humor, the juicy tips you provide, or motivation to get on with the week. We always want to make sure that our readers feel like we're talking directly to them, because if we could, we totally would craft individual notes to everyone. That sense of honesty is the most important thing. Great writing is hugely helpful."

"The criteria for our newsletter is that it shares something that we would want to hear about, ourselves. Usually, we're sharing things that we've discovered and can't wait to share with everyone, like tips to being more productive, funny/great/crazy things we've read/listened to/watched, or ways to stay motivated. We always want it to feel like the kind of information your blogger friends would send you--like, 'Hey, have you heard about this yet?'"

Sign up to The Hello Sessions newsletter as a great read during your next coffee break, and for even more friendship and learning, head to The Hello Sessions conference in October!

Next up - meander with Crafting Connections. This newsletter always slows me down and helps me take a deep breath. If you want to go on a creative journey with some solid guidance, subscribe here

Crafting Connections' newsletter is practical inspiration, creative support, and real glimpses into the lives of creative folks and families.

Crafting Connections' newsletter is practical inspiration, creative support, and real glimpses into the lives of creative folks and families.

WHY?

"The biggest benefit we've seen from our newsletter is connection. The newsletter, while still reaching a big wide audience, feels more personal. Folks are inviting us into their inbox, and we take that invitation very seriously. We honor that by sending along rich stories and essays sharing our personal creative triumphs and challenges. We don't shy away from those!"

WHAT NEWSLETTERS INSPIRE YOU?

"I love 3191 Miles Apart email newsletter; it is short and sweet, has a few beautiful photographs, and usually a link or two to something that I'm super excited to check out. I'm also pretty excited about the newsletter from the Art of Simple at the moment. Her words never fail to inspire me."

Ready for stories and essays about creativity? Take a look at all that Crafting Connections has to offer.

Want to be a better conversationalist? Working on becoming a more interesting person? Sandra of Raincoast Creative Salon has the newsletter for you. I always leave a read with a tidbit to share at my next cocktail party. Subscribe here.

Always on point with culture, movies, and fresh ideas, the Raincoast Creative Salon has a newsletter that will make you even more interesting.

Always on point with culture, movies, and fresh ideas, the Raincoast Creative Salon has a newsletter that will make you even more interesting.

WHY?

"What I love about writing a newsletter is that it feels much more intimate and personal than writing a blog post. A blog post feels more magazine-like and appeals to a more general audience. My newsletter is a place where I feel like I can take more risks and be more 'me'. It's my favorite place to write!

The newsletter has definitely allowed me to share my work and get my name out there as a photographer. And it feels more like how blogging felt at the beginning - speaking to individuals rather than standing on a proverbial social media street corner bleating 'look at me, look at me'."

essentials to a great newsletter?

  1. Have a point of viewTake a stand. Show your personality. Be who you are and share your opinions. Don't play it safe. If I want safe, I can read newsstand magazines. 
  2. Know your newsletter's purpose and be explicit about it. Why are you writing your newsletter and does it come across clearly? Are you promoting a class? Are you selling artwork? Are you building a mailing list for a future cookbook? Are you sharing opinions on issues? Are you sharing personal essays? What do you want them to know after reading it? What do you want them to do? Will they make a craft? Talk to their kids? Come to your conference? Manage their time better? Be inspired? Buy your art? Be better parents? Be more creative?
  3. Know your audience. Who is it that you are writing to? You won't attract everyone but who DO you want to read your newsletter?
  4. Add value. Have some expertise? Give it away through free tutorials. Know how to do lettering? Teach how to do a particular letter or word. Have some ideas on better time management? Share them. You're building a long-term relationship that'll take time to establish. Build trust by sharing your knowledge.

WHAT NEWSLETTERS INSPIRE YOU?

Phew - so many different ones! As I look over my list the common thread is a unique, identifiable point-of-view, whether it's original writing or links to other writing or images.

  • Of course Austin Kleon's newsletter. It's personal and even if I don't get to all of the links, I always find something useful and new-to-me.
  • Abernathy - I'm trying to be more diverse in my reading (both fiction and non-fiction). This is an online mag for black men and I subscribe to the newsletter. This one inspires because it takes a stand on issues.
  • Farnam Street Brain Food -  Eclectic links on a variety of subjects. 
  • On Being with Krista Tippett - I listen to the podcast, too. Super thoughtful and inspiring. 
  • Ann Friedman - I love her tag line: "low maintenance lady swagger". Ann writes and links to writing about gender, politics, & culture.
  • The Broad Experience - Issues about women in biz. Love her podcast as well.
  • Abby Glassenberg - She writes about sewing and running a creative business, but her newsletter is so.much.more! Lots of interesting links. 
  • The Jealous Curator - This breaks my "rule" about not just rehashing old content. It's a summary of her blog posts for the week and entirely visual. 


Do you see what I mean here? She scans the world for you and finds really interesting perspectives. Get on that subscribe for Raincoast Salon Creative.

Mommas? There's a great new podcast and newsletter in town with Motherhood! Unexpected, funny, and tender.

A fresh newsletter on the block from Motherhood: The Podcast! Listen. Laugh. Subscribe!

A fresh newsletter on the block from Motherhood: The Podcast! Listen. Laugh. Subscribe!

WHY?

"The ability to connect in a one-on-one basis is amazing. A podcast is a broadcast out into the universe. But an email in your inbox? That's a special intimate thing."

"I think being able to help someone, whether that's through providing a subscriber-only post, a special discount, or a tech resource, is essential. My personal gage is this: If I'm not adding value to someone's inbox there's no reason to press send."

What kind of information do you include?

"As my friend MJ has recently pointed out - I am a storyteller so a lot of my newsletter fits squarely in the 'here's what I'm learning' category. My thinking is this: If I've struggled with a certain thing there's a chance someone else out there could benefit from my experience, so I should share."

Paige writes with freedom and honesty, and I love losing myself in her narrative. Her stories engage and her warm personality comes through the email exchange. Recommend Motherhood: The Podcast to any new mommas you know, too!

I hope you'll subscribe to all five of these newsletters!!! I learn differently from each. Our Pars Caeli newsletter is coming out tomorrow, and I'm excited to offer some fabulous Back to School finds as well as a giant discount at our shop for all subscribers!! Oh, yeah. The good stuff.

Tell me, what newsletters grab your attention and keep it?

xoxo, MJ

6 Picks for Back to School
Back to school gear is functional and fabulous! See our top picks for the retailers that do it best.

Back to school gear is functional and fabulous! See our top picks for the retailers that do it best.

1. Lunchbox 2. Lunchtime LOL Notes 3. Modern Backpack 4. Water bottle 5. Mini pack 6. Backpack for all

The excitement of school is in the air! It's my favorite time of the year with all the fresh starts that it brings. If you haven't noticed already, you'll soon see all major retailers filling shelves and racks with back to school gear.

For our crew, it's always online shopping that wins out. Not only do we avoid the crowds, but the selections are amazing and coupons abound. 

Here's what my kids will be packing this year:

1. A durable lunchbag: We pack most days, and we have to have a pack that can last through spills, drops, and washes. From our year's of use, I highly recommend the Land's End lunchbags.

2. A great sense of humor: How could I not include my Lunchtime LOL Notes? I partnered with The Land of Nod for my first product - a pack of 180 lunchbox jokes to last year the whole year through. Each one has a full-color illustration and joke with the back side blank for your special message! Hurry and order yours today before they sell out - again!

3. A stylish backpack: My tween wanted something out of the ordinary for her bag this year, and we love what PBTeen had to offer! This vintage inspired polka dot is a classic. I'm highly likely to steal this from her.

4. A strong water bottle: Camelbacks are great for kids, too. These cute designs are available at L.L.Bean, and they withstand the dishwasher oh so well for those of us who avoid hand washing just about everything.

5. The sweetest little thing: The Land of Nod has the most adorable animal packs that you have to scoop up for your darling preschooler. That doggie!!

6. Customization galor: If your child wants a lot of choices and options, Pottery Barn has the best selection we could find. Sizes, patterns, colors, patches, and monograms are all out there to explore. But act fast to be sure you have it all complete come the start of school!

Have you done your shopping yet? Tell me, what's your favorite purchase?

xoxo, MJ

5 Places in Your Home that can Help Your Child Learn
Use these five places in your home as natural spaces for learning. Some creative ideas you'd never expect, but ones you'll use after reading this post!

Use these five places in your home as natural spaces for learning. Some creative ideas you'd never expect, but ones you'll use after reading this post!

As a teacher alum (AKA former teacher), I'm always interested in finding natural, positive ways that my children can fall in love with learning. We (my husband and I) utilize the summer months and casual moments together to reinforce what happens in the classroom as well as open up new avenues for curiosity and learning.

Your home can be a fun place to bring subject matter to life, and to practice and hone in on the challenges your child might be encountering. Here are 5 places in our home that we use for learning:

Use your stairways as a place to high five review learning concepts like site words and times tables. As she/he goes up the stairs, your child says the problem out loud and then gives a high five to the paper.

Use your stairways as a place to high five review learning concepts like site words and times tables. As she/he goes up the stairs, your child says the problem out loud and then gives a high five to the paper.

1. THE STAIRS:

This is a fun exercise in reviewing new and old information! I saw it over at Creekside Learning, and we had to give a it a try. (Ssshh, don't tell my kids they're learning as they're having fun high-fiving.)

The idea is this: Trace your hand onto sheets of paper and add facts that you want to remember. Think facts like multiplication tables or sight words. We have two sets up right now - one for my Kindergartener and one for the 3rd grader (see above). As each goes up or down the stairs, they say the problem (e.g.: "4 times 10 equals 40") aloud and then slap the hand. Using their hands and minds in collaboration helps children to reach a new level of connection. And why not have something to do as you go up and down the stairs? High fives!!

2. THE KITCHEN:

Natural opportunities for learning come up all the time in the kitchen! Measuring ingredients and learning fractions go hand in hand. Doubling recipes or halving them bring out the division skills. Authentic world cuisines bring in history and geography. 

We've brought the kids into the kitchen more and more to make great food and to learn great skills. Here are some easy tips on how to have more success (and joy!) with the kids. 

3. THE COMFY CHAIR OR FAVORITE WINDOW:

Sometimes the learning can be very casual and independent, too. Think of the natural places your children go for comfort or rest. For my children, there are comfy chairs near our sunny windows that are always filled with their presence. Not coincidentally we try to keep the shelves and tables near the chairs filled with books that my kids might want to pick up. I'm all for increasing their associations with comfort and reading. :) 

I like to switch out books for the holidays to catch their attention as well as move new series into the space. We also keep our new library reads in this space so that their reading choices are at hand just when they want to reach for them.

4. THE BREAKFAST TABLE:

A lot of our best thinking happens early in the morning, and the breakfast table can be a good environment for learning, too! Sometimes we use our kitchen's chalkboard wall to learn a new word or try a challenge word problem together. If your child is more on the quiet side first thing in the morning, consider leaving out a relevant newspaper article for him/her to read or even a maze to do while enjoying their morning meal.

5. THE GARAGE:

Ok, maybe I'm stretching the definition of home for this one, but for all of you parents out there who spend hours transporting your children every week, you most likely would consider your car an extension of your home. And all that time in transit can be great learning time, too! If motion sickness is not an issue for your child, have them keep a book next to their seat to read as you drive. If it is, consider checking out audio books that you can cue up for errand running and longer trips. 

Keep a BrainQuest pack of questions in the glove compartment that you can ask each other when you're getting gas or driving to school. 

And most importantly, show your children that you're passionate about learning and growing. Join in the fun with them, and you'll also be building special family moments!!

How do you incorporate learning into your home? We're always hoping to add new ideas!

xoxo, MJ

Create a Constellation Board
Help your children explore the stars with a constellation board! A great craft that brings in geometry and science.

Help your children explore the stars with a constellation board! A great craft that brings in geometry and science.

Summer nights are the perfect time to get out and explore the stars. We've had star gazing on our bucket list, and to kick it off we made a constellation board. Learning the star patterns that can be seen in the night sky as well as some of the stories behind their origins helps the world feel a bit smaller to young minds. If you're looking for some great reading on constellations, check out the picture book, A Zoo in the Sky with its bright and colorful illustrations.

The constellation I can always spot best is Orion the hunter, with his belt of three stars, but that constellation is visible in the winter sky for those of us in the Northern Hemisphere. So I needed to brush up on my knowledge of the star patterns, too! I found the above fabulous constellation map at Mr. Printables, and I think it's the loveliest version I've seen.

From this map, we were able to explore the shapes of the constellations. Some constellations are more faint to the eye than others so we decided to study the original shapes to see if we could find all of the connecting stars. 

Taking this to the next level, we mapped out the shapes ourselves. To make a constellation board, you need:

  • A cork board
  • Pins
  • String in a few different colors
  • Scissors

Beginning with the Summer Triangle, three bright stars in the summer skies, we placed pins on the board and wrapped yarn around them. Tying a tight knot, we trimmed off the excess string. Next, we placed the pins for the stars in Cygnus which became a great lesson in geometry, scale, and art. 

We added the other two constellations that make up the Summer Triangle as well as a few other constellations that my children found particularly interesting because of their names or stories, like Hercules and Pegasus. To create a truly colorful piece of art, we chose a different bright-colored yarn for each constellation. The final product is a beautiful piece of string art that we have hanging for all of us to enjoy during the summer days and nights!

Constellation boards are a colorful, modern way to bring science into art.

Constellation boards are a colorful, modern way to bring science into art.

How do you share the intergalactic beauty with your children?

xoxo, MJ

Make Sponge Bombs
Sponge bombs are created from strips of household sponges. Follow this easy DIY to make these in a few minutes and play all afternoon long!

Sponge bombs are created from strips of household sponges. Follow this easy DIY to make these in a few minutes and play all afternoon long!

The summer weather has finally turned warm here, and we've been looking for ways to keep cool. I ran across this video from Inner Child Fun and decided we needed to add sponge bombs to our summer projects. Spoiler alert: these take 2 minutes to create!!

Sponge-bomb-supplies

Here's what you need: scissors, three sponges, and a hair tie or rubber band. Cut each sponge vertically into three pieces. You'll then have a total of nine thin strips.

Gather these in your hands, turn a few of the strips to make a round fistful. Tie together with the rubber band or hair tie.

Spread out the strips evenly in the ball and dunk in a cold bowl of water. (Ok, it doesn't have to be cold, but that definitely adds to the drama). We played catch in pairs with the sponge bombs, tracking how many consecutive catches we could make. These are also a lot of fun to throw AT someone in a sponge bomb fight.

Hot weather and time to play? Make some sponge bombs.

Hot weather and time to play? Make some sponge bombs.

And for a fun twist: have one person hold a bowl on their head. They work with a partner to try to catch the sponge bombs in the bowl. Play as teams to see who can catch the most (and get the wettest) in their bowls.

Are you ready to beat the heat?

xoxo, MJ