Posts in Kids
The Under-$10 Fix to School Paper Clutter and Chaos

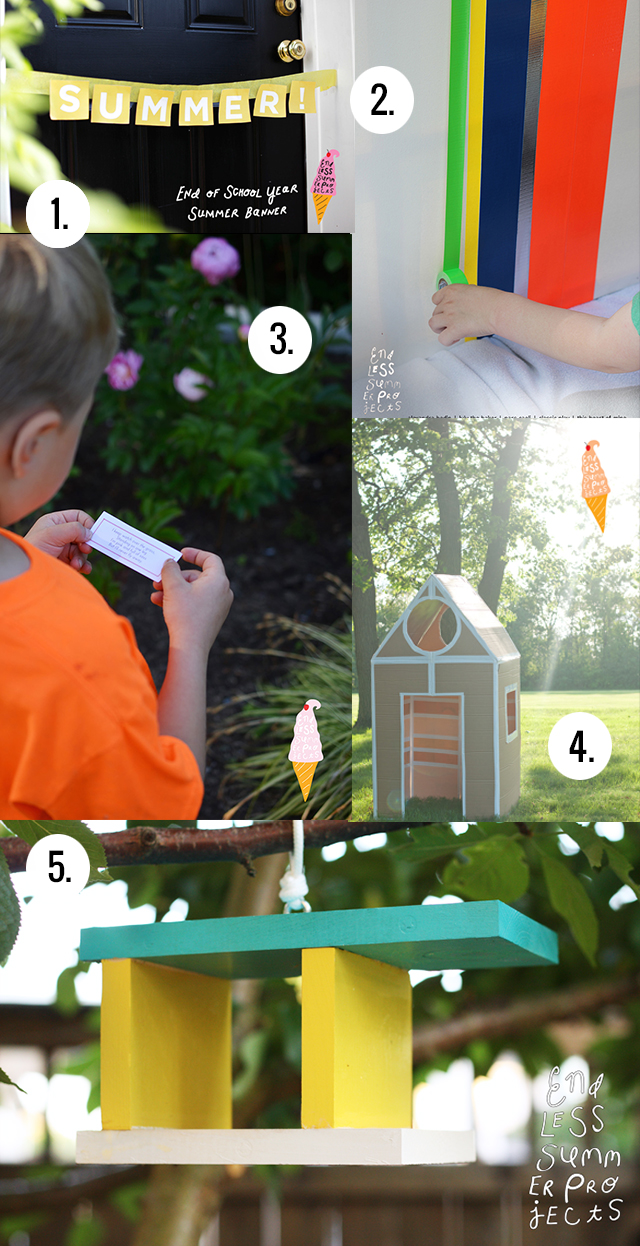
Getting down and dirty today. Do you ever feel like you're being covered by children's papers, projects, and homework? I do, or I did. Here's how I'm showing this year's clutter who's boss.

Our kitchen is the hub of our house. It's located off of the garage and mud room, and it's where we enter our home most of the time. The kitchen had also become the final resting place for all paper and kid clutter. Typical meal prep would involve a grand shifting of piles, that would lead to misplaced papers or unchecked homework assignments.

But that era, my friends, is over. For under $10, we have a new system to keep the counter tops free and clean, to keep kids school work in the right places, and to allow all of us (parents included) to have a piece of responsibility in the process.

It's a simple three-step process. I share it with you in the hopes that it might alleviate your own piles or missed 

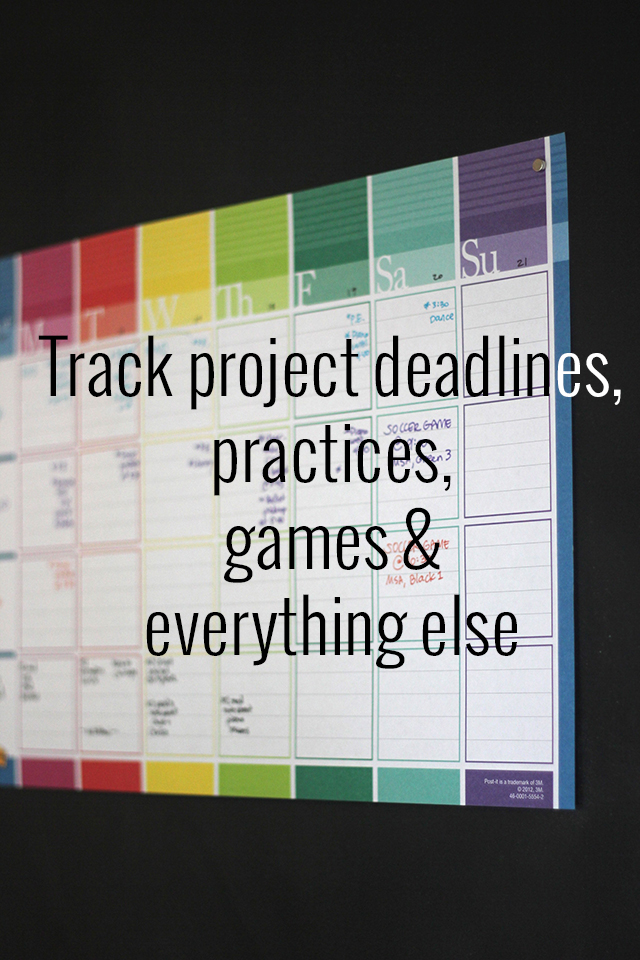
Step One: It all goes up on the calendar. A paper calendar these days, you ask? I have my Google calendar that tells me when to sit and when to stand. :) It also has important dates for my husband and children on it. But with children the ages of 9, 7, and 4, I don't have a way to share this electronic info easily with the people who need to understand it most. 

So this rainbow pad from 3M is where it's at. I complete it only a week at a time (too many things shift for me to go much further in advance), and post it on our chalkboard wall in the kitchen. It's helping all three to take responsibility for prepping their after school bags, squeezing in time to practice instruments, and buying school lunches. Each child has a row, and Mom and Dad have one, too. Guess who gives us helpful reminders, too?

Step Two: Next hurdle to tackle, the unpacking of the backpack. Each child has their own hook and drawer for shoes. This was not a problem. It was the, "Look, Mommy, what I did today!" moments. Folders undone, papers here and there. 

Now, I spend time with each child individually (yes, we're all practicing patience) going through the folder. We look at what homework needs to be completed, and we get right to that. The papers that have come home just for review get clipped by the child to the "Done Door." Go with me on this gimmick. This door is also the door to our garage, a metal door that, thanks to the use of these strong magnetic clips, has a ton of space for everyone to use. So oldest on top, middle in the middle, and youngest on the bottom. It's still in our main traffic area, but it's gleefully off of the kitchen counters.

This activity is a fun one for L, the youngest. The task of clipping and sticking the magnet to the door has proven endlessly entertaining.

Step Three: Because my hubs and I look over work at different times, we ran into the challenge of keeping the papers in a central location for him to see. Now, they all hang on the Done Door. Most of the time, each child brings over things they want to show him.

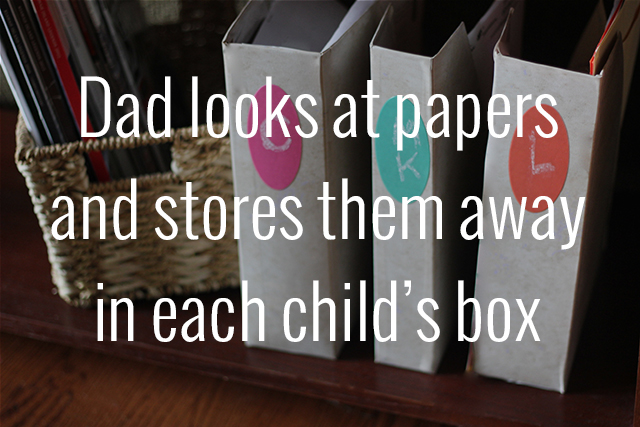
He has a chance now to see them as a stack of one child's work and talk to them about what's going on in their learning. And he's the last step in the chain. When he's done looking at school work, he puts completed work in each child's box. 

Children can now return to that one paper from last Tuesday that they really want to see. :) And I don't need to fish it out of whatever pile it might have landed. Or even worse, rummage through the recycling, because I DO love to recycle. 

These boxes are cereal boxes covered in neutral contact paper. On the end of each, I attached colorful chalkboard labels to entice everyone into keeping up this process. It's cute! Let's do it!!

And it's full steam ahead, friends. We all have our role to play, but my children are movers in this process and not passive participants. And I love that. 

Also, I love my countertops.

xoxo, MJ


A Family Objective

Photography by Brittani Renee Photography

In teaching, I wanted to be clear about my objectives. Write it on the board, "Students will be able to..." Let them know what our end goal was. No need for mysteries or secret reveals. This is what we want to learn.

I've been thinking a lot about this question that Sara Moore posed to me,

What do you hope your children will learn from you?

In the list of 11 questions that she asked, it was the one that took me the longest to answer. The question made me reflect upon my thoughts on sharing my parenting objectives. 

  • Do my children know what I want them to learn?
  • Do I know what I want them to learn? What is it again?
  • Why am I keeping it a secret to be uncovered at a later point?

The question is as deep as it is simple. The whole cycle of parenting involves the activity of what we want our children to learn from us. Our ideals, our beliefs, our dreams become a part of their upbringing. These things "rub off" in our interactions. 

Are there other areas and lessons that I want my children to learn that might not come up so naturally?

My husband and I created a family mission statement late one night when my second daughter was an infant. During one of our innumerable sleepless nights with C, we felt like we were veering off course, or, at least, meandering a bit more in our parenting than we wanted. We wrote out these simple statements to remind ourselves of these goals as we changed diapers and soothed teething cries.

Now two of our three children can read, and they can all express themselves quite clearly. They are perceptive; they are good listeners. I wonder how I am communicating these broader and more important family values. To Sara, in her interview, I said:

I hope my children learn that they are always loved by us, their parents, and by a generous God. I hope they learn to go after their passion and to work consistently to point that passion towards the greater Good. I hope they learn that tenacity and enthusiasm can accomplish almost everything you need. I hope they learn to laugh at themselves (a lot) and help other people do the same.

And now I'm feeling challenged to revisit our original statement or post this new one for my children to read. And to remind me, everyday.

What do you think? How do you let your children know what is most important?

xoxo, MJ

Welcome to a Wonderful Year Teacher Presents & Free Printable

This shop is part of a social shopper marketing insight campaign with Pollinate Media Group® and Office Depot, but all my opinions are my own. #pmedia #inspirestudents http://my-disclosur.es/OBsstV

Pineapples are all over the place these days. They're trendy now, and during colonial times, the pineapple symbolized the warmest welcome you could extend to a guest. It has continued to evoke a sense of hospitality and sweet goodness throughout the generations.

Extending welcome is a primary job for a teacher in the first month of the school. Around here, we're already in the third week of school, and the newness is beginning to wear off...which means... it's the perfect time to give your children's teachers a present that they want.

Sharpies! Smelly markers! Window markers! Great pens! The list of fantastic school supplies is a long one. Children aren't the only ones who love these colorful tools. Show the teachers in your life that you look forward to what the next months hold with a Welcome to a Wonderful Year present. You and/or your children can create these gift tags or notecards using pencil erasers and stamping pads. 


We bought fun school supplies at Office Max. Right now, you can save $5 off your purchase of $20 or more on select Newell Rubbermaid brands which include all of our favorites (PaperMate, Expo Neon Window Markers, Sharpie, Uni-Ball, & Mr. Sketch) And, you can cash in on Office Depot Rewards for shopping at Office Max as they are owned by the same company! It's kind of hard to resist...Head over to your Office Max or Office Depot and take advantage of the deal while supplies last.

You'll need some pencils with fresh erasers, an inkpad, and some paper to make these pineapple prints. Draw simple shapes on your erasers, like the ones shown above. With an X-acto knife, cut around these shapes. We made two sets of these shapes so that one of each could go into the yellow and green.

The pineapple shape is a breeze once you get the hang of it. Using a combination of diamonds and triangles, you can create a charming geometric design.

Or, if you aren't ready to take the project right now, click here to download your own pineapple printables.

Wrapping up a bundle of these fun supplies with a parachute cord or ribbon and a tag, lets our teachers know that we appreciate them, and we're looking forward to working together!

My oldest (9) and I created these together in less than an hour. Holding her back from using all the colorful markers was the hardest part....

Happy making!

XOXO, MJ

The Fall Bucket List

It's the most wonderful time of the year...

Oh, wait. That was written for another season...but I'm hacking it for fall. I will miss summer (you were so lovely this year), but I am ready to welcome autumn with its colors and cozy scents in a warm embrace.

So, happy fall, friends! As a family we made a list of adventures we want to enjoy together this season, similar to the one we created for the summer. This past weekend as we reminsced over our favorite summer memories, we also tallied up all our favorite aspects of fall. It's always good to have something to keep you moving forward! Looking back on our summer list, I am happily surprised by how many of these ideas we were able to do. We treat our bucket lists as great go-to ideas to make the most of the season with no pressure involved. 

Here in Indiana, there is so much to do as we transition to a time of harvest and get to the heart of what makes this land so wonderful.

Are you ready for apple dumplings, crisp and colorful leaves, and a whole lot of football? How do you celebrate the change of seasons?

xoxo, MJ


Teaching the Art of Giving

I saw very little of my siblings the two weeks leading up to Christmas every year. You see, I'm the youngest of three - my brother is 8 years older, and my sister is ten years older - and they were busy. Busily creating, making, finishing (or sometimes beginning) homemade gifts for my parents or me or my grandparents. My memories, even rhythms, of Christmas include time away from events and shopping to imagine and to cherish loved ones by spending time making special gifts. 

It's just what you did. Or what we did. I grew up thinking that every sibling did this.

I also grew up thinking this is how you use your talents. You create out of love. You create for others.

My sister is a great artist and amazing needleworker. The handmade creations she can put together (in a very short amount of time) are remarkable. She has very few of these pieces in her own home. They have all been given as gifts.

My brother is, too, an artist - sculpting and creating with fabric as well as pencil and paper. As a young child, I would challenge him to create something awesome for me, say, a purple-spotted black giraffe (with nearly 100 individual spots that he sewed by hand), and he'd make time to do it. He's given away all of these time-intensive, labors of love.

As my own creativity grew and developed, I followed suit and gave away my art as well. 

It starts simple, right? Our children bring home that coloring sheet crayoned in our favorite shades. It moves to the work from camp or art class, like the pot or pencil holder that was made extra-specially for you.

And somewhere, judgement comes in from either the giver or receiver, and with time limitations and conflicting priorities, the handmade gets left behind.

My oldest daughter at age four, when she began to recognize the quality of her drawings, wanted to keep all of her artwork. She loved each paper so intensely, how could she give it away? She had spent so much time on it... She had thought about each pencil mark and erasure. And it had turned into something that she really loved...

As I told her then (in four-year old language), I'm not advocating for giving away everything that you create. I suppose it's more of a mindset. You see, these talents and artistic abilities and creative ideas are all a gift to us. To think that we are the sole creators or originators of these capabilities would be false or at least a distortion. Our talents have been given to us by a good and gracious God, and the fruits of those talents are meant to be used, dispersed, and spread.

The simple act of giving away today's coloring sheet or tomorrow's popsicle stick creation teaches a broader, stronger lesson on love and how to love. And how to live.

Keep encouraging your children to create and to create for others. Even if something is not made with their own hands, teaching children that thinking about someone else and spending their time giving for other's betterment is such an essential life skill and a budding lesson in love.

Oh, and thanks Brub and Sis for teaching me that this is the way it goes.

xoxo, MJ


Lunchbox Whiteboard: Back to School
MJ-whiteboard-DIY-logo.jpg

Celebrating back to school around here means that we're getting a whole host of lunch box notes ready to go. These little love notes have become a treasured part of my communication with the kids while they're away at school. We retell jokes on roadtrips, and my oldest is challenging herself to come up with original jokes all the time.

When they heard that I was going to be doing a back to school project, they asked for a little something special for their lunches. Hence the birth of the lunchbox whiteboard.

This project is a breeze to make (you can even have your kids make it themselves), and it will bring smiles for a long time to come!

PC_bts_whiteboard_1.jpg

Grab an inexpensive, small frame (we bought ours at CVS, and it's 3"x3"). Painting is not necessary, but we wanted chalk paint on the frame so that it could be decorated for special occasions like holidays and birthdays.

Trim a piece of notebook paper to fit in the frame. Assemble.

Write your note, create your joke, or draw your doodle with a dry erase marker.

Top the note with a piece of transparency trimmed to the size of the frame. This helps to keep the note from wiping off while it's in the lunchbag. It also allows your child the opportunity to write a note back to you. My children have already discussed a rating system for my jokes. :)

I recommend keeping the frame in the front pocket of a lunchbag if possible just to keep the food and drinks away from the frame. If that's not an option, consider wiping down your frame and pen as you pack the lunch.

PC_bts_whiteboard_2.jpg

If you're looking for joke ideas, follow me @parscaeli on Twitter or Instagram or Facebook to see a daily joke. We'll begin a fresh school year of giggles next week. And you can always search the archives by following #pc_lunchboxnotes (over 100 in there to get you going).

Aannnd...

I have one more awesome surprise today. We're making chic mouse pads as a part of this series. Head over to Frock Files to see the incredible work of Joy. So good. The watercolor effect and the perfect typography.

Thanks to all who helped out with this awesome week of projects. It's been a blast to see how everyone gets ready to school in their own very cool way.

Are you ready to head back?

xoxo,

MJ

PC_backtoschool_logos.jpg
Printable Map Memories: Endless Summer Projects

This post is sponsored by Bing.

Our summer is almost coming to an end, and we are reliving happy memories! This printable map from Lulu the Baker is the perfect way to capture our epic beach trip and plan for future adventures.

We have dreams of going out West next summer, but my husband and I wonder if the kids are old enough yet to appreciate the sights and experiences. As a child, I often traveled in my uncle's RV with my parents and siblings. I loved being about to sleep, eat, play cards, and see the sights all from our vehicle. I'm fancying doing the same for my kids. Have you made a long road trip with your children?

Melissa's map today would be awesome for a little back-to-school learning, too. A review of the state names and/or capitals? A sharing of where various members of the family were born? And I love her idea of embroidering a special journey on here and framing it.

There's one more week in the incredible Endless Summer Projects series. Be sure to tune in next Wednesday and catch up on all the projects here:

xoxo, MJ


Printable Math Game

We have this last week left of summer vacation so we are in celebration mode for Back to School around here. We all love school at my house (some more than others) so it's a happy time of year as we anticipate new teachers and prep backpacks for the first days.

This entire week I'm bringing you awesome projects and ideas to get the school year started on the right foot. I've collaborated with a fresh team of talented women to share ideas for your kiddos and a few fancies for you, too.

Tan of Squirrelly Minds, the originator of this series, is kicking it off with a fun printable math game that will help get the gears moving for your younger set as they get ready to dive back into school. It's the perfect way to keep two siblings busy and learning together as well.

Scamper over to Squirrelly Minds and download your game and join me back here tomorrow for TWO great projects for Back to School!


Free Printable Back to School Signs

Are you back to school yet? I have a pack of back to school signs for your first day photos that will make them even more memorable. Do you remember what you wanted to be when you were going into fourth grade? Or how about second grade?

Me? (Well, thanks for asking) I wanted to be a ballerina in second grade. And as an upcoming fourth grader, I thought I'd be an artist. Some dreams were closer to reality it turns out, but that doesn't make them any less special.

I love hearing my children's dreams, both big and small. They are each growing fast and sometimes by leaps instead of the increments that I prefer.

PC_backtoschoolprintables_1.jpg

I made an entire free set - preschool-12th grade - of printables for our friends over at Modern Parents Messy Kids that capture your child's future dreams as well as their grade for this year's back to school photography. There's even a set in color and black and white so that you can find the right combination for those first day of school duds.

It's the best time of year for social media, and we want to see your first day photos and share in these little's big dreams. Tag your photos #MPMK_bigdreams and share in the sweet joy of childhood wonder. You can catch all my kiddos over there, too.

xoxo, MJ

Upcycled Camping Lanterns: Endless Summer Projects

This post is sponsored by Bing.

Summer is the perfect time to travel, even if it's just to your backyard. Last weekend, we even perched our tent in my son's bedroom so that he could have a special sleep over with his sister. Since then we've had camping on the brain. Staycations are always great on the budget, and here's an idea to up the imagination on your next adventure at home. I'm delighted to share my last (how can summer possibly be coming to a close?) Endless Summer Project for this season: an upcycled camping lantern.

Using oatmeal containers that a friend had given to us for our crafting, we painted and doodled our way to a working camping lantern. To create, grab:

  • A battery-operated candle (pull out a few from the Christmas stock)
  • An oatmeal container with the wrapper and plastic ring around the top removed
  • Acrylic or poster paint and paintbrush
  • Wire, rope, or heavy string
  • Transparency sheet
  • Construction paper

1. Hole punch one hole on either side of the top of the canister.

2. Cut large rectangular holes on either side. This is an easy job for an X-Acto knife, but even child scissors can cut through the cardboard cylinders with some assistance.

3. Put little hands to work on painting. We chose campy green to make our lantern look like official camping gear.

4. Cut a large circle out of the construction paper. Cut a line into the center. Overlap and glue the excess paper to form the cone top of the lantern.

5. Cut a letter-sized transparency in half. With a permanent marker, doodle your design. Remember that the light will shine through these two panels so color to your heart's desire. Consider even making shapes to create special shadows on your tent wall.

6. Attach the transparency to the interior of the canister with invisible tape.

7. With double-sided tape or a hot glue gun, attach you candle to the bottom of the canister. *If your candle has an on/off switch at the bottom, cut out a small hole to reach the switch before gluing into place.

7. String wire or rope through the holes punched on the canister and through the cone roof.

The warmth of the candlelight makes a charmed evening feel like one of the best of childhood.

The kids are excited to use theirs inside and outside. We haven't yet done an overnight in the tent (outside), but these upcycled camping lanterns might be the inspiration we need to stay brave in the dark.

We've had such a blast sharing these creations with you throughout the summer, and there's still more to enjoy! Join in next Wednesday for another great Endless Summer Project! Here's the entire list in case you missed them:

Here's to the last glorious weeks of summer, friends!

xoxo, MJ


Back to School Geometric Initial Totes

This shop is part of a social shopper marketing insight campaign with Pollinate Media Group® Elmer’s and Wet Ones, but all my opinions are my own. #pmedia #CraftandCleanUp http://my-disclosur.es/OBsstV

PC_geometricmonogramtote_pin.jpg

We are getting excited for school around here, and, to celebrate, we created geometric initial tote bags to hold the after-school supplies. Backpacks, lunchbags, and school shoes of all sorts are filling the store shelves and catalogs in our mailbox. Ready or not, summer is coming to a close and a new school year is about to begin. Quite honestly, it's one of my favorite times of year. The beginning of school is like New Year's, with better Midwestern weather. So much potential bundled up into fresh pencils and new notebooks.

For once, we're ready with school supply purchases. I like to hit Target early to see the entire landscape of what they're offering. I grabbed up this Elmer's and Wet Ones combo pack in the Back to School section. The pairing of these two is genius.

PC_geometricmonogramtote_8.jpg

This year my girls, now in second and fourth grade, are involved in a full schedule of after school activities. We purchased some awesome backpacks, but we were still in need of something to hold the piano books, soccer balls, Daisy folders, choir schedules, and more. Little hands tire quickly at the end of the day and carrying all of the other equipment in their arms just isn't practical anymore.

So, with the help of some Elmer's glue and a pack of Wet Ones to clean up our smudges and messes, we got crafty and transformed some plain tote bags into geometric initial totes that the girls can use every day.

PC_geometricmonogramtote.jpg

We purchased durable canvas tote and drawstring bags, found some acrylic paints in colors that the girls loved, grabbed our Elmer's glue and a paint brush and went to work.

To begin, I drew in a very light pencil, each girl's initials on the bag. I freehanded ours, but you could easily transfer on a large letter image from your favorite font. I'd recommend something simple and bold since the detail of this craft comes through in the geometric shapes.

PC_geometricmonogramtote_1.jpg

Next, trace over your lines with glue, trying to maintain the same thickness in each line. Sometimes you'll catch an air bubble or make your own goober so be sure to keep a Wet One wipe close by to clean up your mistake in no time.

PC_geometricmonogramtote_2.jpg

Once you have your initial outlined, the fun begins! From the edge of a letter, draw a small triangle and then another and connect them. Be silly, go geo-crazy, and surround your letters with shapes. Be sure to leave the inside of the letters clear of any glue. Make sure that the layer of glue you paint is thick and dimensional.

Let glue dry for a good 2-4 hours.

Grab your paints. We chose just two colors for each bag and mixed different shades together to create an analogous palette. Paint each shape right up to the glue, allowing the glue to act as a barrier to the next shape.

PC_geometricmonogramtote_7.jpg

My ladies were quite happy with their new, personalized bags. Fingers crossed for a cleaner minivan.

PC_geometricmonogramtote_6.jpg
PC_geometricmonogramtote_3.jpg

These bags are getting a workout already with soccer practices nearing and piano lessons every Monday. I love that my ladies are so well rounded and involved, and I'm happy they have some place to keep all of their stuff for these busy times as well!

PC_geometricmonogramtote_4.jpg
PC_geometricmonogramtote_5.jpg

So many possibilities with this technique! Find a bottle of Elmer's gel glue to create a washable design for your bags that might need more laundering.

We're on the countdown to school with just over three weeks to go. How about you?

xoxo, MJ

Vacation Mobile: Endless Summer Projects
This post is sponsored by Bing.

I stink at scrapbooks and photo albums, but a vacation mobile? I can get behind that. Today's Endless Summer Project is a sweet one from Jen over at Classic Play. It's a three-dimensional way for your kids to put together the images, words, and memories of their special trip, and I know my kids are excited to give this one a try.

We had our first visit to the ocean this summer. Living in landlocked Indiana, we rejoice at sport lakes and adore Lake Michigan, but wide-open, amazing ocean space is a whole different story. They were clearly blown away in the most positivie ways. During our long drive and leisurely dinners, we wrote down and sketched our memories so that they would always remain fresh in the pages of our journal. I'd love to see how they'd turn these doodles and writings into a creative mobile like this.

There's still plenty of time to soak up all of the Endless Summer Projects:

Next week we'll be hosting Endless Summer Projects with an outdoor project that you can enjoy well into the fall!

And thank you for your patience with my two posts-a-week schedule lately. Summer is so full, and it's been a wonderful one, but I almost miss investing time here. But that, too, will soon change! Lots of great ideas coming your way in August.

xoxo, MJ

Outdoor Cooking with Kids: Endless Summer Projects


Summer to us means a whole lot of outdoors. Playing, swimming, chalk, bubbles, and eating! I'm delighted to try out the incredible recipes and ideas that Melissa of Lulu the Baker has for us today on the Endless Summer Projects series.

We use our grill a ton in the summer for kabobs and corn and s'mores in the summer, and Melissa is taking this to a whole new level... Chicken and bacon for dinner! Peach cobbler! I can't wait to try these out.

Here are all this year's Endless Summer Projects:

What do you love to cook outdoors? Isn't there something just grand about the experience?

xoxo, MJ

Screen Printed T-shirts: Endless Summer Projects

Screen printing t-shirts are a great way to give your child something really unique that they love. Our next Endless Summer Project comes from Amy over at This Heart of Mine blog. Her kids are adorable and so is this fabulous project.

We love to tie dye, and I'm excited to take our creations to a new level with this tutorial. Also, you need to check out all of the cute designs that Amy created for his kids wearables.

Next week Melissa of Lulu the Baker has an awesome project that the whole family will love! Tune in on Wednesday.

Catch up on all of our Endless Summer Projects:

Don't forget to tag your projects #endlesssummerprojects so we can see your creations and join in the fun!

xoxo, MJ

Summer reading bucket list

Some of my favorite childhood summer memories are wrapped within books. The summer before sixth grade I spent doodling and imagining hot air balloons thanks to Twenty-One Balloons. Agh, and I can't forget the summer I read Old Yeller for the first time. I was so shocked by the ending.

Having the time to soak in a good book is a real joy around our house, and I'm doing all I can to make sure that my kids have time and space to make reading something special. C had her first bookclub meeting last night, and she was excited to talk about her book with friends. Ramona Quimby, Age 8 is up next, and I'm looking forward to her enjoying all of Ramona's antics.

I'm traveling around a bit this week to visit some wonderful blogs, and today, I'm over at The Happy Family Movement. They have an awesome summer bucket list challenge going on, and I had to join in when Jenny put out the offer.

Take a gander at some of the wonderful ideas they have over at The Happy Family Movement for a blissful summer!

xoxo, MJ

Firework Tablecloth: Endless Summer Projects

Let's make a firework tablecloth with the kids today to celebrate the Fourth!

These are a ton of messy fun! And I love the final result for a tablescape that shows off the joy that comes with the summer celebration of the Fourth of July. Alexandra has all of the details for today's Endless Summer Project! What are you up to for the holiday weekend?

In case you've missed any projects thus far:

Join us next week for an awesome project that you and your children will love!

xoxo, MJ


6 fun water balloon games: Endless Summer Projects
PC_esp_waterballoons.jpg

The hot days of summer bring on lots of water play at our house. And beyond the sprinkler and waterslide, we love water balloon games. The surprise of the break in combination with an instant soaking speaks to the unique beauty of summer fun! For today's Endless Summer Projects, we're sharing 6 water balloon games that we love.

1. The Fast Fill

The first (and sometimes most difficult task) of a good water balloon game is having lots of water balloons at your disposal. This game is for the older kids/adults in your group. It's a race to see how many balloons you can fill up and tie off in a set amount of time. Be careful, you're likely to spray yourself and others as you attempt to knot balloon ends and find the ones that leak and explode!

This game is a great way to kick off the balloon festivities because it gets everyone a little wet and laughing at themselves and each other. Make sure you have a secure location, like a bucket or baby pool to hold all the completed balloons.

PC_waterballoons_fastfill.jpg

2. The Balloon Pinata

A twist on the traditional pinata game with the prize being a great splash! Fill a handful of balloons and tie them together with string strong enough to hold the weight of the full balloons. Find a great location to hang the pinata for the various gamers to reach. Perhaps a tree limb, a playset, or a gardening tool might work well.

Be ready for a few sets of swings to make sure all the balloons have burst!

PC_waterballoons_pinata.jpg

3. The Balloon Toss Through a Hoop

Of course, you can do the traditional balloon toss back and forth, moving one pace further with each successful catch.

But we like to get everyone involved and take it to a different level. Have someone hold a hula hoop and have two team members work together to toss the balloon through the hole to their partner on the other side. Be careful, that hoop might cause a quick break in a balloon!

PC_waterballoons_hoop.jpg

4. The Spoon Balloon Race

This is a take on the outdoor egg race game. If you have small water balloons like we do, find large serving spoons to balance them upon. Some of our balloons broke before we even got the race started, so if you're a fierce competitor, use both hands to keep your balloon steady until the GO! signal is made.

Determine how far you want your race to go (and if you want to lap back to the start line), and go as fast as you can. The object is to make sure you finish the race with your balloon balanced and in tact on your spoon - and you can use only one hand. If your balloon falls off, you have to go back to the starting line. If your balloon breaks, you're out of the game!

PC_waterballoons_spoons.jpg

5. The Balloon Explosion

Lay out a tarp or vinyl tablecloth on the ground. Sprinkle baking soda on top of it. Fill balloons with a mixture of vinegar and water. Watch the explosion!

This one is all about who can make the best effect. Consider making small piles of baking soda on the cloth so that participants have something to aim for. This one is a great science experiment brought to life!

PC_waterballoons_explosion.jpg

6. Soak Your Sibling

This is our favorite - a combination of balloon pinata with a hint of a dunk tank. Caution on this one. Be sure you have gentle participants with good aim so that they do not hit one another with the bats, but only hit the water balloons.

Everyone takes a turn sitting under the pinata. The batter keeps his/her eyes open and tries to break the pinata in as few hits as possible to get his/her sibling as wet as he/she can while remaining dry themselves.

PC_waterballoons_soaksibling.jpg

Summer is the perfect time to burst open water balloons - even if it's just to throw them right at someone who needs to get soaked!

Join us for Endless Summer Projects next Wednesday to get you ready to celebrate the 4th!

xoxo, MJ

A Backyard Circus Party: Endless Summer Projects

Minted is the premier marketplace for independent design and art. They sell the best work of indie designers and artists as fine stationery, art, and party decor. Their newly-launched collection of birthday party invitations and party decor suites would be perfect for summer birthdays, fitting every theme from movie nights to pool parties!

Today's Endless Summer Project is an incredible array of circus themed goodies topped off with a fabulous DIY from Jen at Classic Play. We're making stilts this week, and I am giddy about the final product! I have no idea how to walk on stilts, but I think it would be a ton of fun to try it out with our kiddos.

Have you ever been to or thrown a circus party? I haven't yet, but I want to! Especially after seeing all of the possibilities. I spent some time looking at invitation ideas for our party over at Minted, and I was amazed by the many options and awesome designs.

Minted offers a platform for independent artists and designers to showcase their work. If you find a design that you love, you can easily personalize and adapt it to the theme that you want. So, if you see a birth announcement that is just what you need for a summer party, you can easily make those changes right on screen.

Check out just some of the celebratory invites and cards over at Minted:

You can find all of these and more under the circus search of Minted. The top two are my favorites, and I can imagine my guests getting excited after receiving one of these!

The circus theme is such a fun one that we've expanded it across all of the blogs in Endless Summer Projects. Click around to see some amazing creations from these ladies!

  • On Lulu the Baker today, find a round up of circus treats that would make the ideal menu for your circus party.
  • This Heart of Mine features delightful circus party decor.
  • Alexandra has some super cute costumes that you can DIY to bring the circus to life!

Have fun making your stilts! We're living the high life this year.

Join in next Wednesday for a watery-good post in the Endless Summer Projects series.

xoxo, MJ


DIY Puppet Show

I'm sharing a quick craft you can make for and/or with your children today over on Classic Play. Puppet shows are always fun, no matter the season or occasion. We created our own mobile theater that fits in our doorframes by transforming a pillowcase into a stage curtain.

It's an easy project that will last you all summer long. We also made paper bag puppets (remember these?), and you better believe that sock puppets are on tap for another project this summer.

IMG_4880.jpg

Click on over to Classic Play to see all of the details! See you back here tomorrow for one crazy good circus for Endless Summer Projects!

xoxo, MJ

Mid Century Modern Bird Feeders: Endless Summer Projects


This week's Endless Summer Project is a real treat from Melissa of Lulu the Baker. Combine the love of color, architecture, and modernism into one fantastic project for the family to create. Her midcentury modern birdfeeder is simple in design, with full instructions included.

We love watching the birds in our backyard. With the warm temperatures, we've been eating dinner out on the deck and have discovered a momma robin feeding her nest of four babies in one of our plum trees. When I mention to my three that they once resembled those desperately hungry hatchlings, they snicker and giggle. It's awesome to watch another family in its beginning stages.

Hop on over to Lulu the Baker to get all the info you need to make one of these modern birdhouses, and be sure to check out all the other projects we've had so far in the Endless Summer Projects series! Next week's post is a full on circus to delight...

  1. The printable summer banner from Classic Play
  2. A large-scale art project with tape from Pars Caeli
  3. A ready-to-go, free printable scavenger hunt from Alexandra Hedin
  4. A collapsible cardboard playhouse from This Heart of Mine
  5. This mid century modern bird feeder at Lulu the Baker

 Happy summer? Have you started any projects yet?

xoxo, MJ