Every now and again, I add features or links to posts from companies that sponsor the blog. When I do this, I'll let you know right at the top of the post. Sponsor companies are ones that I select and shop myself. Products are theirs, but opinions are mine. Today's valentines were selected by me and provided by Minted.

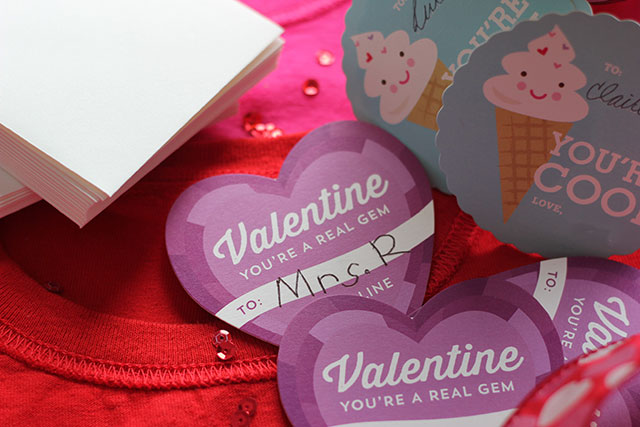
Happy (almost) Valentine's Day, friends! We are in full-on Valentine prep around here with classroom parties galore. The great folks at Minted offered us classroom valentines of our choice (and, oh, the choices!), and I'm pretty sure these are the nicest valentines we've ever sent. They came personalized with my daughter's names, too, so we've had fun adding special touches to the envelopes (hello ring pops) since the hard work was already done!
Since our cards are stepping it up this year, we decided to take our valentine container up to the next level, too. Did you decorate shoe boxes to collect your valentines as a kid? Or make a heart complete with doilies and ribbon to hold your cards? I did, and I loved the creation of the container almost as much as the cutesy notes themselves.
Well, times have not changed, but instead of gluing my box or envelope, my kids and I crafted some sassy t-shirt bags to tote our love notes. These bags are super easy, upcycled, and take less time than construction paper and glue (no...really). I have a sewing machine that loves dark corners of my basement, and I wasn't ready to change its mind for this project so I found this idea and made it valentine.
(And also, I love that my daughters were most excited to send their teachers cards!)
STEP ONE:
Dig to the bottom of the drawer, or for us the bag of giveaway clothes. We found a pink and a red t-shirt that were too small to wear but in awesome shape, ready to be remade. *Just a note, if you're making a bag suitable for kids, use a kids t-shirt so that the bag won't be too large for their size.
STEP TWO:
We wanted a blank canvas so we turned the shirt inside out. Trim off the tag as well as the sleeves (with a little extra for the handles). Next trim a rounded or squared shape from the neckline to create the handles of your bag.

STEP THREE:
We made our bag with three holes in the bottom and therefore we cut three slits at the bottom of the shirt, about equi-distant from one another.
STEP FOUR:
With the sleeves that you trimmed, cut 1/2 inch strips the entire length of the sleeve width. Pull on the strip to make it curl on the edges (neat-o trick).
STEP FIVE:
Grab one of the strips, pin it with a safety pin on the end and feed it through the seam allowance at the bottom of the shirt. Thread it through two sections of the shirt, pull the cord, and tie a knot. Continue to do this with the two other strips and the remaining seam sections. Tie all ends into one large knot at the bottom of the bag.

STEP SIX:
Grab your freezer paper and cut a heart stencil. Apply paint evenly with the brush or sponge of your choice. We chose a metallic paint to add some shimmer to the bag and stamped simple hearts on the front and back.

That's all there is to it! Our first shirt took us 20 minutes with painting included, and we whipped up the second in under 10.

My 9-yo could craft these on her own, and they'd make great party favor bags for a sleepover or to go bags from a crafternoon.


Maybe gift wrap for a galentine's day present?Or make one for yourself to show that you love Love Day!

Happy Valentine's, dear readers. You all are the sweetest!
xoxo, MJ