Posts tagged frames
Endless Summer Projects: Shoebox Frames
PC_endlesssummerprojects_shoebox_pin.jpg

I cannot believe it. Here we are at my last Endless Summer Projects! We've been planning these and posting them for so many weeks now, that I can't believe we're at the finish line already. And that feeling of quick endings is all around us as we squeeze the literal juice out of the remaining two weeks of summer.

PC_endlesssummerprojects_shoeboxframes1.jpg

In our house, August brings the start of school preempted by one of our favorite (made up) holidays, Siblings Day! To foster great relationships and celebrate the special people we have right around us, our family indulges in a special dinner, a lasting craft, silly games, some storytelling of great memories, and silly pictures together.

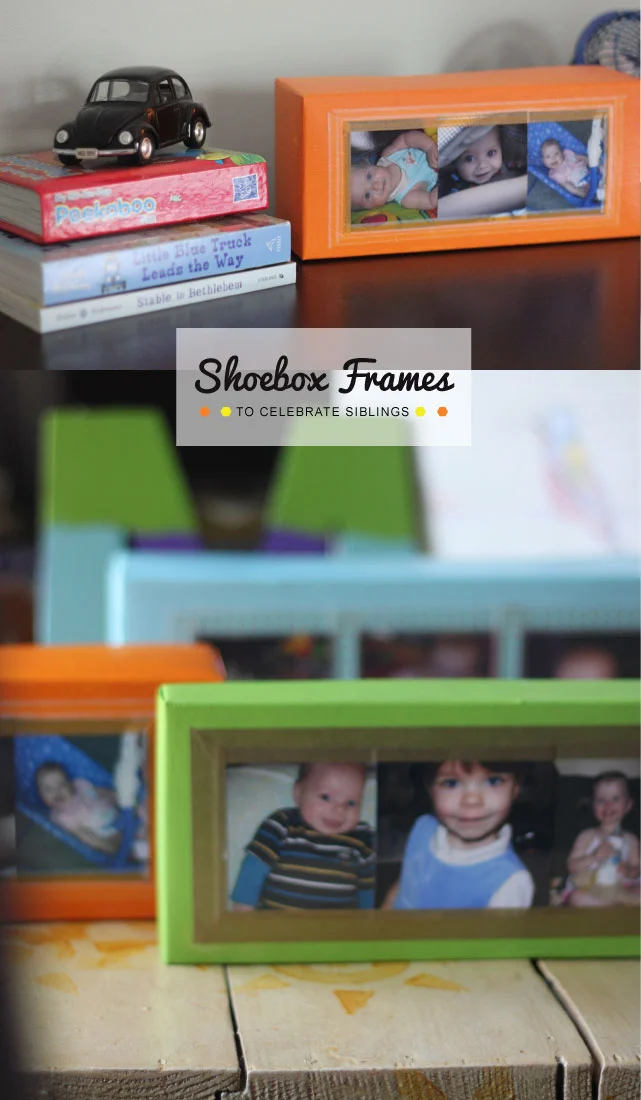
My children are 8,6, and 3, and although rather close in age, their ability levels and interests can seem light years apart at times. Lots of "he's not old enough" and "she's too big" get thrown around in conversation. I wanted a way for everyone to see each other on a level playing field... So we spent some time going through baby pictures as a family. Each sibling heard stories of the other sister or brother and their habits as babies, the toys they loved, the ridiculous noises and first words they said.

And each one selected a baby photo of their brother and/or sister to hang in their rooms. Sometimes it's good to remember that your bossy older sister was once an adorable baby, too. And that annoying little brother, well, he was super huggable with those pudgy cheeks.

Once we had our photos selected and printed, we were ready to get to work.

PC_endlesssummerprojects_shoeboxframe.jpg

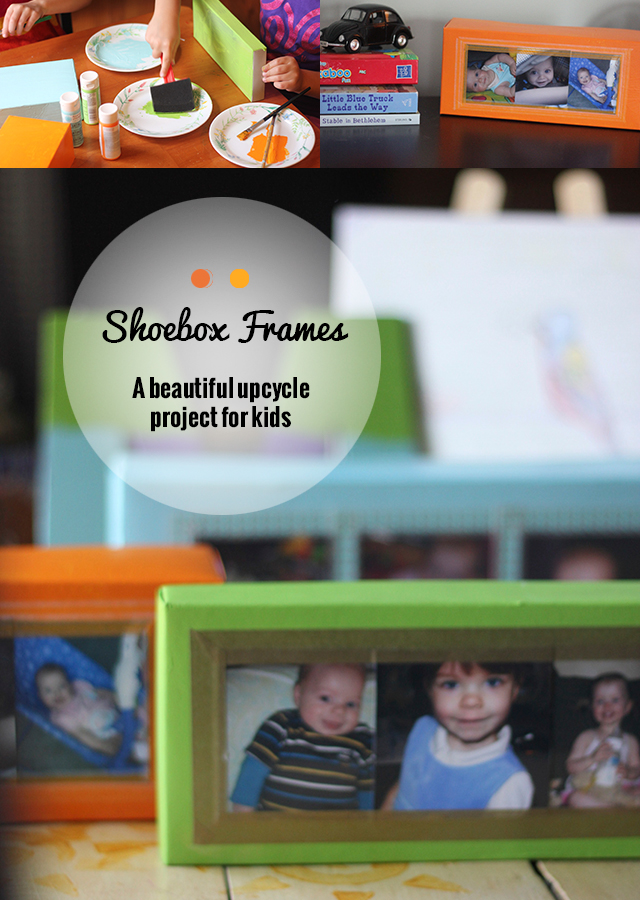
Wanna make some, too? Super simple supplies for this one: sturdy shoeboxes, quality paint, brushes, photographs, scissors, and washi tape

PC_endlesssummer_sb1.png

My daughters picked the box lids, and my son wanted the box bottom, (and either side can turn out quite nicely)! Have children paint the boxes, likey 2-3 coats, depending on the coverage.

PC_endlesssummer_sb2.png

Once the box lid is completely covered in paint, assist your children in trimming the baby photos to all the same size. For the size boxes we had, I trimmed the photos to 3" x 3".

PC_endlesssummer_sb3.png

Line up photographs on the long flat surface of the box or box lid, and carefully adhere to the box with washi tape. I also glued the photos onto the boxes to insure that the washi tape would have some assistance in keeping the pictures in place.

PC_endlesssummer_sb4.png

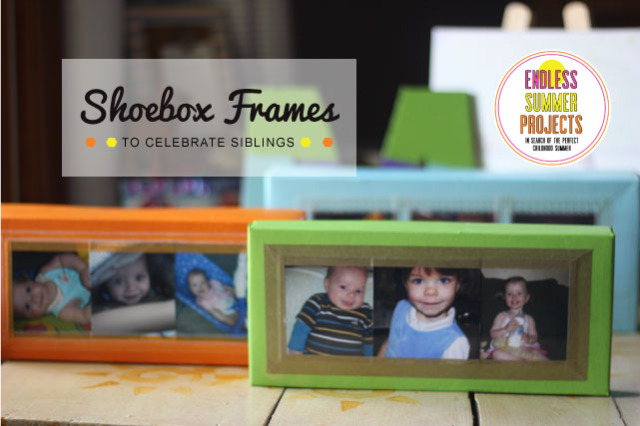
Finished boxes make cute photo bricks on dresser and shelves.

PC_endlesssummer_sb5.png

Add fun washi tape patterns to add some visual interest to your frame.

And don't forget to find a spot on the wall to show off your new creation.

PC_endlesssummer_sb6.png
PC_Endless_summer.jpg
Make It: Washi Tape Frames

Hi there, lovelies. It's wonderful to have you back here again. I missed you at the end of last week, but I promise I've been working some magic behind the scenes to move Pars Caeli to a new level of fabulous.

I had a wonderful birthday - thanks for all the wishes - that was topped off by a fantastic performance of Wicked. Though I'd heard the music and read the book, it was my first time seeing the musical, and I loved it!! Many other special, special moments continued throughout the weekend and into Mother's Day.

PC_mothersday.jpg

I have definitely grown into motherhood and grown from motherhood. Lately as they are now 3, 5, and 8, I find myself staring at my kiddos, amazed at the people they are becoming. Where did these lovely souls come from, and how did I get so lucky to share in life with them? I'm not sure, but I am most definitely humbled and grateful.

And on that note, I have an easy DIY I want to share with you. I made these cheeky notecards with vinyl letters last week that I'm stuffing in packages headed out to some of my favorite bloggers who joined in For the Love of Blogging series.

One of my favorite parts to these bundles are some sacred words.

These inspirational quotes come directly from the writers themselves.

I wanted to create something special for these writers, photographers, artists, and stylists. And as any crafter knows, washi tape is the most forgiving medium around so I was able to adjust and rework the prints as I wanted.

PC_washitapeframe_.jpg

Here's what you need: cardboard, fun paper, glue, washi tape, and a bulldog clip for hanging.

I treasure the words these bloggers shared with me. And I hope they treasure their own words in the same way. Sometimes we discount our own wisdom, don't we? I think with these prints around, it will be a lot harder to do!!

PC_washtape2.jpg

STEP 1: Design your print. Load paper. Print.

STEP 2: Trim print and cardboard to the same size. These are 5x7 but make them in any size you'd like.

STEP 3: Glue paper to cardboard. I used rubber cement just because I love it.

PC_washitape_6.jpg

STEP 4: Add washi accents. Make sure that you use the washi tape around the edge to combine the cover the cardboard/paper seam.

STEP 5: Add a washi either right next to the framed edge or a bit closer into the center for more of a matted look.

STEP 6: Attach a bulldog clip for hanging!

PC_washitape_5.jpg
PC_washitape_3.jpg
IMG_1725.JPG

Have you ever framed your own words?

xoxo, MJ

P.S. A brand new Celebrate the Normal is headed your way on Wednesday; don't forget to tag your photos. And, I'll be joining in Anne's Love Yourself in a special Tuesday post tomorrow. Hint: The temptations of Photoshop.

Itty Bitty Lovelies: The Beauty of Minimal

Hiya, lovely! How's it going? Exciting times around here...It's a great week of the year, the holiest one for Christians, as we gear up for Easter. My family is looking forward to all the services this week (with our oldest in the Church choir) as well as a fun egg hunt and Easter brunch with friends. What have you been up to?

Today I'm bringing you some Itty Bitty Lovelies that work with minimal supplies for maximum results. When you can create a masterful DIY with only a few items it's just that much sweeter, don't you think?

1. Tape saves the day again

Though I love art and photography, I don't have as much of it hanging on my walls or sitting on my shelves as I would like. Why? Frames are costly.

Jordan from Oh Happy Day posted this, and I just have to share it with you. Using kraft tape and some other supplies, she made these gorgeous thin frames for her home. The final look is remarkable, considering the low price of the materials. I am almost convinced that I need to buy my own matte cutter, too ($15).

Can't you imagine these in bright hues for a children's room or a classic black accent on book shelves?

2. Wall gallery for the no budget

Melissa takes us through the art that hangs in her bedroom in this lovely gallery made of simple frames she's purchased from Ikea. I adore the rhythm she's created on her bright walls. And learning the details behind each piece is delightful. It inspires me and reminds me that simplicity is more.

Head over to her blog and see what I mean. I think I'd love seeing all these frames hung really tight together as she has them in some of the photos. Have you created a wall gallery in your home? I'd love to see it!

3. Elegant bracelets for all the gals on your list

When I saw this post, I knew I wanted to savor it for Itty Bitty Lovelies. My good friend Joy from Frock Files has created the purest friendship bracelet that you could wear to the opera or the supermarket and look glamorous.

The way that she's stacked them is divine, and the closure method is genius. These are completely budget-friendly and the perfect spring accessory. Way to go, Joy. You've done it again.

My lovely for the week:

Life is better with friends. Be bold and ask someone, with whom you share common interests but not much time together, to join you for coffee. Invite that family you've been bumping into all over for a simple dinner. Arrange a Google Chat with bloggers you admire. Too often I imagine that others may not have time or an interest to get together, when the reality is, we're all just busy living our lives. A warm invitation does wonders for the spirit.

Let's make this a great week, friends. It's time to contemplate, refocus, and celebrate all that is to come.

xoxo, MJ