Posts tagged neon
Flourescent and Gold Leaf Flower Vases
This post is part of a social shopper marketing insight campaign with Pollinate Media Group® and All You Magazine, but all my opinions are my own. #pmedia #lifeforless http://my-disclosur.es/OBsstV.
PC_budvase_4.jpg

Happy Monday, lovelies! What a treat to be greeting you at the very beginning of your week.

Temperatures are warming; we even saw our first bulbs peeking through the mulch this weekend! Spring brings fresh blossoms with their gorgeous color and fragrance. I love to bring in bunches of lilacs and snips of hyacinths and tulips, too. Often, after the larger bouquet has lost its brilliance, when one or two blooms remain fresh, I like to float them in a bowl to savor their beauty a few days longer. And more often, my three children find "daisies" (AKA: dandelions) and peonies they want to bring in to our house to cherish.

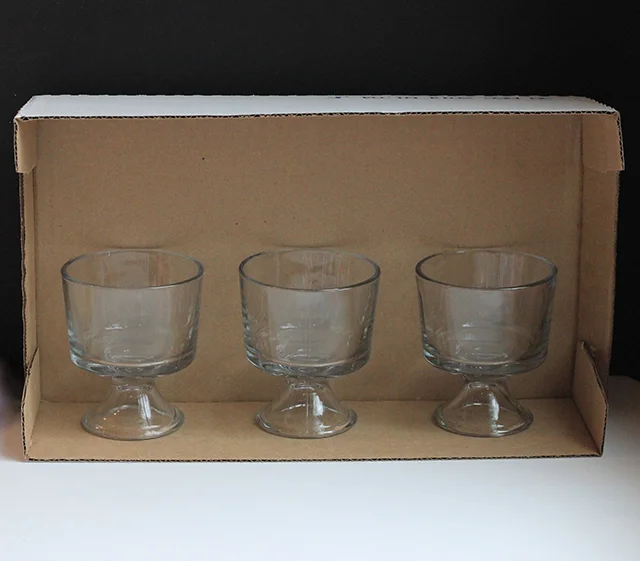
With no specifically charming bowls to hold the buds and flower heads, I went out to search for floating bowls. Nothing I found seemed unique enough to showcase our buds. I did, however, fall for these cute ice cream bowls. The shape was just what I had in mind for a "personalized" size of bowl - perfect for place-setting color, sparkle on a tray, or brilliance on a desktop.

PC_budvase.jpg

To transform the ice cream bowls, I ran over to our local Meijer and grabbed frosted glass spray paint and flourscent spray paint. And I had some gold leaf paint on hand, just a small bottle, from another project. It was more than enough to gild the interior of the bowls. I took this entire project outside and grabbed a box from the recycling to keep me from overspraying.

Follow the direction on your paint can! The frosted glass paint I used required three coats in order for the glass to reach a filmy state, a slight texture in which another paint would be more likely to adhere. Drying time for each layer was only 10-15 minutes so the process went rapidly.

PC_budvase_1.jpg

Once I was happy with the frosted (slightly textured) nature of the glass paint, I added the flourescent! Neon when used sparingly can add a lot of life to a room or table. This pink-orange shade was the perfect burst of tone I wanted to compliment the warm weather. The picture below shows off the look of the new vases after three coats of the flourescent. If you want your vase to have more of a tinted look, paint on only one or two coats. For a glossier, opaque feel, keep adding layers!

PC_budvase_2.jpg

Next up, making it golden. Beware, gilding objects might make you want to treat everything with a fresh wash of gold. It's amazing how simple objects can turn from ordinary to treasure with the addition of gold leaf. My paint was oil-based (to help with the waterproof nature), and I let the two layers dry overnight.

PC_budvase_5.jpg

And voila! $3 ice cream bowls transform into show stopper flourescent and gold flower vases!

PC_budvase_6.jpg

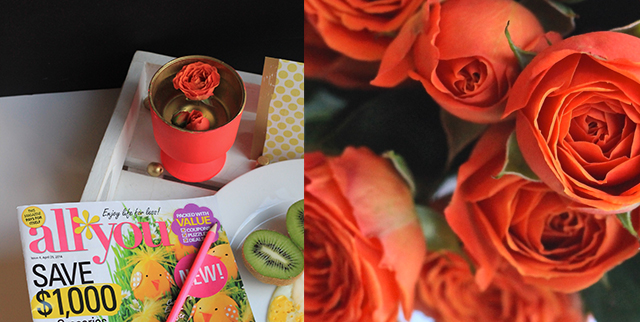
The colors from the new magazine, All You, inspired this palette, and I'm pretty sure that the golden pool of water will make even our common dandelions look pretty spectacular.

PC_budvase_8.jpg

All You is available at many national retailers including Target, Safeway, Kroger, Dollar General, and Meijer. Grab a copy for yourself by using this $1 off coupon while supplies last.

PC_flowervases_pin.jpg

And for this project or so many others you may have on your to do list, I'm giving away $50 to Meijer stores. Enter below for your chance to win!

Here's to a great week, golden and bright!

xoxo, MJ

Entry

-Form

Neon + Succulents

Yay for Tuesday! I'm off on a first grade field trip today for M, and we're headed to a local botanical garden. I am so ready to be surrounded by buds, blooms, and butterflies, as well as very energetic seven-year olds. I always get itchy to return to the classroom when I get these sorts of opportunities, but my fortunate role on this journey is just to be a proud momma. I love that.

The kiddos, hubby, and I were up to some more garden goodness this weekend. We hit nursery #2 for thyme, dill, and some wonderful fragrant honeysuckle.

I also found seventy-two (72!!) different varieties of succulents, and I've been dying to have some of these beauties in our home. Each species was more intricate and amazing than the next. I forced myself to decide upon just two, and these little hen and chicks found their way home with us.

Add to this two neon bottles of paint that I just had the urge to pick up last time I was at Michael's and here we are with some terracotta neon goodness. The kids and I had fun painting shapes of neon to our pots.

I'm still not sure how I feel about neon making a comeback. I was really into the trend in the mid 80's, and I might have worn out my lifetime allotment of hot pink in middle school.

BUT, neon combined with the natural, I find that kind of intriguing. A happy juxtaposition.

These smiling circles are made with stampers and pencil eraser tops. Terracotta just drinks up the paint so I did apply a second coat to make sure that the neon remained bright. Here you see the dampness of the soil has already added a level of saturation to the colors.

These succulents now adorn our deck, but I think I might even steal them away for a sunny spot in the kitchen.

And best part of these beauties? They are basically indestructible. Perfect.

Have you been adding any neon to your life? Or featured some everlasting succulents in a special spot? Say more, please.

Thanks for stopping over! I have another crafty project I'm super excited to share with you tomorrow. I hope you'll join me again...it's always lovely to have you here. Thank you.

XOXO,

MJ

A tote with a touch of neon/chevron + DIY

I go through phases with patterns. When my eye is attracted to one, it subconsciously finds its way into a lot of my design at home and work.

I've got a bad case of chevron brain lately. The energy of the geometry and boldness of line makes me want to run - jumping - into summer.

Here's a DIY on how to make your own chevron goodness.

You'll need a canvas tote, masking/blue tape, fabric paint, paintbrush, iron, and your design on iron-on paper*. Iron-ons are so fun, and you can transfer any image/text onto fabric with them. The style of paper I used required me to reverse the image before printing. Just follow the instructions on whatever style paper you use (some need mirror image, some do not).

Make your chevron with masking tape (remember that the paint will go in the space not covered with tape). I learned the hard way that I need to cut clean edges for each piece to keep the paint lines crisp.

Iron on your design, using your hottest, no-steam setting.

**As a first-time fancy crafter (I am usually such a mess), it took me a few tries to get photos that made sense. And I, of course, ironed the letters on the wrong side, making the entire graphic melt onto my iron. Oops. Thank goodness for nearby hotpads to clean the surface pronto.

It felt so good to see the paper peeling away to reveal JOY underneath.

Using the foam brush, I painted on the lime green being careful along the tape edges. Oh, the satisfaction of removing the masking tape and seeing the grand reveal of a crisp, clean line.

And, that's it.

I use totes for everything...grocery store, library, farmer's market, storage, soccer gear, swimming equipment...you name it. And with this crafty addition you can brand away.

Happy creating, friends.

XOXO, MJ