Posts tagged DIY
Yarn Pumpkin Wreath
Add a touch of fall color to your front porch with this pumpkin wreath!

Add a touch of fall color to your front porch with this pumpkin wreath!

Pumpkins are the iconic image of Halloween for me, and I can't get enough of them right now! We made some jack o'lanterns from foam balls and orange yarn last week, and, as projects some time go, we got hooked in the process. The half sphere makes an easy, mountable pumpkin for any craft. These pumpkin magnets make me smile every time I pass by them.

Have you ever kept going with a process even after a project is complete because the process itself brings joy? My friend, Emily Jeffords, talks about the enjoyment of the process in her work as a painter and entrepreneur, and it resonates with me. On a more basic level, in this process of crafting, I found the rhythm of slicing the foam balls, the meditative nature of wrapping the yarn, and the assembling of mounds of bright-colored pumpkins totally satisfying.

DIY Yarn Pumpkin Wreath from Pars Caeli

DIY Yarn Pumpkin Wreath from Pars Caeli

So, I kept going. And made dozens and dozens of yarn pumpkins. Now we have a vibrant pumpkin wreath to add to our front door. 

DIY Yarn Pumpkin Wreath from Pars Caeli

DIY Yarn Pumpkin Wreath from Pars Caeli

Make one for your home, too! Here's what you need: 

  • Wreath form
  • Foam balls, halved
  • Orange yarn (I used three shades of orange to make the composition more interesting)
  • Glue (craft or hot glue)
  • Scissors
DIY Yarn Pumpkin Wreath from Pars Caeli

DIY Yarn Pumpkin Wreath from Pars Caeli

With the half spheres, wrap yarn around and around like you're creating a ball of yarn. Make sure that you cover all of the white foam as you wrap. Glue the end of the yarn on the back of the pumpkin.

DIY Yarn Pumpkin Wreath from Pars Caeli

DIY Yarn Pumpkin Wreath from Pars Caeli

Once you have a few dozen ready, you can get to wreath making. The amount of pumpkins you need depends on the size of your wreath, as well as the size of the foam balls. I had 3" and 4" sized to help cover a 10" wreath.

TIP: Cover the white surface of the wreath with orange paper so that the gaps between pumpkins aren't so apparent at first glance.

DIY Yarn Pumpkin Wreath from Pars Caeli

DIY Yarn Pumpkin Wreath from Pars Caeli

As you add each pumpkin, you'll see the wreath come to life! My son's favorite color is orange, and he is a big fan of the project. I love the impact that the color statement makes with simple forms. You could add faces to each pumpkin or a select few if you want more of a specifically-Halloween feel.

DIY Yarn Pumpkin Wreath from Pars Caeli

DIY Yarn Pumpkin Wreath from Pars Caeli

As you glue on each pumpkin, be sure to vary the shades of orange so that you end up with a cheerful mixing of the tones. I'm a big fan of how ours pops right off the slate green door! Happy fall!!

DIY Yarn Pumpkin Wreath from Pars Caeli

DIY Yarn Pumpkin Wreath from Pars Caeli

Remember this project I did with tiny balls of yarn? It's a quick alternative to the larger wreath, with the same process!

Happy making!

xoxo, MJ

DIY US Map Puzzle
Make your own game with this free puzzle pattern of the United States! Use foam to create a game you can use and re-use.

Make your own game with this free puzzle pattern of the United States! Use foam to create a game you can use and re-use.

This post is sponsored by Cricut, but the opinions and ideas are all my own. Thank you for supporting the brands who support Pars Caeli!

Some of my best parties have been the ones where I've planned games for every generation to enjoy! And this fourth of July I'm continuing the success with this fun puzzle activity for guests to take on together.

Create your own map of the U.S.! Use Cricut foam and this free pattern.

Create your own map of the U.S.! Use Cricut foam and this free pattern.

We decided to make ours from foam to give it the weight of a real puzzle, and we added in our patriotic colors to add to the fun. 

Supplies:

Upload the US Map puzzle file to the Cricut Design Space as a vector file. This will create multiple pages of boards with states on them. If you'd like to use less foam (or less colors), you can ungroup the image and consolidate your states onto less sheets.

Replace the normal cutting blade with the deep cut blade. This is super simple: open the latch, release the blade cartridge, press down on the top button to release blade, and insert the new blade. Place the foam on the heavy grip matte. When you select your material on your Cricut Explore, be sure to set the dial to custom, and then on the app, select foam. Also, did you know that the Cricut Explore has a new app for your Iphone? Yup, you can design from anywhere.

Once you've cut all of the pieces from the foam, carefully remove the states from each piece. The Cricut Explore can cut even the smallest states so be careful as you remove them from the larger piece to make sure you capture all the details!

Get the whole crowd involved in this fun foam map puzzle that you can create! Bring the family together as you build our nation. Pinning this for 4th of July parties!

Get the whole crowd involved in this fun foam map puzzle that you can create! Bring the family together as you build our nation. Pinning this for 4th of July parties!

Are you ready to win a Cricut prize pack? Head on over to the Facebook page and click on the Summer Love Tab. Here are the details on the giveaway:

Until Friday, July 3, 2015 , submit through the online Facebook form your answer to this question: Where will you create and/or use the Cricut Design Space™ app for iPhone® this summer? Complete entry details will be available by 9:00 AM MDT June 29, 2015, on the Official Cricut Facebook page. Entrants’ answers must be submitted through the form on the Official Cricut Facebook to be considered, and meet criteria listed in Selection of First Prizes section below.

  • One (1) Weekly Winner will receive: One (1) Cricut Explore One™ Machine, a Brights Cricut® Vinyl Sampler Pack, Cricut® Transfer Tape, a Cricut® Tools Weeder, a Cricut® Material Sample Package (contents will vary) and a $100 gift card from Jo-Ann Fabric and Craft Stores. (Approximate Retail Value: $427.96 USD)
  •  Selection of weekly winners:  A panel of judges will select the top three entries per week from among all eligible entries received.  The top three entries will then be sent to a panel of judges who are bloggers (that’s me) to pick one winner per week based.  The entries will be chosen by each panel of judges based on the following judging criteria:
    • Originality of submitted item
    • Creative use of daily themes (as specified above)
    • Educational value
    • Demonstrates new possibilities for use of Cricut® products
    • *If you will submit a supplement photo through Instagram, you must follow @OfficialCricut on Instagram, use tags of @ OfficialCricut and #CricutSummer and provide your Instagram handle in your entry form on the Facebook page so that Sponsor can match the photo to the entry. A photo is not required to enter or win.
DIY Iron-on Pillow

This post is sponsored by AllModern. Thanks for supporting the companies that support Pars Caeli!

Make a pillow even cuter with an iron-on message! This quick, easy process is a fun way to personalize.

Make a pillow even cuter with an iron-on message! This quick, easy process is a fun way to personalize.

Remember the fabulous 5 Ways to DIY? It's back, and even more awesome than ever. We have taken on pillows with some really wonderful results, and we want to inspire you to try them for yourself with a $250 giveaway from AllModern. How awesome is that?!

The team this challenge includes the fabulous ladies behind Delineate Your Dwelling, Sarah Hearts, Oleander and Palm, and A Bubbly Life. We all ordered a solid colored pillow from AllModern. There were so many color options, and this pillow also has a really well made hidden zipper and removable cover.

What would you do with a beautiful, blank pillow canvas?

This pillow design is a handwritten note. Using my Wacom tablet, I designed the words in Illustrator. Once I had the letters looking as I wanted them to, I created a mirror image of the text for the iron-on sheeting.

I used my Cricut Explore to cut the letters out of the sparkly gold iron-on. You can also cut them out by hand, keeping in mind that they should be a mirror image to work correctly for this project.

Arrange the words on the pillow cover (removing the pillow insert) to make sure you have everything where you'd like them. Using the iron-on material, you simply use a hot iron (steam off) right on the letters for 15-20 sections to make sure that the image is secure!

Make a pillow even cuter with an iron-on message! This quick, easy process is a fun way to personalize.

Make a pillow even cuter with an iron-on message! This quick, easy process is a fun way to personalize.

I wanted to add some sweet words to mine! Don't gag from the gushy mushy sentiment, but in our early years of marriage, my husband would often sing the country song Good Morning, Beautiful to me. I know. He is charmingly overdone, as I like to say.

If you're not into sewing, why not try ironing on a fun message? Check out the DIY on Pars Caeli.

If you're not into sewing, why not try ironing on a fun message? Check out the DIY on Pars Caeli.

I love how the sweet message turned out, and our new pillow adds pizzazz to our master bedroom.

Want to give it a try?! Enter our giveaway below. You have a great chance to win $250 to shop at AllModern! All you have to do is tell us in comments what project we should do next for #5WaystoDIY. And follow the Rafflecopter for additional entries (I'd love to see you over on Instagram!!). Contest ends on June 29 and is open to U.S. and Canadian residents.

Get in on the goodness!! And thanks for following along.

xoxo, MJ

DIY Picture Frame Dry Erase Board

Looking for an easy gift to whip up? One of our favorites is the DIY Dry Erase board that can add some personality to your message keeping.

Looking for an easy, quick gift? Turn any large frame into a patterned dry erase board. Simple how-to on Pars Caeli!

Looking for an easy, quick gift? Turn any large frame into a patterned dry erase board. Simple how-to on Pars Caeli!

The color (?) white has grown on me in recent years. But I will admit, I'm a true color lover so the idea of making a white board not so . . . white is right up my alley.

All you need is a larger frame (for a better writing surface), fabric, scissors, and sturdy tape. Pick fabric you love, but remember to keep it light enough that your writing will still show, and subdued enough in pattern that the fabric doesn't distract from the messaging.

All you need: fabric (preferably one lighter in color with subtle patterning), scissors, large wall frame, and tape.

All you need: fabric (preferably one lighter in color with subtle patterning), scissors, large wall frame, and tape.

Simply wrap the frame backing as you would a present, maintaining a tight pull on the fabric as you secure it with tape. The corners are the trickiest so trim as you need to be sure to get a flat finished edge.

My two daughters share a room so we created two of these blue marbled boards to unify their spaces. And I love that the boards are lovely pieces of art when not used for the latest homework tracking or doodling.

Looking for an easy, quick gift? Turn any large frame into a patterned dry erase board. Simple how-to on Pars Caeli!

Looking for an easy, quick gift? Turn any large frame into a patterned dry erase board. Simple how-to on Pars Caeli!

Fabric can be easily removed when you're ready for a new pattern, too! Way easier than repainting a room, wouldn't you say?

Looking for an easy, quick gift? Turn any large frame into a patterned dry erase board. Simple how-to on Pars Caeli!

Looking for an easy, quick gift? Turn any large frame into a patterned dry erase board. Simple how-to on Pars Caeli!

What do you prefer a white board? Or a dry erase board with personality?

xoxo, MJ

Bubble Valentine Printable

Maybe I saw you at the store this weekend. What that you in Target, too? The mad dash for Valentines, after receiving the note from teachers on details for this week's celebrations, was a real deal for many parents. We spent a few more minutes than most, circling the aisles, trying to find something perfect for boys and girls, with a definite fun factor.

Easy and cute way to personalize bubbles for classroom Valentines! Print now and assemble in five minutes.

Easy and cute way to personalize bubbles for classroom Valentines! Print now and assemble in five minutes.

We settled upon these cute bubble blowers in assorted colors! My daughter and I both loved the design and colors, but we needed to create a personal element.

Easy and cute way to personalize bubbles for classroom Valentines! Print now and assemble in five minutes.

Easy and cute way to personalize bubbles for classroom Valentines! Print now and assemble in five minutes.

She and I made this printable together. She's a big fan of the smiling hearts, drawn in all the colors of the bubble wands, and I like that the card expresses friendship and good wishes without going over the top into mushy, gushy love messages for 7- and 8-year olds.

Easy and cute way to personalize bubbles for classroom Valentines! Print now and assemble in five minutes.

Easy and cute way to personalize bubbles for classroom Valentines! Print now and assemble in five minutes.

With a bit of Valentine washi tape, we attached the strip of paper to the bubble vile. From there, we wrapped the message around until we came to end of the message. She secured the rolled message with a Valentine heart sticker for an extra sweet ending.

Easy and cute way to personalize bubbles for classroom Valentines! Print now and assemble in five minutes.

Easy and cute way to personalize bubbles for classroom Valentines! Print now and assemble in five minutes.

Click here to print a full page of Valentines! Enjoy a little more happy togetherness tonight, now that your stack of Valentines are ready to go!

Happy crafting!

xoxo, MJ

The crafted life: 12 Bloggers

We are making things happen today! The final four of the 12 Bloggers of Christmas (an annual tradition on Pars Caeli) didn't make it into the roll. I've saved these last ladies as ones to watch for 2015, and I'm highlighting some of their goals and new adventures for the new year. If you're not already following them, check out their sites for beautiful and inspirational posts.

PC_2015_12bloggers_rachelsmith.jpg

I'm super excited to have Rachel of The Crafted Life to start it off! I will meet her in just a few days (for reals) at Alt, and I'm so lucky that she'll be an Alt Rep with me. Rachel has great projects and roundups on her site that inspire you to get a move on and make your space more fabulous.

PC_2015_12bloggers_thecraftedlife_1.jpg
PC_2015_12bloggers_Lulu_4.jpg

For the upcoming year, I'd really like to expand my store. Right now, I sell goods on Etsy, but would love to take it a step further and host it myself in connection with my blog. Stay tuned for more!

I loved Rachel's post on her goals for this year! It's a great combo of business and personal, and I'm excited to see how the year unfolds for her. I foresee big, big goodness in her future. Also, make sure you stop over to download her awesome (free!) girlboss printables. Say what? Yes. Go check them out.

PC_2015_12bloggers_Q2.jpg

Gold-foiled Votives

This was one of those projects that I didn't really think too much about before doing, but that still came out nice (and you have to love that!). I still have them in my home and use them for votives in the fall and winter and flower vases for spring and summer.  

PC_2015_12bloggers_Q3jpg

Would love to send extra love to Carrie of Dream Green DIY. Her photography is always on point and no matter the subject, her work is consistently beautiful. I seriously can't get enough of her blog!

I ordered these fabulous photo holders from Rachel's shop, and I love how they add a dash of modern to any shelf.Keep your eye on her friends!

xoxo, MJ

This Heart of Mine: 12 Bloggers of Christmas

It is now an annual tradition on Pars Caeli to celebrate twelve incredible bloggers and show off just some of their creations. Unflappable in their tenacity, determination, and imagination, these artists return again and again with posts that amaze all around. Sit back and enjoy as we talk about Christmas traditions and projects and send out love to another creative!

Today I'm delighted to shine a light over to Amy of This Heart of Mine. Amy has top notch photography to highlight the most delightful recipes and crafts. She's behind so many of the amazing DIYs you've seen on Design Mom, and I want her to shout from the rooftops all the great projects she makes because... she's just that good.

PC_2015_12bloggers_AMy.jpg
PC_2015_12bloggers_Q1.jpg

I love to sit in the dark with just the tree illuminated, listening to my favorite Christmas songs (quietly) and drinking something warm. It's so peaceful. Also, I love to bake and give the baked goodies to friends.

PC_2015_12bloggers_Q2.jpg

I liked this car tree ornament because I waited almost a whole year to post it. It was right after Christmas the year before when I noticed the perfect car in my son's collection and snagged it for use the following Christmas. I love it because it's so old-school, feel-good-Christmas looking.

PC_2015_12bloggers_Q3jpg

To MJ. MJ is so kind and thoughtful and excited about whatever the project. She works hard and manages to be super supportive of others. Working with her is pleasure and a treat. Plus, her Illustrator skills are enviable. So thankful for her and her friendship.

Awh. Thanks, Amy. I promise I didn't pay her to say that one. Amy is making ornaments and bread and all kinds of amazing this holiday season. Pop on over to see all that This Heart of Mine creates.

xoxo, MJ

P.S. Tomorrow's special guest makes the season, and every day, a tasty treat!

The Sweet Escape for 12 Bloggers of Christmas

It's the most wonderful time of the year! During what is now an annual tradition on Pars Caeli, I'll be celebrating twelve incredible bloggers and sharing some of their beautiful projects. I know well how much dedication and old-fashioned hard work goes into the creation, the photography, and the promotion for it all to sync into a fabulous post. These creators come back, week after week, with high quality, fresh material that is too good not to be celebrated. I know you'll enjoy their stories and their favorite Christmas traditions, And - this year - we're spreading the love around in big heaps by throwing out some love to more of our favorite makers and writers! Keep coming back every day to see if (you or) your favorites are mentioned!

First up, even better than a partridge in a pear tree, Melissa of The Sweet Escape! I've seen her work all over the web, and this year I had the pleasure of teaming up with her. I'm delighted to share her creativity with you!

PC_2015_12bloggers_Melissa.jpg
PC_2015_12bloggers_Q1.jpg

If you asked me 20 years ago, it would've been a very different answer but these days I really look forward to the traditional meatless feast that my aunt cooks up on Christmas eve. My family is Italian and it includes homemade cannelloni, seafood pasta and lots of other delicious dishes. I don't eat all day in anticipation and it's great to spend time with my growing extended family that I don't get to see that often.

PC_2015_12bloggers_Q2.jpg

Well, it would be impossible for me not to mention my latest huge holiday project, Merry magazine. I decided to bring together 15 of my blogger pals and pool a whole magazine worth of Christmas posts together in an online magazine.

PC_2015_12bloggers_Melissa_1.jpg

It includes home decor, DIY projects, entertaining, gifting & style. My favourite project that I contributed was this marshmallow wreath that I did last year because it was such a simple idea but turned out so well, and it was featured on designer Sarah Richardson's website which was such a big deal for me as a new blogger.

PC_2015_12bloggers_Q3jpg

If you're looking for a new blogger to follow, head over to Hello Lidy. Lidy and her husband will constantly inspire you by their clean, fresh and Scandinavian inspired home & decor DIY projects. They also have an inspiring adoption story to share. I'm pretty sure they've found a way to create more hours in the day with 3 children, a beautiful house and a constant flow of original creative content.

Merry Christmas to Lidy and to Melissa! So happy to have you here.

Come back tomorrow to see what maker always puts a full heart into all she does!

xoxo, MJ

PC_2015_12bloggers_tree.jpg
Create Your Own Christmas Tree with Painted Glass Balls
PC_glassornaments.jpg

It is the season. Frenzy has set in around here. Not full-on panic, but excitement, merriment, forgetfulness, and binge eating at weird hours of the day. Deep breaths. I am excited to say that we have whipped up a handmade tree that I am all sorts of in love with.

It's like Pars Caeli reincarnated in tree form. My oldest daughter and I went shopping for the supplies together and selected the palette which ended up looking a whole lot like this one here. It's the first time I've gone non-traditional, and the colors pop with the festivity of the season.

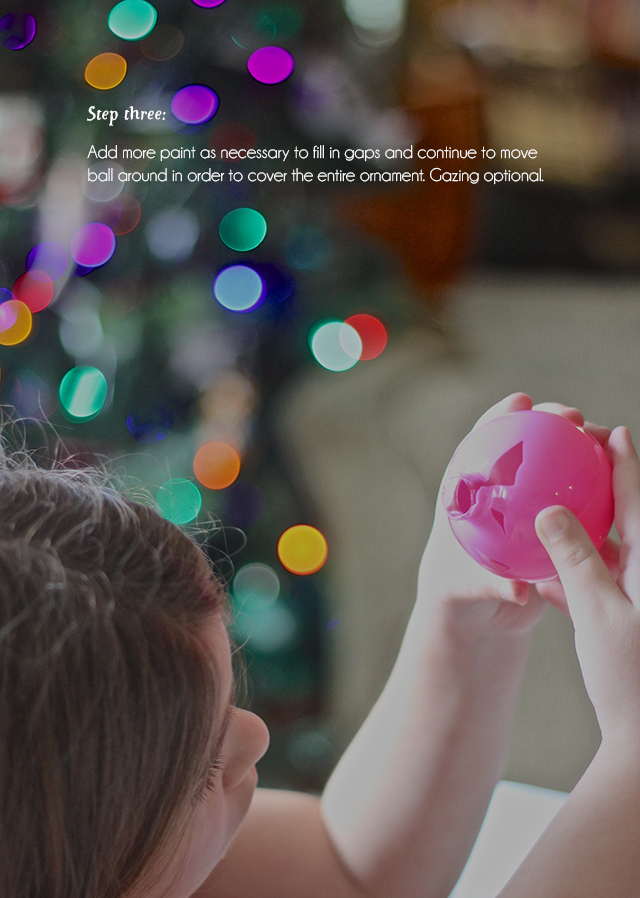
If you're looking to create a themed tree or something unique, try this easy method that is friendly to ages 3-133 as long as everyone is careful with the glass ornaments!

PC_glassornaments_1.jpg
PC_glassornaments_2.jpg
PC_glassornaments_3.jpg
PC_glassornaments_4.jpg
PC_glassornaments_5.jpg

These are magical in their final form, even better than I had hoped. And I can't wait to show them all to you on the tree, but, first, I have a few more additions to show you to our that include a few super easy projects!

Check in tomorrow to see the best ever pink and orange ornaments for our fanciful tree.

Also, starting later this week, a return of one of my favorite times of year! The 12 Bloggers of Christmas will be sharing with you their favorite holiday traditions and projects/recipes that have kept them excited about the holidays in the midst of frenzy! I'm delighted to have their personalities here to share with you.

xoxo, MJ

Halloween Hanging Ghosts
PC_hangingghosts.jpg

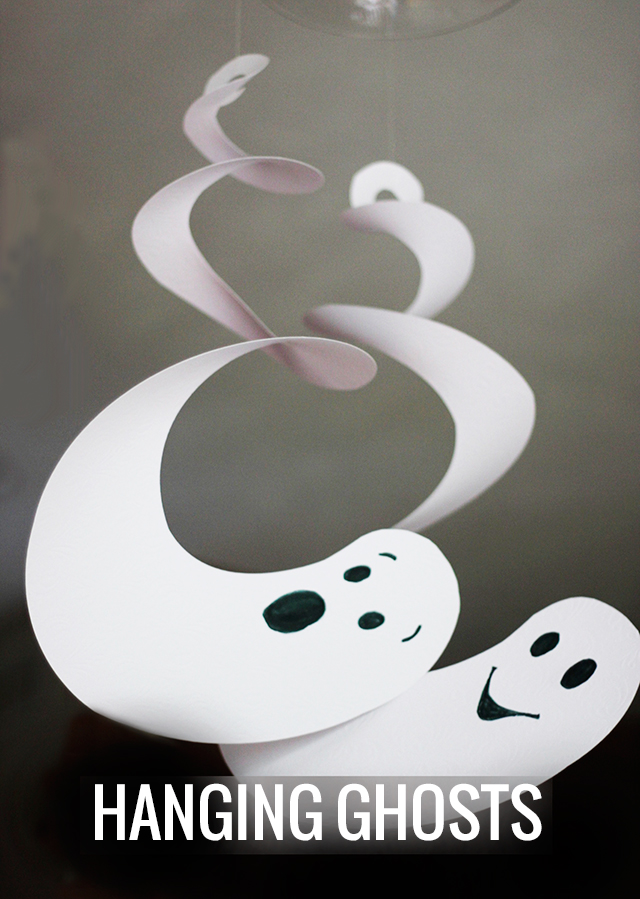
Ready for a really easy Halloween decor with high impact? Let's make some Halloween Hanging Ghosts. These are an awesome addition to your party and interior decorations for the season.

Inspired by these twirling spiral ghosts, I created these ghoulish creatures that are now hanging from chandeliers and pendants all over our house.

I love how simple they are to create from cardstock, scrapbook paper, or posterboard. You need something that will give you extra weight so that gravity can do its thing.

PC_hangingghosts_1.jpg

You can cut the design with scissors or upload this ghost file on to your Cricut Explore. I mass produced these ghosts so that we could have some hanging from the chandelier in the dining room and the kitchen pendants. These were created from 12" x 12" white scrapbook paper.

This swirl can be transformed into candy corn stripes or the twirly stem of a pumpkin, too! The best part about hanging ghosts is that they catch the wind easily and spin in the air. I attached ours to the ceiling lights with invisible beading string for a fun "magic" appearance.

Have you decked out your home for Halloween yet?

XOXO, MJ

3 Steps to Create an Art Caddy for Kids
PC_artcaddy_2.jpg
PC_artcaddy.jpg

Sometimes you run across a loved object and know that it's just perfect. But, you can't quite put your finger on what it is or what it will be perfect for...

This is.... a chicken feeder, used on farms, and it's seen a lot of good use and has an interesting patina to it.

So, I picked it up at a bargain price.

And we have repurposed it for the perfect art caddy for the kids! It fits in so well with my goal to live in every room.

In every room of our house (save the bathrooms), we have art supplies. We also, of course, have an art room where all major art projects happen. Sometimes my adventurous children want all of the supplies wherever they may be, inside or out.

We've always enjoyed the joy of spontaneous and mobile creation. I have many happy memories of bobbling toddlers and determined preschoolers walking around with buckets of crayons, as my daughters or my son would decide to plop anywhere and draw.

PC_artcaddy_1.jpg

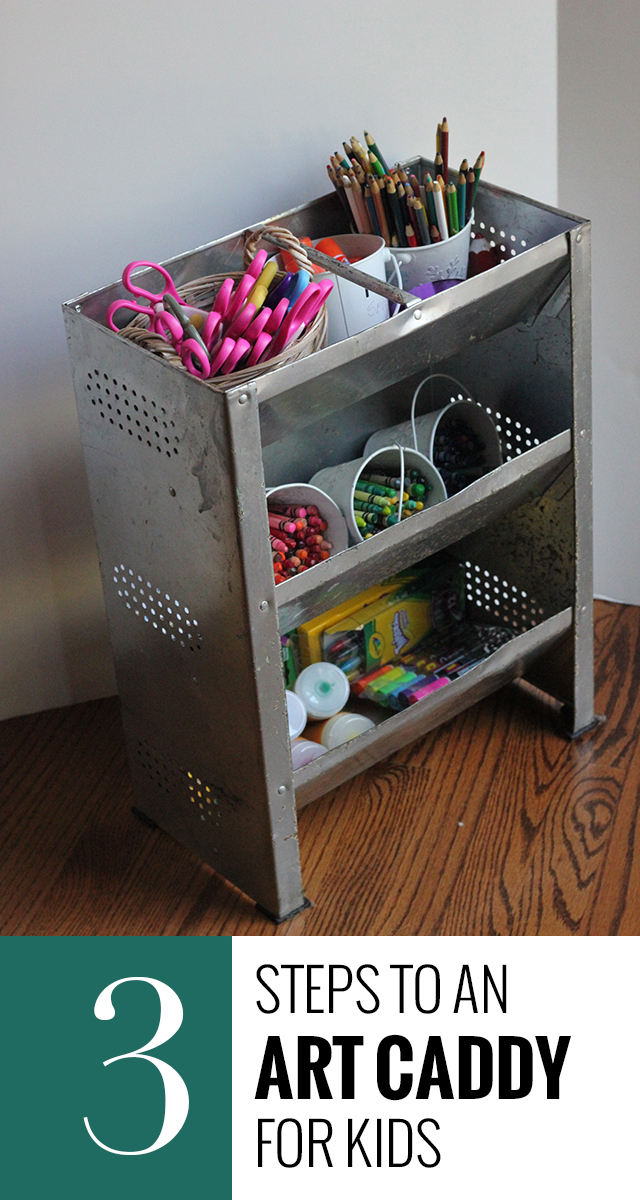
Now we have a chicken feeder converted to art caddy extraordinaire. Here's what every great caddy needs:

1. Portability:

Whether it's a bucket or a shelved unit like ours, a great caddy needs to be easily handled in small hands. Sturdy buckets with strong handles work well indoors and out. Ours is a big piece so the handle bar at the top is helpful, as well as felt pads under the caddy to allow even small people to push this one easily from room to room on our floors.

I love seeing one of my kids creating, with the caddy pulled up right alongside.

PC_artcaddy_3.jpg

2.Select the best of the best supplies:

When children are young artists, they may focus on one medium more than another. Until preschool, my kids were all about crayons. Now everyone has their sophisticated choices for what they want to use.

Our caddy currently holds:

  • Scissors with many different edges
  • Hole punches of various shapes
  • Glue sticks and white glue
  • Tape
  • A ruler
  • A bucket of colored pencils
  • A pencil sharpener
  • A stack of small notepads (always ready to be doodled upon)
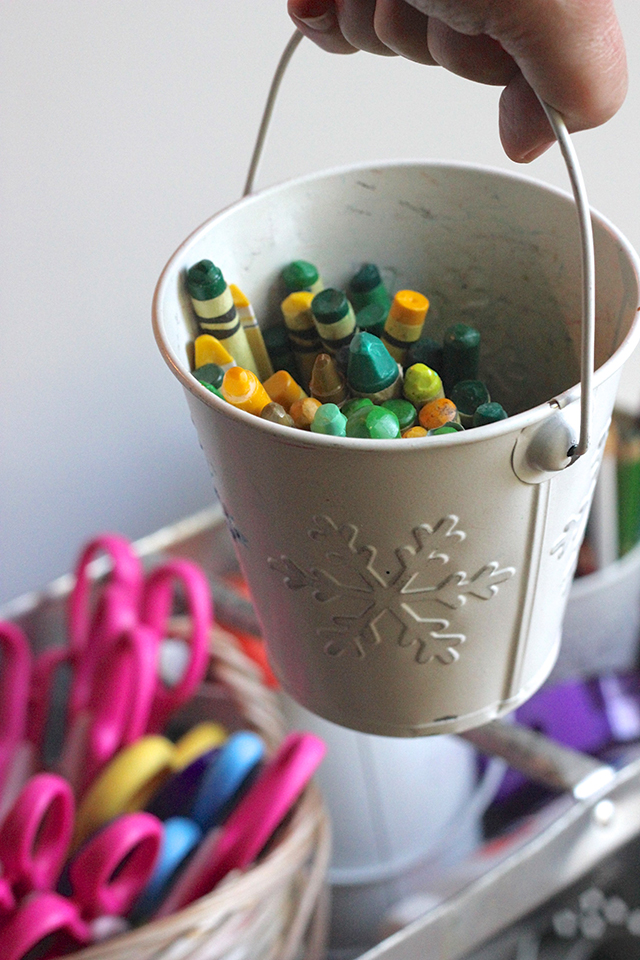
  • Three crayon buckets (now that everyone is older, we sort them by primary colors for learning and ease of use)
  • A pack of markers
  • 3 small packs of crayons (great to grab if you're headed to the car)
  • Finger paints
  • Stapler and staple remover

We rotate the caddy supplies in and out as favorites come and go.  What's most used in your house? Make sure your caddy is well stocked for a great invitation to create.

PC_artcaddy_4.jpg

3. Make storage within the storage.

The dollar section at Target or any dollar store have great options for small storage. Keep old Easter baskets, sturdy gift boxes, and even plastic containers to help your caddy stay clear of clutter.

It also allows for easy sharing. One child can grab the bucket of gluesticks and basket of scissors to create out of construction paper, while another takes the box of markers and a hole punch for a birthday card.

___________________________________________________________________

Such a beautiful and clutter-free caddy might just inspire the grown-ups in the house to create and to bring that sense of spontaneous art making anywhere you go!

xoxo, MJ

For the Love of Pumpkin
PC_9pumpkin.jpg

I haven't purchased any yet this season, but it's almost time for pumpkins. The crafting, the eating, the cooking, and the carving - so many wonderful projects coming all from one little gourd! I have been falling in love with pumpkin over and over again through a group board that I collaborate on called Pumpkin Recipes, Crafts, and More. Come on over and check it out...

I'm sharing 9 super ideas with pumpkin that will get you into the spirit of fall and delight your taste buds, too...

Mini Pumpkins:

I created these for Gina's Month of Pumpkin. She's a master with pumpkin recipes, and she let me join in the fun with this super easy pumpkin craft. These balls of yarn are topped with small pieces of pipe cleaners and stacked inside a shadow box. They make great additions to a tablescape and a delightful garland, too.

PC_9pumpkins_1.jpg

How about two great uses for pumpkins?

Pumpkin Pinata:

A balloon, yes! And a pinata! Perfect. What an awesome way to begin or end a night of trick or treating. You get all the info on how to fill the jack o'lantern over at The Gunny Sack.

Chalkboard Pumpkin Planters:

Also, I'm not over chalkboard (I hope you aren't either), and I love this pumpkin turned potted vase for colorful mums. This is a super easy and approachable (quick) project that can make any front door warm and welcoming for fall. Chelsea shows off how-to over at Making Home Base!

Memorable pumpkin treats...

PC_9pumpkins_2.jpg

Easy Pumpkin Krispie Treats:

Rice Krispie treats are always a family favorite around here, and these are too cute as pumpkins. The simplicity is right on for the kids to join in on the creation stage, too. Jen has her creations over on Yummy Healthy Easy. Can you guess what she used for the stem? 

Pumpkin Pie French Toast:

Pumpkin pie French toast? A total yes! This recipe is from Erin Chase over at $5 Dinners which means it's also incredibly affordable. We make pumpkin swirl French toast every Halloween, and I love this variation on it. But why save it just for Halloween?

And two classic desserts...

PC_9pumpkins_3.jpg

Pumpkin Cookies:

When I think of baking with pumpkin I think of these two recipes. Crissy of Parenting Pretty has gorgeous and uncomplicated Melt in Your Mouth Pumpkin Cookies. The texture and moisture of pumpkin is just perfect for these delicious desserts.

Pumpkin Donuts:

Everything tastes better as a donut. Well, almost everything. But for sure on pumpkin. Rolled in sugar... The Blue Eyed Bakers are genius. Click over and make Petite Pumpkin Spice Donuts.

An unexpected must try...

PC_9pumpkin_4.jpg

Pumpkin Pie Spice White Chocolate Caramel Popcorn:

Though I've never eaten this particular flavor combination, I think we'd be fast friends. I'm excited to give it a try. Cooking Classy serves this popcorn in a clever way, too. Go check it out!

And finally for the kids...

Hammer the Pumpkin:

Something to occupy and entertain the young hands in your house is this simple pumpkin activity. Once the gourd has reached a certain ripeness, it's perfect for hammering. Grab a golf tee and a plastic toy hammer.

Okay, it's your turn! What's your favorite way to use pumpkin?

xoxo, MJ 

Golden Pineapple Scarf for Cricut Design Space Star™

Disclosure: I am a member of the Cricut Blogger Network. I may receive prizes in exchange for my winning projects. Even though I am not being directly compensated for these posts, I am under consideration for a prize with Cricut Design Space Star. All opinions are 100% my own.

PC_pineapplescarf.jpg

Sometimes I like to push the limits. When I received my Cricut Explore machine for the Cricut Design Space Star, I wanted to see just what this wonder could do. What materials can I use? How big can I go? How intricate?

How small?

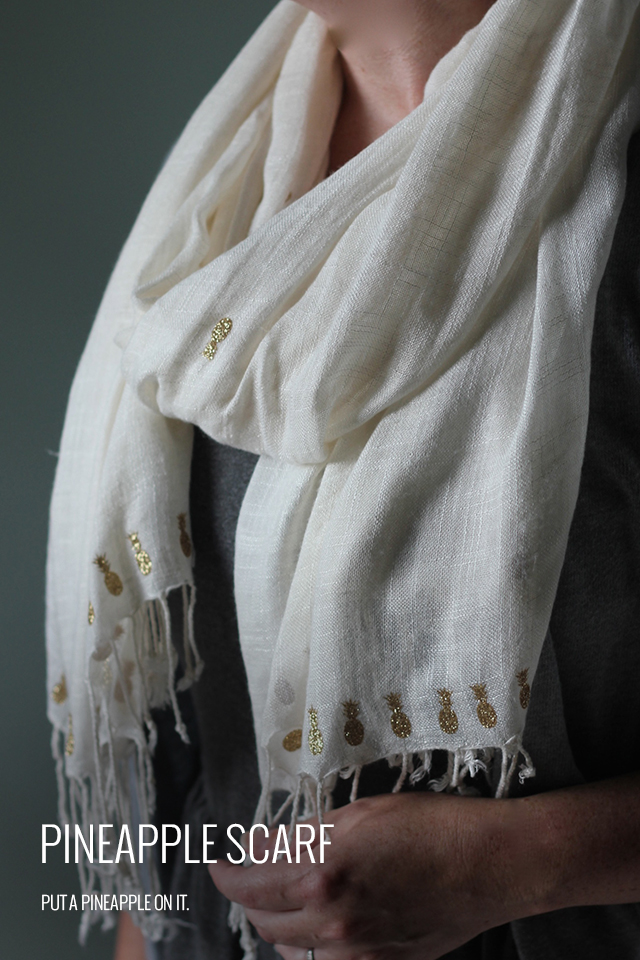
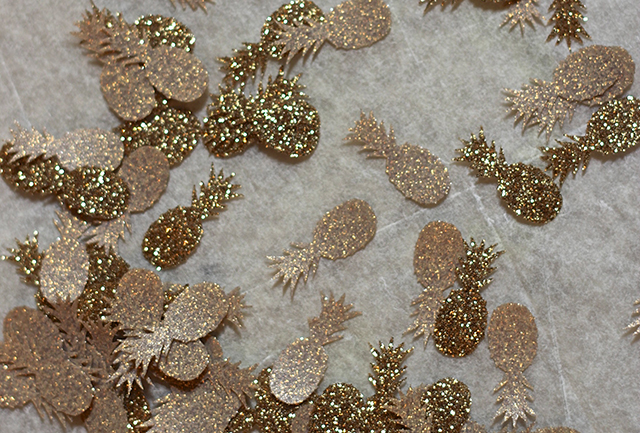
I designed tiny pineapples - like half an inch small - and watched as the Explore trimmed out every little fiber and leaf at the top of the fruit. Pretty amazing. Along with my talented and Lucky #13 team, I wanted to create something with gold. Enter the glitzy glamour of Cricut gold glitter iron on material.

Pineapples are on trend, and when you keep them ultra small, they can accent any outfit really well.

To make yours, gather:

  1. Neutral scarf (I loved the juxtaposition of the soft gauze with the bold glitter)
  2. Gold iron on material
  3. Cricut Explore
  4. Iron/ironing board
  5. Parchment paper 
PC_pineapplescarf_1.jpg

Step One: Design your tiny pineapples. I made an .svg file in Illustrator and uploaded them to the Cricut Design space. The program makes the best use of space for you! Switch the materials setting to Iron On, feed in your mat with the material in place, and watch the magic happen.

The precision of this task is pretty amazing.

PC_pineapplescarf_cricut.jpg

Step Two: Remove the iron on material from the mat. This process is known as weeding. You may want to use a Cricut tool to help you carefully remove each pineapple. I accomplished this task while watching some TV with my kids. It's really fun to see the shape, with such detail appear from the page.

PC_pineapplescarf_2.jpg

Step Three: Place your pineapples on your scarf in the desired pattern with the glitter side up. I did a line of fruit at each end and then a wide pattern for the rest of the scarf.

Step Four: With your iron on the non-steam setting, place a piece of parchment paper over 3-5 pineapples at a time. The iron on paper in the Cricut line adheres really quickly so you only need to move your iron back and forth over the parchment for 8-10 seconds.

Step Five: Remove the parchment and continue ironing the remaining pineapples.

PC_pineapplescarf_3.jpg

I love the flash and subtlety of the finished scarf. And I'm already planning my fall wardrobe around it.

Why not put a pineapple on it? xoxo, MJ

My team, Lucky #13, has put together a wide variety of incredible projects. And you need to check out every single one! Find the links below. Vote for and pin your favorite projects!

You can also search for our projects on this and upcoming challenges with #cricutdesignteam13

Cricutgearchallenge_Lucky13_fashion.jpg

Lucky 13 team in the Cricut Design Space Star™ team:

  1. Booties, Earrings, and Hearts from Andrea of Andrea’s Notebook
  2. Children's shirt and gold sandals from Celina of Petit A Petit and Family
  3. Cut out leather purse with cross lining from Erin & Tricia of Suburban Bitches
  4. Leather cuff from Monica of East Coast Creative
  5. Easy DIY hashtag t-shirts from Sarah and Jessica of Pretty Providence
  6. DIY umbrella and Pineapple Scarf from MJ of Pars Caeli
  7. Leopard leggings and tank from Sadie Jane of Simply Sadie Jane
  8. Laptop decals from Crystal of Sew Creative Blog
Lucky 13 team picture.jpg
DIY Umbrella on the Cricut Design Space Star™

Disclosure: I am a member of the Cricut Blogger Network. I may receive prizes in exchange for my winning projects. Even though I am not being directly compensated for these posts, I am under consideration for a prize with Cricut Design Space Star. All opinions are 100% my own.

PC_DIYumbrella_pin.jpg

I've wanted to turn my Pars Caeli cloud into an umbrella design for the longest time, with no tools to make it happen. And then this wild and wonderful Cricut Design Space Star contest comes blowing into my life, and I know exactly what I want my first project to be!

This cloudy umbrella is basically a no-mistake project. Vinyl shapes can be moved and removed without leaving marks or residue. The shapes cling easily to the coated material, and the transparency of the umbrella allows you to see what you're doing the whole way through. I had my first bubble umbrella when I was six, and I've loved them ever since. These clear canvases also pair beautifully with the opaque vinyl.

So now that we've all left our intimidation at the door, here's what you need to make your own:

  • Clear umbrella (this one is from Totes in a classic design)
  • White vinyl sheets
  • Cricut Explore
  • Gold paper or vinyl
  • Cloud and lining template

Step One: Design your pattern. Of course, I wanted clouds. Using Illustrator I created an .svg file. Based on the size of my umbrella, I made the clouds about three inches wide. I was happily surprised with how many clouds I could fit on one sheet. Using the vinyl setting, feed your mat with vinyl into the machine and carefully remove the cut clouds from your mat when complete.

PC_diyumbrella_cricut.jpg

I created another .svg file with the thin lining that rests on the bottom of the clouds. I changed the setting to paper, and fed in gold hammered scrapbook paper. These were fragile so removing them from the mats was a careful process.

Step Two: Next I wanted a GOLD lining for the clouds. I'm joining with a merry group of ten creatives for this Cricut Design Space Star challenge, and we had decided early on that we wanted our theme to be Gold is the New Black. And, do you know what's even better than finding the silver lining on a cloud? Yes, that's right, finding a gold lining.

PC_DIYumbrella_close.jpg

Step Three: Press the gold paper lining to the bottom of the white vinyl cloud. 

Step Four: Press the clouds to the interior of the umbrella. This will protect your design from the wear of the elements. I kept the clouds to the lower portion of the umbrella, with three on each panel, so that I could still see through the bubble. Decide on how much vinyl coverage you want on yours.

PC_DIYumbrella_1.jpg

We've had a rainy end to the summer, and this umbrella, with its gold lining reminders is the perfect way to stay happy and dry in the downpours.

If you love this idea, head on over to the Cricut Pinterest board, and repin! I am so appreciative of your support and kindness!

PC_designspacestarlogo.jpg

My team, Lucky #13, has put together a wide variety of incredible projects. And you need to check out every single one! Find the links below. Vote for and pin your favorite projects!

You can also search for our projects on this and upcoming challenges with #cricutdesignteam13

Cricutgearchallenge_Lucky13_fashion.jpg

Lucky 13 team in the Cricut Design Space Star™ team:

  1. Booties, Earrings, and Hearts from Andrea of Andrea’s Notebook
  2. Children's shirt and gold sandals from Celina of Petit A Petit and Family
  3. Cut out leather purse with cross lining from Erin & Tricia of Suburban Bitches
  4. Leather cuff from Monica of East Coast Creative
  5. Easy DIY hashtag t-shirts from Sarah and Jessica of Pretty Providence
  6. DIY umbrella and Pineapple Scarf from MJ of Pars Caeli
  7. Leopard leggings and tank from Sadie Jane of Simply Sadie Jane
  8. Laptop decals from Crystal of Sew Creative Blog
Lucky 13 team picture.jpg
The Curators of the best DIY round ups
PC_curatorsofDIY.jpg

Finding fabulous projects is not as easy as it may seem. These three curators are the ones to follow for the best DIY round ups on the worldwide web.

Before I began blogging, I had little appreciation for what we lovingly term a "round up post." These are typically a list or a collage of ideas or images found around the web based around a particular theme or topic. Searching out the best of the best is a tedious process; it's more than a Google search or Pinterest entry. It's a keen eye, a great sense of design, and a knowledge of what's possible and practical.

Rachel, Marlene, and Sarah post the best DIY round ups to be found.

You've likely seen Rachel's round ups on Pinterest. Her blog The Crafted Life is jam-packed with her process, inspiration, and business-sharing advice. Her themes are unique and her picks are always beautiful. Rachel mixes the complex with the super simple to create a lovely blend for every level of creator. Even when I'm not ready to make one of the recommended pieces, I find myself returning to her pages just to see what's inspiring her and what's trending for DIY. She always has the latest.

Marlene of Jade and Fern has a modern and clean feel to her round ups. I am always surprised by her finds and wishing to find time in my schedule to create such beauty. Though a handful of her tutorial links are outside of my comfort zone, none of them feel unapproachable or, even worse, undesirable. She has her eye set on her brand and every DIY that she selects fits well with her own posts that are in their own right gorgeous as well.

Sarah of Sarah Hearts wins for color and pattern. She finds DIYs with texture, design, and charm. Her projects are just the kinds you want to create for your best friend and yourself. The energy with which she creates her own posts comes through in her picks. My favorite part? She never picks a dud. Every project is fresh, unique and approachable for a variety of skill levels.

In today's busy times, finding great projects can be a challenge, or at least a time challenge. Follow these three curators for only the best of the best. You'll appreciate their careful editing and helpful suggestions, I promise.

Who would you add? Who always finds just the right project?

xoxo, MJ

Stamped dish towels

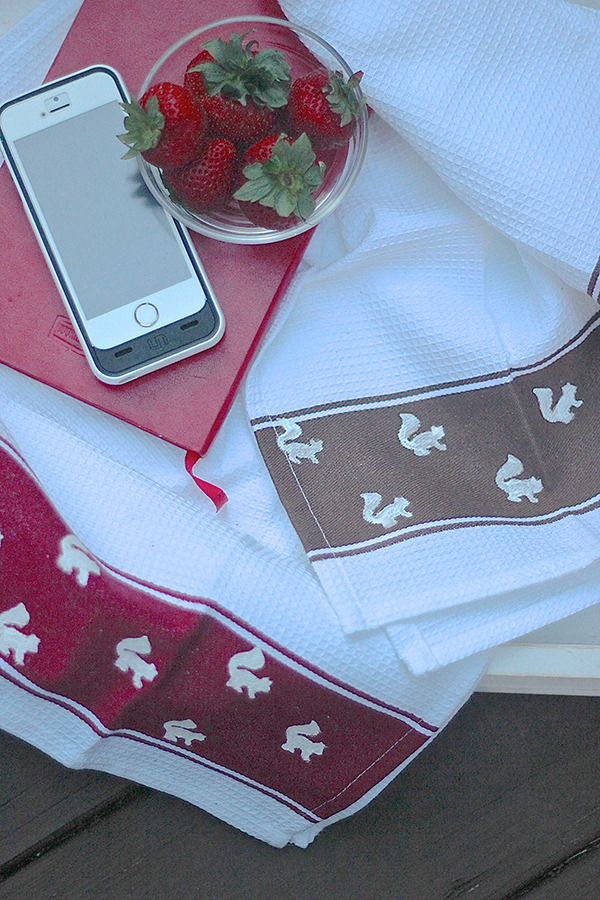
Move over hedgehogs, bunnies, and owls - squirrels are the new hipster animals. I'm sharing a fun project, stamped kitchen towels, using the charming icon of Squirrelly Minds. I think it's the perfect blend of practicality and whimsy.

140710-pars-caeli-stamped-squirrel-towels_2.jpg

Have you made your own stamps? I've only recently gotten into the gig, and I may have already made a dozen or so with my kids. The power of making your own patterns! Admittedly, the carving of the design takes some patience, but the final results are completely worth it.

140710-pars-caeli-stamped-squirrel-towels_3.jpg

Head on over to Squirrelly Minds to see the full project. I think the towels would make a great housewarming present or hostess gift for those early fall dinner parties with friends.

xoxo, MJ

Screen Printed T-shirts: Endless Summer Projects

Screen printing t-shirts are a great way to give your child something really unique that they love. Our next Endless Summer Project comes from Amy over at This Heart of Mine blog. Her kids are adorable and so is this fabulous project.

We love to tie dye, and I'm excited to take our creations to a new level with this tutorial. Also, you need to check out all of the cute designs that Amy created for his kids wearables.

Next week Melissa of Lulu the Baker has an awesome project that the whole family will love! Tune in on Wednesday.

Catch up on all of our Endless Summer Projects:

Don't forget to tag your projects #endlesssummerprojects so we can see your creations and join in the fun!

xoxo, MJ

Mid Century Modern Bird Feeders: Endless Summer Projects


This week's Endless Summer Project is a real treat from Melissa of Lulu the Baker. Combine the love of color, architecture, and modernism into one fantastic project for the family to create. Her midcentury modern birdfeeder is simple in design, with full instructions included.

We love watching the birds in our backyard. With the warm temperatures, we've been eating dinner out on the deck and have discovered a momma robin feeding her nest of four babies in one of our plum trees. When I mention to my three that they once resembled those desperately hungry hatchlings, they snicker and giggle. It's awesome to watch another family in its beginning stages.

Hop on over to Lulu the Baker to get all the info you need to make one of these modern birdhouses, and be sure to check out all the other projects we've had so far in the Endless Summer Projects series! Next week's post is a full on circus to delight...

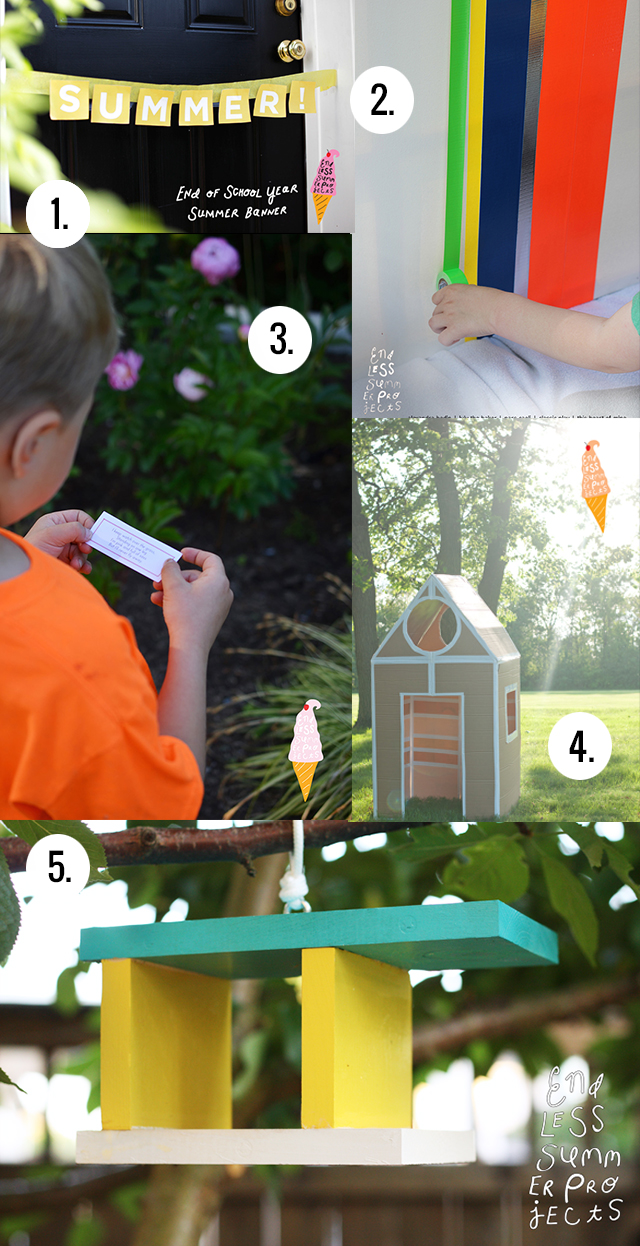
  1. The printable summer banner from Classic Play
  2. A large-scale art project with tape from Pars Caeli
  3. A ready-to-go, free printable scavenger hunt from Alexandra Hedin
  4. A collapsible cardboard playhouse from This Heart of Mine
  5. This mid century modern bird feeder at Lulu the Baker

 Happy summer? Have you started any projects yet?

xoxo, MJ


Make it together Mother's Day
PC_mothersdaymake_1.jpg

May is a busy month with birthdays, year-end celebrations, sports, and Mother's Day! Sometimes special dinners out and shopping trips don't make the final agenda before Mother's Day. And though I sometimes enjoy the quite solitude when everyone leaves our home, I really love experiencing all of us together in this space - making and creating.

So why not craft together as an activity for Mother's Day? Or have your children to create alongside special grandmothers or aunts for a sweet Mother's Day experience?

PC_mothersmake_2.jpg

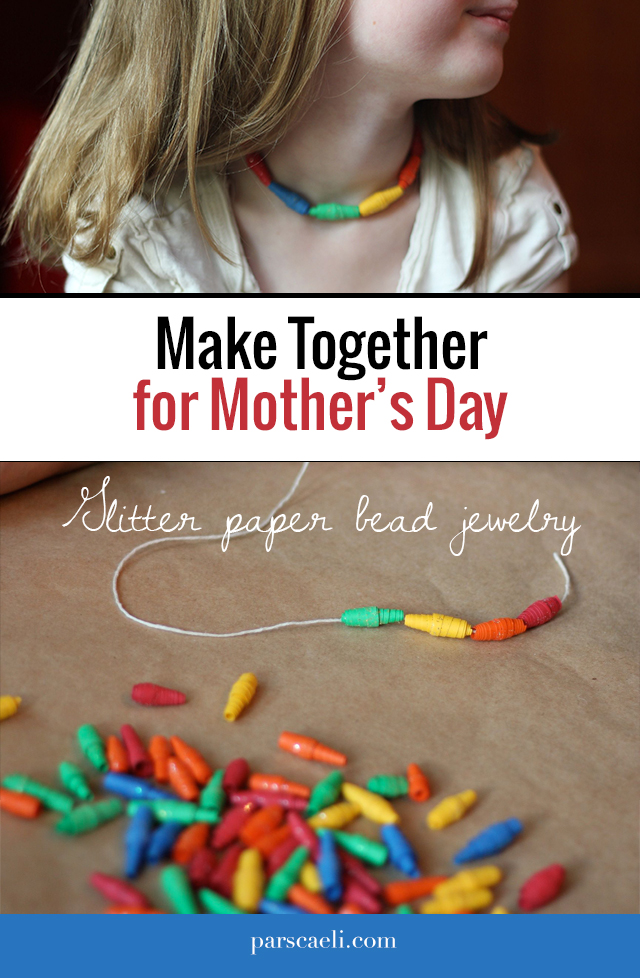
This is an incredibly budget-friendly (slightly time intensive) craft that all three of my children enjoyed. Gather together:

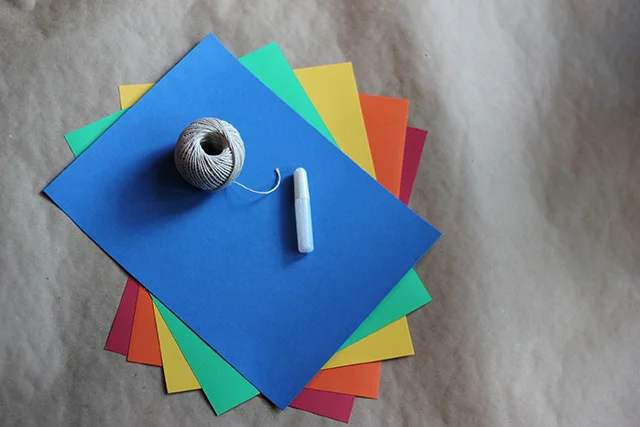
  • Paper (we chose rainbow and only used one piece of each color paper to make all the beads here)
  • Scissors or paper cutter
  • Glitter glue (really, any glue is fine, but glitter makes everything better, right?)
  • Pencil or pen (to wrap the paper)
  • String or twine for necklace/bracelet/anklet creations
PC_mothersmake_3.jpg

First step? Cut isosceles (ish) triangles out of your paper. Ours were about an inch at the thick end. Here's the important next step: begin with the thick end and tightly wind the entire triangle around the pencil. We made different shapes by doing this. Some beads were exactly symmetrical, some looked more like cones or party hats, and others looked like a wobbly top.

PC_mothersmake_4.jpg

As you get close to the end of the wrapped paper, squirt a dollop of glitter glue on the front and back of the end tail and graciously smear it all over the end and the rest of the bead. This will help secure the tight wrap and spread the glitter around the whole bead.

Once the bead is secured, carefully remove it from the skewer and let it dry for a few minutes before crafting further.

PC_mothermakes_5.jpg

String your handmade beads for necklaces and bracelets that are one of a kind. You'll have the finished product made from little hands, and the priceless memory of the entire experience as a special Mother's Day treat.

PC_mothermakes_6.jpg

Happy Mama's Day! And happy crafting!

xoxo, MJ

Flourescent and Gold Leaf Flower Vases
This post is part of a social shopper marketing insight campaign with Pollinate Media Group® and All You Magazine, but all my opinions are my own. #pmedia #lifeforless http://my-disclosur.es/OBsstV.
PC_budvase_4.jpg

Happy Monday, lovelies! What a treat to be greeting you at the very beginning of your week.

Temperatures are warming; we even saw our first bulbs peeking through the mulch this weekend! Spring brings fresh blossoms with their gorgeous color and fragrance. I love to bring in bunches of lilacs and snips of hyacinths and tulips, too. Often, after the larger bouquet has lost its brilliance, when one or two blooms remain fresh, I like to float them in a bowl to savor their beauty a few days longer. And more often, my three children find "daisies" (AKA: dandelions) and peonies they want to bring in to our house to cherish.
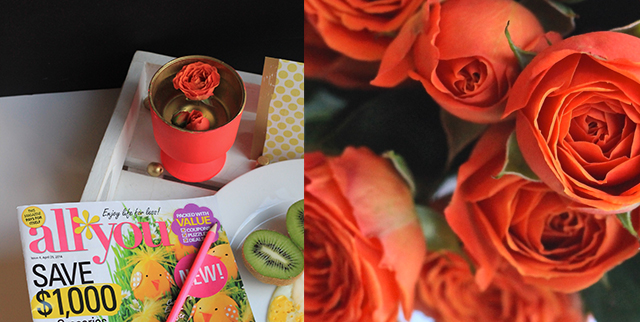
With no specifically charming bowls to hold the buds and flower heads, I went out to search for floating bowls. Nothing I found seemed unique enough to showcase our buds. I did, however, fall for these cute ice cream bowls. The shape was just what I had in mind for a "personalized" size of bowl - perfect for place-setting color, sparkle on a tray, or brilliance on a desktop.

PC_budvase.jpg

To transform the ice cream bowls, I ran over to our local Meijer and grabbed frosted glass spray paint and flourscent spray paint. And I had some gold leaf paint on hand, just a small bottle, from another project. It was more than enough to gild the interior of the bowls. I took this entire project outside and grabbed a box from the recycling to keep me from overspraying.

Follow the direction on your paint can! The frosted glass paint I used required three coats in order for the glass to reach a filmy state, a slight texture in which another paint would be more likely to adhere. Drying time for each layer was only 10-15 minutes so the process went rapidly.

PC_budvase_1.jpg

Once I was happy with the frosted (slightly textured) nature of the glass paint, I added the flourescent! Neon when used sparingly can add a lot of life to a room or table. This pink-orange shade was the perfect burst of tone I wanted to compliment the warm weather. The picture below shows off the look of the new vases after three coats of the flourescent. If you want your vase to have more of a tinted look, paint on only one or two coats. For a glossier, opaque feel, keep adding layers!

PC_budvase_2.jpg

Next up, making it golden. Beware, gilding objects might make you want to treat everything with a fresh wash of gold. It's amazing how simple objects can turn from ordinary to treasure with the addition of gold leaf. My paint was oil-based (to help with the waterproof nature), and I let the two layers dry overnight.

PC_budvase_5.jpg

And voila! $3 ice cream bowls transform into show stopper flourescent and gold flower vases!

PC_budvase_6.jpg

The colors from the new magazine, All You, inspired this palette, and I'm pretty sure that the golden pool of water will make even our common dandelions look pretty spectacular.

PC_budvase_8.jpg

All You is available at many national retailers including Target, Safeway, Kroger, Dollar General, and Meijer. Grab a copy for yourself by using this $1 off coupon while supplies last.

PC_flowervases_pin.jpg

And for this project or so many others you may have on your to do list, I'm giving away $50 to Meijer stores. Enter below for your chance to win!

Here's to a great week, golden and bright!

xoxo, MJ

Entry

-Form