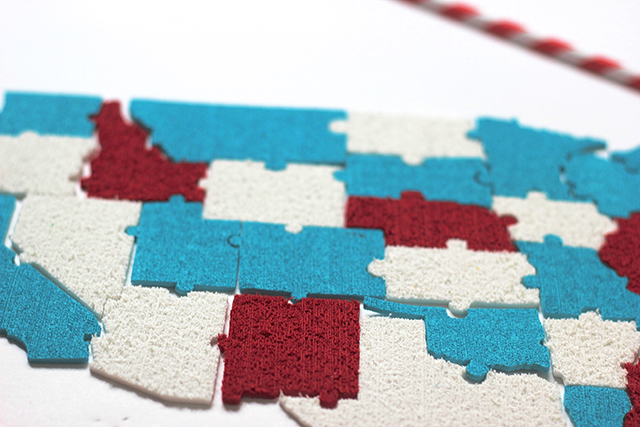
Make your own game with this free puzzle pattern of the United States! Use foam to create a game you can use and re-use.
This post is sponsored by Cricut, but the opinions and ideas are all my own. Thank you for supporting the brands who support Pars Caeli!
Some of my best parties have been the ones where I've planned games for every generation to enjoy! And this fourth of July I'm continuing the success with this fun puzzle activity for guests to take on together.
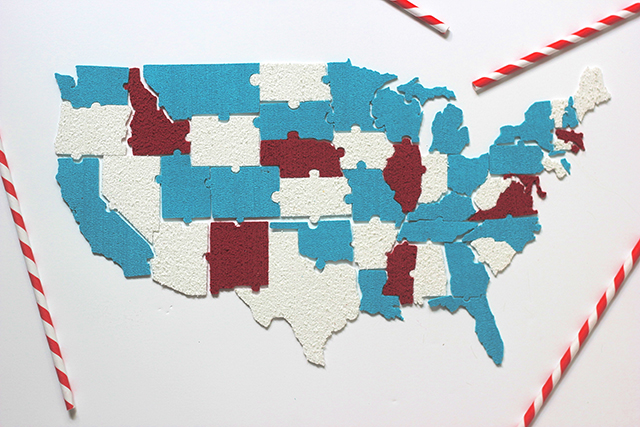
Create your own map of the U.S.! Use Cricut foam and this free pattern.
We decided to make ours from foam to give it the weight of a real puzzle, and we added in our patriotic colors to add to the fun.
Supplies:
- Cricut Explore
- Cricut Design Space
- Cricut craft foam
- Cricut deep cut blade and heavy grip mat
- SVG file of the US Map puzzle - I made a free version that you can download!
- Intrigued guests

Upload the US Map puzzle file to the Cricut Design Space as a vector file. This will create multiple pages of boards with states on them. If you'd like to use less foam (or less colors), you can ungroup the image and consolidate your states onto less sheets.
Replace the normal cutting blade with the deep cut blade. This is super simple: open the latch, release the blade cartridge, press down on the top button to release blade, and insert the new blade. Place the foam on the heavy grip matte. When you select your material on your Cricut Explore, be sure to set the dial to custom, and then on the app, select foam. Also, did you know that the Cricut Explore has a new app for your Iphone? Yup, you can design from anywhere.
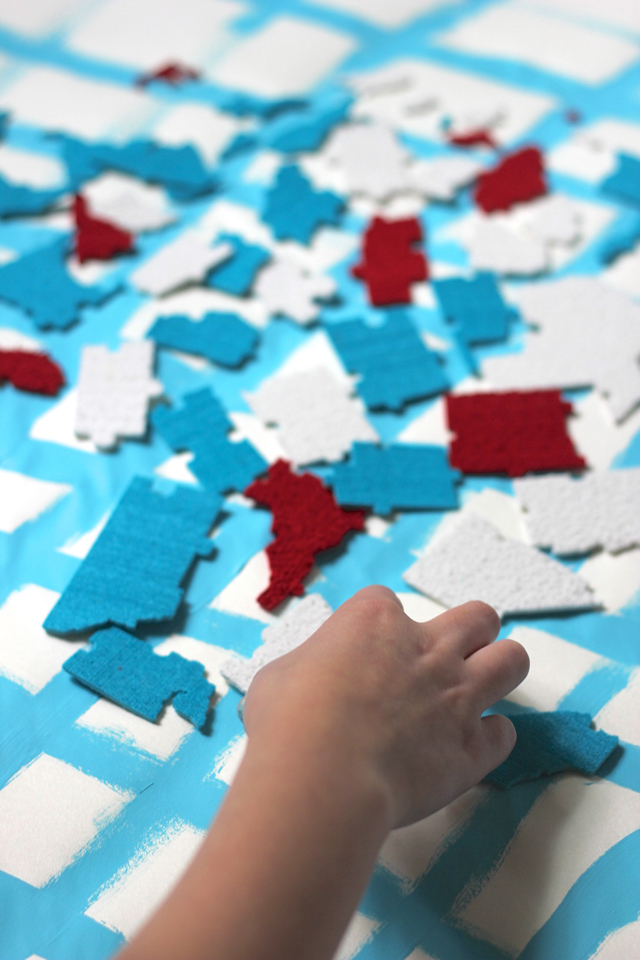
Once you've cut all of the pieces from the foam, carefully remove the states from each piece. The Cricut Explore can cut even the smallest states so be careful as you remove them from the larger piece to make sure you capture all the details!

Get the whole crowd involved in this fun foam map puzzle that you can create! Bring the family together as you build our nation. Pinning this for 4th of July parties!

Are you ready to win a Cricut prize pack? Head on over to the Facebook page and click on the Summer Love Tab. Here are the details on the giveaway:
Until Friday, July 3, 2015 , submit through the online Facebook form your answer to this question: Where will you create and/or use the Cricut Design Space™ app for iPhone® this summer? Complete entry details will be available by 9:00 AM MDT June 29, 2015, on the Official Cricut Facebook page. Entrants’ answers must be submitted through the form on the Official Cricut Facebook to be considered, and meet criteria listed in Selection of First Prizes section below.
- One (1) Weekly Winner will receive: One (1) Cricut Explore One™ Machine, a Brights Cricut® Vinyl Sampler Pack, Cricut® Transfer Tape, a Cricut® Tools Weeder, a Cricut® Material Sample Package (contents will vary) and a $100 gift card from Jo-Ann Fabric and Craft Stores. (Approximate Retail Value: $427.96 USD)
- Selection of weekly winners: A panel of judges will select the top three entries per week from among all eligible entries received. The top three entries will then be sent to a panel of judges who are bloggers (that’s me) to pick one winner per week based. The entries will be chosen by each panel of judges based on the following judging criteria:
- Originality of submitted item
- Creative use of daily themes (as specified above)
- Educational value
- Demonstrates new possibilities for use of Cricut® products
- *If you will submit a supplement photo through Instagram, you must follow @OfficialCricut on Instagram, use tags of @ OfficialCricut and #CricutSummer and provide your Instagram handle in your entry form on the Facebook page so that Sponsor can match the photo to the entry. A photo is not required to enter or win.