Posts tagged canvas
Host a You Paint Party

Birthday parties!! They have become bigger and pricier since my sweet days of paper crowns and kids meals at Burger King. My daughter, M, and I were dreaming up what would fit her personality and passion for a 9-year old sleepover party with friends. Locally we've had all sorts of group painting stores and party places open up. These are fabulous for unique get togethers, and they are also a little more than we could afford so we decided -- Let's do our own You Paint Party.

PC_youpaintparty.jpg

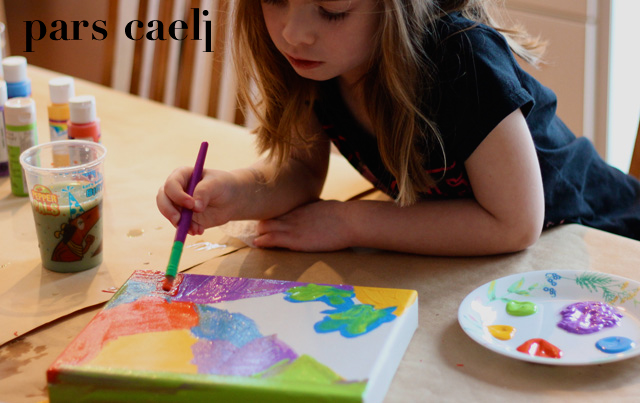
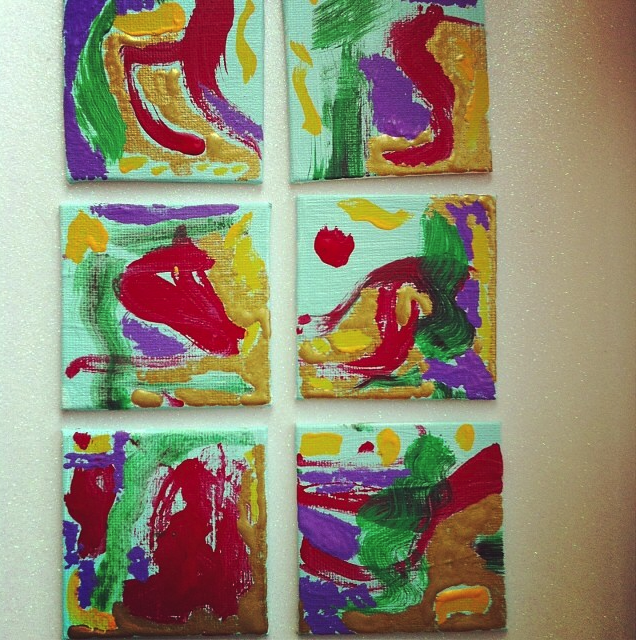
It began with the 2 inch canvases that M painted for invitations. She embraced the abstract and each one became its own masterpiece. We glued event details to the back and mailed them out.

PC_youpaint_invites.PNG

M also loves donuts so we decided that the girls would paint canvases of sprinkled donuts on them. We kept our eyes open for great sales on canvases, and we were able to grab a bundle from Michael's for a steal. We chose 12" squares to accommodate our studio space (also known as our kitchen) as well as ease in transporting after the party.

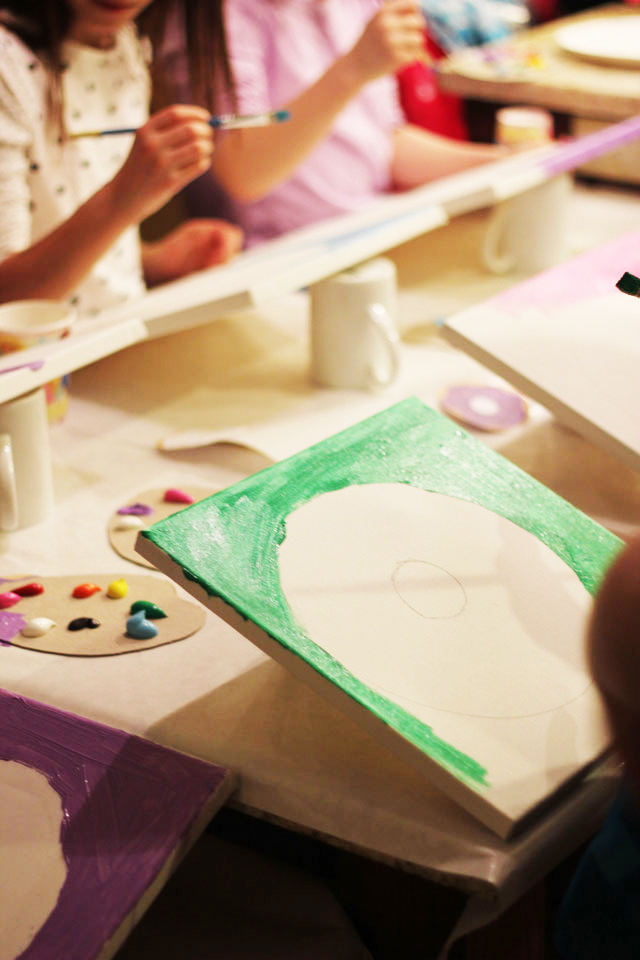
To convert our home into a studio, we prepped the kitchen. Covering the table with freezer paper and removing the chairs was the first step. Creating make-shift easels from canvases propped on coffee mugs worked out perfectly!

PC_youpaint_setup.jpg
PC_youpaint_cup.jpg

Each painter received a thin and thick brush as well as a mini palette of paints. We created our palettes from cardboard sheets, and each artists had her own array to choose from.

PC_youpaint_palette.jpg

To make our guests of every skill and comfort level feel ready to dive into the project, we decided to offer some easy guidelines. Paper plates made a handy outline for the outer edge, and the bottom of paper cups become our stencil for the donut hole.

PC_youpaint_circle.jpg

We began with the background color(s) first to set the stage, and already personality came through!

PC_youpaint_first.jpg

We then moved onto glaze followed by the cake of the donut. The best part was all the giggling and compliments they lavished on one another. Such a supportive group of painters!

PC_youpaint_second.jpg
PC_youpaint_finished.jpg
PC_youpaint_final_pin.jpg

The form of a donut is such a beautifully simple one that painters from all backgrounds can own their own sense of style to it! I was amazed at how many variations we had on the same theme, and I loved that no one felt frustrated in trying to make their painting look too realistic. There's something fantastical about donuts, no?

xoxo, MJ

A DIY for Lent
PC_PaintingforLent.jpg

Amidst the super cute, heart-shaped posts and the irresistably pinnable pink and red vignettes floating around the interwebs, I'd like to offer a DIY to break you into... Lent. For those of you who may be confused, this year Lent (the season leading up to Easter) began yesterday with Ash Wednesday and will continue for the next forty days. It's a time of reflection and growth, where we reserve our Alleluias and songs of praise, and focus inward on the change within ourselves. So why not have a DIY to accompany it?

Tell me you've seen this technique on Pinterest... The one where you use a canvas painting and adhere text, like vinyl lettering over top of it, paint over the entire surface to then remove the vinyl letters and reveal the great quote constructed from the colors and strokes of the painting underneath? Yes? No?

So that one got me thinking... how about a little Lenten project?

PC_paintingforLent_1.jpg

Here's what you need (or what we used): 8 x 10 canvas, assortment of your favorite paint colors plus black, brushes, vinyl letters.

PC_paintingforLent_2.jpg

My daughters were d-lighted to be involved with this one. I asked each girl to paint one half (diagonally for interest) in five of their favorite colors. As we brushed on the brilliant and quiet tones, we talked about our blessings, many of which the girls represented in their pictures. After the paint was definitely (ack, so much patience required) dry, we added the vinyl lettering, careful to place each one squarely in place.

PC_paintingforLent_3.jpg

Before adding a black layer over the entire top surface, I used a pen to press down the letter edges to be sure no sneaky paint would leak underneath. Here's our creation, full of color and blessings.

PC_paintingforLent_4.jpg

Time to cover up the Alleluias and keep them in waiting until Easter. Check out the cool texture that's revealed.

PC_paintingforLent_5.jpg

And then it's all covered.

PC_paintingforLent_6.jpg

So.. in another 39 days, I can give you the grand reveal.

PC_paintingforLent_7.jpg

Wait, wha? Seriously? A DIY cliffhanger. Here's what we'll have on our table throughout Lent, reminding us of all that we've been given and reminding us to let our goodness shine through the darkness.

The final product will be reposted here on Easter. Happy Lent!

xoxo, MJ