Posts in DIY 3
How to Add Stylish Back to School Organization

*This post is sponsored by Minted. All opinions expressed are my own. Thank you for showing love to the brands that support Pars Caeli!

We're a few weeks into school now. Can you believe it? My 5th, 3rd, and Kindergartener are humming along with their daily schedules and evening activities. And in order for me not to completely use my mind, we have our systems in place. I still find that I lose my phone or forget someone's library book way more than my wishful, maximizing self would like it.

How can we make our days smoother? Less forgetful? Happier? I'm always analyzing and wondering if we could set up our home or our schedule differently to make our days better. So many organizational systems and DIYs are out there (SO, so many, dear Pinterest). However, most of them are not the kind that I want to put in my home. Organization doesn't have to be ugly! Take those cute Minted labels (see above photo) that are saving me many trips to the Lost & Found box. 

An organized school year is a happy one! Of course, no one wants to skimp on style for the sake of tidy. Here's how to add stylish back to school organization to your home.

An organized school year is a happy one! Of course, no one wants to skimp on style for the sake of tidy. Here's how to add stylish back to school organization to your home.

Inspired by the combo of style and organization, I'm putting these fabulous projects on my fall to do list. They not only make lives more efficient but make (or keep) your home super styling, too. Win!!

1.  GIANT MAGNETIC BOARD

I swoon over this one! We have a chalkboard wall in our kitchen, and I feel like this magnetic board would be the Gandalf version. Michelle of 4Men1Lady has created this command center that's chic, textural, and completely multipurpose.

2. CLIPBOARD HANGER

Clipboards as frames or easels? Bring it on. Why couldn't schedules, calendars, classroom projects be displayed so beautifully? Amy of Delineate Your Dwelling created this piece to hang clipboards, and it's brilliant and sweet on the eyes.

3. FOLDER HOLDER

The papers that need to be kept for reference throughout the school year? Where should those go? We put ours in a folder holder, mounted right next to our exit door (by the garage) and are easy for people of every height. :) I think the way Summer of Simple Stylings beautified hers is perfect. Who wouldn't want to add to this lovely?

4. ORGANIZATION TO VIEW

The passwords, phone numbers, permission slips, special tickets - they also need a home and often one where they can be seen! Laurel of A Bubbly Life has this chic geometric board idea that I think would fit right in.

5. TAKING IT TO THE COFFEE

This project from Lindsay of Shrimp Salad Circus is perfect for the grown ups. Keep your supplies in check, too!! And make the morning rush a breezy, chic moment. Why not keep all your coffee/tea supplies on a gorgeous tray? It's enough to make you feel special and cared for even in the early AM.

What's your favorite way to incorporate organization into your home design?

XOXO, MJ


Thanksgiving ideas: Kids' Table Projects
PC_Thanksgiving_kidstable.jpg

Thanksgiving awaits us in just 9 days. Our family is hosting as we typically do, and it's my absolute favorite time of year! Our festivities this year include, along with both sets of grandparents and my aunt, my nephew in college who is near. He'll bring along friends, too, who may not be able to travel home, and I'm excited to open our home to a new set of companions.

We may have to break out into two tables for the first time. My children might experience the kids' table for the first time ever. Did you enjoy any holiday meals from the kids' table? My maternal grandmother often hosted our Thanksgiving, and I have memories of many years (as the youngest grandchild) spent at the table that was adjacent to the main action - the kids' table. To be fair, the kids' table had a lot of antics to be enjoyed so it wasn't a disappointment to be sitting there.

What if it were a treat? Or if you're looking for ways to keep your children busy while the meal is prepared or football games are watched? I've discovered these five great projects from creators who know what they're doing that I wanted to share with you. Such great results!

FAN TURKEYS

Hand turkeys have had their time. Let's try fan turkeys! For this you'll need some construction paper, markers, and glue. I love that it's more detail-oriented but can amuse the young child, tween, and maybe even teen. Googly eyes are always a nice addition. Check out all of the instructions over on A Girl and a Gluegun.

THANKFUL HEARTS

I love this gesture of gratitude that Katie and her family did over on Lasso the Moon. On Thanksgiving day, they gave family and guests small plush hearts and thanked them (one on one) for little and big things they do for them. On one sheet they wrote down who received each heart and why.

Throughout Thanksgiving Day, our family will take on the task of giving away as many hearts as possible. To give them away, we need to notice something that a person does for us, without being asked, that shows they care about us. (This can include neighbors and others, but I think we’ll just be sticking with the members of our family this year.) We give them one of our hearts, thanking them for the thing they’ve done for us, recognizing the reason why they’ve done it.

And there you have a lesson in gratitude for all to enjoy.

FIRST THANKSGIVING NAPKIN RINGS

This one will delight even the youngest set. While the turkey is roasting, pull out those collected toilet paper tubes to convert them into one of a kind napkin rings. If you head over to Crafts by Amanda - warning she has a ton of amazing projects for kids and adults - you get all the details on how to make your pilgrims just right.

THANKSGIVING TREAT BOXES

And if napkin rings weren't sweet enough, how about these adorabel treat boxes? They'd be fun to craft in advance and use as placecards, or to leave ready to decorate for your young guests. Wouldn't these be a fabulous take home treat, along with tons of extra turkey, for kids traveling near and far? Learn all the details over at A Pumpkin and A Princess.

OMBRE PINECONES

This is the perfect project for the teens and tweens who may not be delighted that they are relagated to the kids' area. Raid your backyard or any craft store this time of year. Grab some paint brushes and set one example on the table to follow. The ombre effect is really pretty and metallic edging would be great, too. With a bit of sparkle, the kids can feel like the are getting ahead on their Christmas decorating. Oh, wait, kids probably aren't worried about that. :)

Wishing you and your kids a fabulous Thanksgiving. How do you keep your kids happy and entertained while hosting?

xoxo, MJ
P.S. Need some more ideas to make this Thanksgiving the best? Check here.

Apple Pie Doughnuts and a Printable School Poster

I love so many aspects of collaboration...and right near the top is APPLE PIE DOUGHNUTS! Yes, my friends, today I get to share with you the recipe for apple pie doughnuts, thanks to our Back to School series. The incredible Lyndsay of Coco Cake Land has a charming apple printable and the most incredible recipe for a back to school treat today.

But not only that, Sara of Confetti Sunshine, has a great Back to School sign - gigantic in size - for you to use in your back to school photos! It's free, and you have got to see how adorable her daughter looks in her return photos.

We have another two projects for you tomorrow! I'm joining up with one of my favorites, Joy, to show you two DIYs to complete your week.

PC_backtoschool_logos.jpg
Mini Cooks: A healthy snack
Minicooks_red.png

It's time for another great recipe to enjoy with your Mini Cooks! Big thanks to Joy and Sheri for this awesome series. Today Sheri takes on snacks!

We keep our snacks, sorted sweet or savory, in our pantry on the low shelves and on the bottom shelf of the fridge so that the kids can help themselves as they'd like. I am all about independence and knowing when you feel hungry. I also want my children to make good choices.

Honestly, I have a love/hate relationship with snacks and my kids. Sometimes snacks can supplement our meals so well and other times they devolve into another dose of sugar. I'm always on the hunt for a healthy snack that will appeal to them. I think Sheri heard my silent plea to the world and created these yummy granola bars with her son, Noah.

I've never made granola, and I'm ready to dig in.

I love their circular nature, and they're sized just right for little hands (and stomachs). Hop on over to see adorableness meet healthy. Thanks Sheri and Noah!

Guess what? We have a great collaborative Pinterest board for Mini Cooks that you should check out for new ideas on fun recipes and tips for cooking with children.

Catch up on the series with the intro of “5 ideas for getting started with Mini Cooks” and don't miss Joy’s yummy breakfast of “Egg in a Basket”

xoxo, MJ

Craft Date: Paper snowflakes
PC_craftdate.jpg
PC_papersnowflakes_4.JPG

Winter craft date? It's the perfect time of year to gather inside, in the warmth, with a coffee or cocoa and a good friend and make something awesome. My friend, Renee, and I were determined to add to our repetoire of seasonal crafts after the burlap placemat success.

We decided to go simple, or so we thought, and make the paper snowflakes.

As a little girl, I remember attempting paper snowflakes, trimming off the wrong edges instead of the right ones, and ending up with a heap of trimmed pieces of flakes. Determined not to repeat this, Renee and I made six-point snowflakes following this process:

PC_papersnowflakefolds.jpg
PC_papersnowflakes_2.jpg

We had a variety of papers, and I ended up using a looseleaf pack that I've had for a very long time because of the thin, durable weight to the paper. And, the white tone was just a bit softer than our other choices.

So grab a stack of paper, sharp scissors, good lighting, and a pal.

Lots of great patterns around the interwebs will surprise and delight you, like the ones we used as inspiration: Wee Birdy, these great ideas, and you can even find paper snowflake patterns based on the new movie, Frozen (pinned for my girls).

PC_papersnowflakes.jpg

Folding the six-point pattern takes a little practice to get all the segments equal, but it it amazing the variety of snowflake you can create.

Originally Renee and I were thinking that we'd put these together in a chandelier-type arrangement. Can you imagine cascades of intricate snowflakes floating down?

Renee opted to display her snowflakes against her gorgeous red walls in the dining room. Fabulous contrasts!

Honestly, mine sat in a pile for a while, waiting for me to have time and inspiration to make something. And then I started making more and more of them of various sizes.

We have two trees in our house - our freshly cut and our (now duct-taped) artificial. The fresh tree has balls and ribbon and my favorite loose tinsel.

It needed a little something extra.

*Lightbulb.

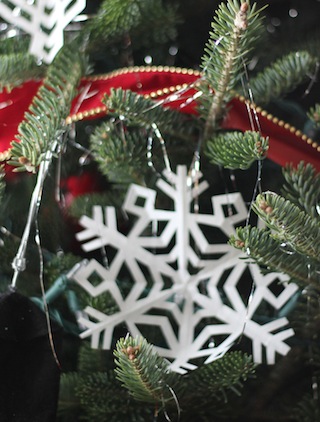
Spread throughout the limbs now are dozens of paper snowflakes.

PC_papersnowflakes_1.jpg

If you want a simple craft that will make you feel way more talented than you might be feeling on any particular day, cut some snowflakes.

They can be used in wrapping, garlands, chandeliers, and in my opinion as awesome ornaments.

Big hugs and thanks for Renee for the motivation to make these! Can't wait to see what we'll work up for spring.

Also, Kim of Design Life Kids and I will be showing off our long-distance Craft Date soon!

If you wanna make something and need a buddy, let me know. It's always more fun to do create with a pal.

Happy weekend, lovelies! I'll be writing my arm off and sending Christmas cards! Best to you and yours. 

xoxo, MJ

PC_papersnowflakes_5.jpg
PC_papersnowflakes_6.jpg
Fresh Holiday Traditions: Party Hat Christmas Trees
PC_partyhattrees_1.jpg

"Perhaps I had a wicked childhood, perhaps I had a miserable youth, but somewhere in my youth or childhood, I must have done something good."

Whether those words are sung from Carrie Underwood or from Julie Andrews, they resonate with me here today, friends. We're coming to the near close - one more week - of another great series of projects and posts from my ladies who collaborate on the Fresh Holiday Traditions series. I feel blessed to have been asked to work alongside these minds and spirits, and I feel pretty lucky that they were willing to do it one more time!!

To recap our creations thus far:

And today, we're adding Party Hat Christmas Trees - fun for the kids table at holiday meals (or the adult table), or to set around the office or house in seasonal decor.

PC_partyhattrees.jpg

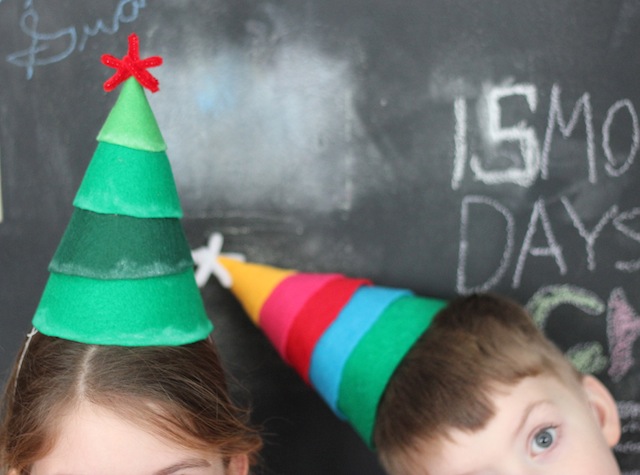
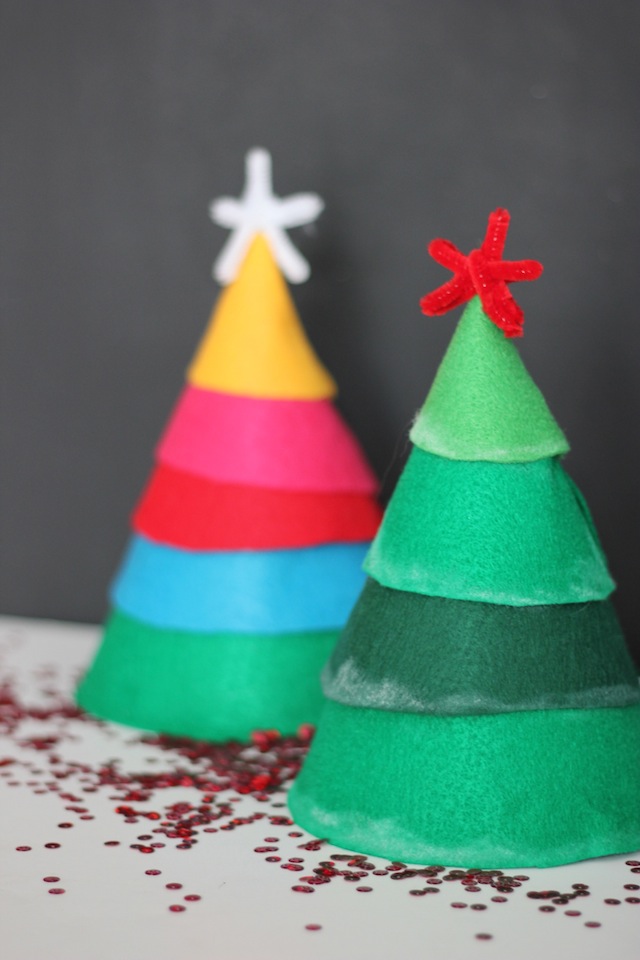
Inspired by the clever craftings of Kelly from Studio DIY, we over here at Pars Caeli decided to convert our old party hats into Christmas trees! These cute cones make a great head toppers as well as darling Christmas decor.

Imagine setting up the kids table with party hats, some felt (precut depending on the ages), some pipe cleaners, sequins, pom poms, and see what kind of hats they can create before Christmas Eve dinner!

Here are the suspects, no-longer-used princess party hats:

IMG_3165.JPG

Grab some felt (about two rectangles per tree), some craft glue or hot glue, chalk, and other crafty notions.

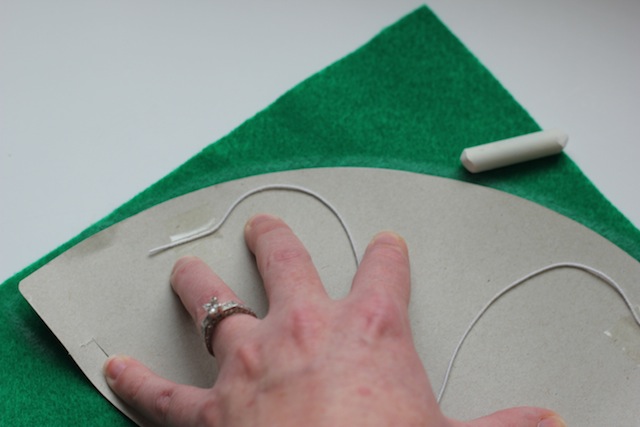
First, unfold one of your party hats to trace the size for your C-shaped ring of felt. I used chalk to trace my outline. It makes a nifty double as snow!

IMG_3172.JPG

We selected a variety of colors for a traditional and more modern tree. I'm kind of a felt softie. I can always find a reason to get a few sheets every time I swing by the craft store.

PC_partyhattrees_3.JPG
IMG_3173.JPG

Ring by ring, beginning on the bottom, glue the felt onto the hat! Varying colors adds some texture and life to your creation.

IMG_3192.JPG

You can imagine these as all white with silver and/or gold accents, too! Hello holiday photo booth!

IMG_3181.jpg
IMG_3186.jpg

Little elves find them quite funny.

Imagine whole forests!! Or entire family photos with everyone in tree-d hats!!

Enjoy these and don't forget to share if you make 'em! Thanks gals for the fun. :)

xoxo, MJ

More Holiday Traditions: Jesse Trees and Painted Wrappings

Happy Wednesday, good people! Two fun things to share with you today: an easy Fresh Holiday Tradition and an Advent tradition to begin.

First off, a little Advent. You all have seen some amazing Advent calendars going around, have you not? Do a quick search on Pinterest to see just how creative people can get with countdowns! I am amazed.

Have you heard of a Jesse Tree before? It's an Advent calendar of sorts, that takes you through the days leading up to Christmas and uses the words from the Old Testament stories to do so. I posted all the details last November, but I've received so many questions about it, that I wanted to post it again for new readers.

PC_jesse1.jpg

Wanna make one? Here's what you need:

  • 1 yard of purple felt (it's a traditional Advent color)
  • 1 yard of brown felt for the limbs and trunk
  • Printed or drawn symbol ornaments
  • Velcro to attach
  • Dowel and ribbon/twine to hang.
  • Fabric glue or hot glue
PC_jesse4.jpg

Head over here to get the full details including printable symbols, a reflection book to follow, and some more Advent ideas.

And as we get our homes and gifts ready for Christmas, I'm excited to share with you this great kiddo project from Jen over at Classic Play! I know that I've been looking for a few ways to contain, errrr focus, my children's holiday energy in good directions. This is a perfect project. And I love Jen's first reminder to keep it simple! Click over to see Painted Wrapping Paper!

Only two more projects in our Fresh Holiday Traditions series! Here's what we've seen so far:

What holiday traditions are you bringing out these days? Cookie baking? Christmas-book reading?

Check out these great traditions from my pal, Janae, over at Bring Joy.

xoxo, MJ

Fresh Holiday Traditions: Turn Your Children's Writing into a Thank You Stamp
Alexandra-Hedin-Thank-you-Stamped-Cards.jpg

Happy, happy Wednesday, friends!! It's time for another wonderful Fresh Holiday Tradition. This time we hear from the extraordinaire, Alexandra, with a clever way to incorporate your children and their handwriting into thank you notes for the season!

As a mom, I'm always looking for ways to teach and to practice gratitude with my three children. After birthdays and holidays, we write out thank you cards, but as we all know this can quickly become a tiresome chore.

Ta da. Try this! Alexandra asked her son to write the words Thank You, and she converted his handwriting into a stamp (via a handy dandy eraser),

Click on over to get the details! I could see this method being an amazing way to use children's greetings for Christmas on envelopes or gift wrap. Or how about an I love you stamp put on every correspondence to Grandma and Grandpa?!

Too cute! Don't forget to check out our other projects in the series:

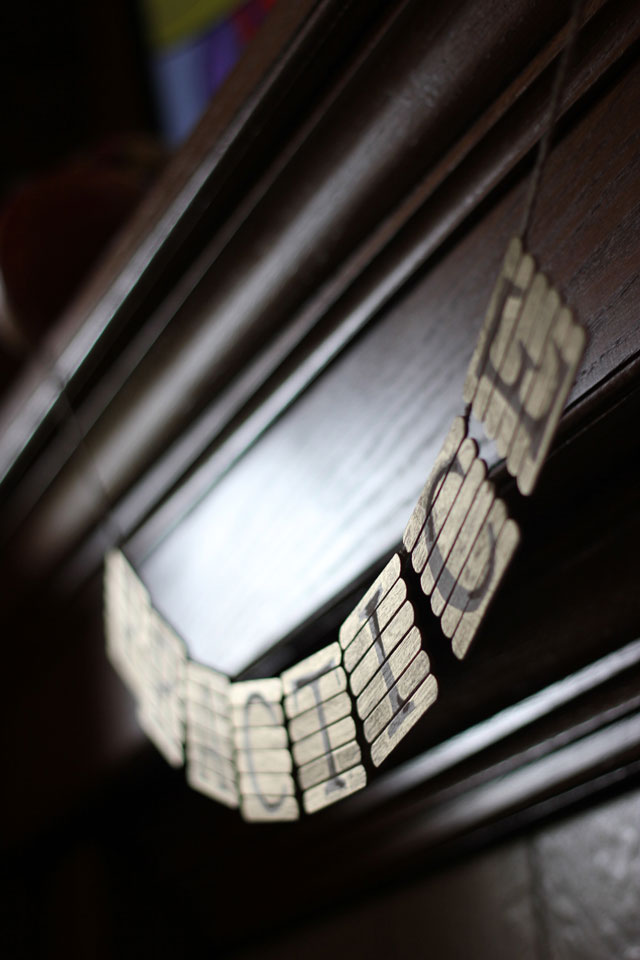
Gilded Popsicle Stick Garland
PC_popsicle_icon.jpg

Ever since my craft date with Renee, I've been thinking about a fall banner to hang in our home. Homemade pom poms, something catchy in paper? In an attempt to be resourceful, I took a look-see in our craft cabinet to assess: modeling clay, glitter pipe cleaners, some beads...

Bingo: Mini popsicle sticks.

Now before you give up on me, let's look past the camp frames and pencil holder possibilities of the past and consider these magic sticks like small scale wooden pallets. Stacked together, they make a great flat canvas.

Painted with a gold leafing marker? These canvases might even sparkle.

PC_popsicle_1.jpg

To make your own, pull out your pack of Woodsies mini sticks, some cardboard, twine, glue or Modge Podge, and a gold paint marker.

Stack your popsicle sticks on a narrow piece of cardboard. Glue them in place, making sure to cover the edges of the cardboard.

PC_popsicles_2.jpg

Draw or stencil letters or symbols on your squares. Paint the remainder with your gorgeous gold marker. If you're really into highlights, add some with white chalk.

PC_popsicles_4.jpg

Bend the top portion of your cardboard rectangle.

PC_popsicles_3.jpg

And glue the twine (I braided mine for a bit more heft) to the back, folding the cardboard over it.

PC_popsicles.5.jpg

 The effect of the gold on the natural wood makes the sheen an interactive element in the banner.

PC_popsicles_8.jpg
PC_popsicles_10.jpg
PC_popsicles_7.jpg

I decided practicing gratitude was a mantra we could all use for fall and all year through. :)

PC_popsicles_9.jpg

This little project has me thinking of other banners, runner, placecards, and signs I can make using these super inexpensive and super easy to paint popsicle sticks.

What do you have hiding in your craft cabinet that can be reworked into something gilded?

xoxo, MJ

Craft Date: Burlap Placemats
PC_craftdate.jpg

Hi cuties,

Happy week to you. It's the last full one for September, and it's time to get your fall on. So far we have three oversized pumpkins on the stoop, a wreath on the door, and 3 large bags of apples hanging out in our kitchen. We're just beginning to crack open the wonder of autumn.

PC_craftdate_burlap.jpg

My pal, Renee, and I decided to get crafty last week, and we were choosing among some ideas we'd seen around the interwebs. Choices: yarn words, burlap placmemats, or concrete planters

With all the supplies ready at hand, we opted for.... drumroll please... the burlap placemats.

IMG_2592.JPG

Renee was our shopper and purchased all that we needed (though it wasn't much) from the local craft store. Wanna do this craft date with a buddy of yours? Here are the simple ingredients:

  • 3 yards of burlap - we made 10 placemats out of this amount with plenty spare.
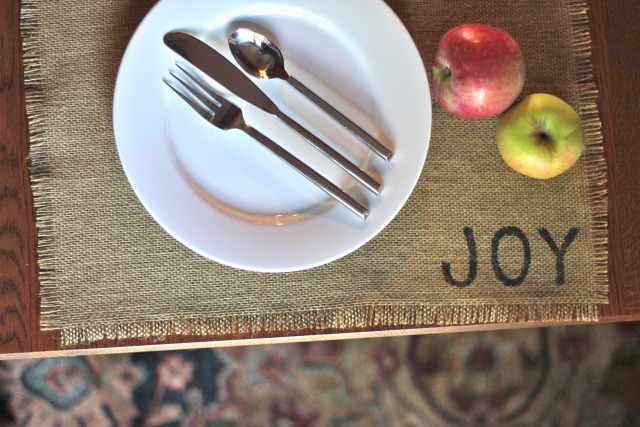
  • Paint - we had a variety of colors but opted for the black since it made the biggest statement against the brown texture
  • Scissors
  • Sharpies or stencils
  • Fray stop or clear nail polish
  • Patient friend (not required but makes it much more fun)

First we measured the size of a standard placemat and decided to cut ours to 14" x 18".

Renee has a beautiful home and even more beautiful children (three under the age of 4), and I'd like to take just a moment to thank her for hosting me and for putting up with my very crooked cutting of burlap.

We worked at her dining room table, and I laid out the fabric to get the best cuts. Inevitably the burlap would stretch and pull in one direction or another, and nice straight edges were no where to be found.

But! Never fret. Burlap is forgiving, and for this project we wanted to create a fringe... so we had a little wiggle room (and some repairing trims to do).

IMG_2529.JPG

Burlap cut to size... To create the fringe on the placemats, pull one string on each edge until you achieve the desired length you'd like.

IMG_2538.JPG

Next step adding the design. We both wanted words. Renee went with the names of her family members (except for baby E who might not yet appreciate burlap). I went with words of thanksgiving.

These dried really quickly, and we added some fray stop to the border. Simply turn the placemat over and trace along the entire perimeter.

IMG_2597.JPG

We've been enjoying our new placemats since last week, and the kids have been intrigued with their words at each meal. I love the bit of texture and some homespun goodness all tied together with a fun friend project.

Renee and I had so much fun we're making Craft Date a quarterly gathering. We're currently sketching out the winter project (got any ideas you wanna toss our way?)!

PC_craftdate_burlap_2.jpg

Also the idea of a Craft Date sparked a collaboration with Kim over at Design + Life + Kids. We'll be doing a project next Tuesday for Craft Date... one from the idea files last week... those amazing milk carton concrete pots. If you're dying to make some too, send me a message!!

Have a project on your mind and need a pal to get you motivated to create? Leave an idea in the comments or send me an email at parscaeli@gmail.com, and we just might be able to set up a craft date, near or far.

Because it's just more fun to do it together.

xoxo, MJ

PS. Renee, you're the best.

A DIY for Lent
PC_PaintingforLent.jpg

Amidst the super cute, heart-shaped posts and the irresistably pinnable pink and red vignettes floating around the interwebs, I'd like to offer a DIY to break you into... Lent. For those of you who may be confused, this year Lent (the season leading up to Easter) began yesterday with Ash Wednesday and will continue for the next forty days. It's a time of reflection and growth, where we reserve our Alleluias and songs of praise, and focus inward on the change within ourselves. So why not have a DIY to accompany it?

Tell me you've seen this technique on Pinterest... The one where you use a canvas painting and adhere text, like vinyl lettering over top of it, paint over the entire surface to then remove the vinyl letters and reveal the great quote constructed from the colors and strokes of the painting underneath? Yes? No?

So that one got me thinking... how about a little Lenten project?

PC_paintingforLent_1.jpg

Here's what you need (or what we used): 8 x 10 canvas, assortment of your favorite paint colors plus black, brushes, vinyl letters.

PC_paintingforLent_2.jpg

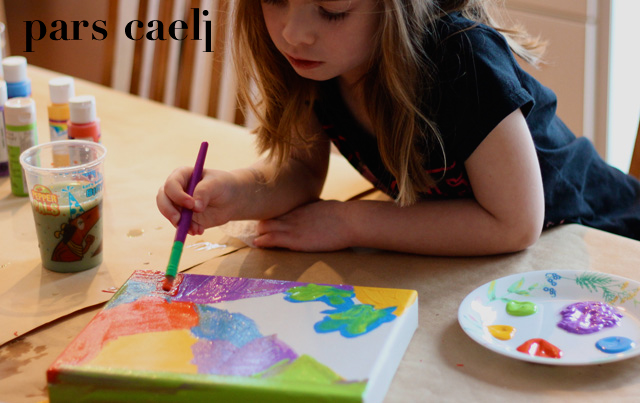
My daughters were d-lighted to be involved with this one. I asked each girl to paint one half (diagonally for interest) in five of their favorite colors. As we brushed on the brilliant and quiet tones, we talked about our blessings, many of which the girls represented in their pictures. After the paint was definitely (ack, so much patience required) dry, we added the vinyl lettering, careful to place each one squarely in place.

PC_paintingforLent_3.jpg

Before adding a black layer over the entire top surface, I used a pen to press down the letter edges to be sure no sneaky paint would leak underneath. Here's our creation, full of color and blessings.

PC_paintingforLent_4.jpg

Time to cover up the Alleluias and keep them in waiting until Easter. Check out the cool texture that's revealed.

PC_paintingforLent_5.jpg

And then it's all covered.

PC_paintingforLent_6.jpg

So.. in another 39 days, I can give you the grand reveal.

PC_paintingforLent_7.jpg

Wait, wha? Seriously? A DIY cliffhanger. Here's what we'll have on our table throughout Lent, reminding us of all that we've been given and reminding us to let our goodness shine through the darkness.

The final product will be reposted here on Easter. Happy Lent!

xoxo, MJ

Vlog - DIY Make Your Own Patterned Bookmark from Children's Art

Tra la la la la, we made it! It's Friday, and I'm wrapping up a whole lot of work today. Feels so good.

My buddy, Paige (one of my major blog inspirers) is here today, readers. And she has brought an ah-mazing present! Enjoy, enjoy the first vlog we've had on this here blog...a charming DIY.

Paige is the head honcho over at Approaching Joy (you should also totally follow her on Twitter cause this girl knows how to brighten a day). Okay, let's be honest she's the only honcho, but she's one of those people who dig alone time. If you adore pretty things and slightly offbeat humor and have a propensity to enjoy small beautiful moments in life, you're probably already her friend. Go say "Hi" on her blog or Twitter (just make another tab and come on right back).

>>>>>>>>>>>>>>>>>>>>>>

Hey guys!!

As a *kid I loved going to the library.  It was a chance to learn about new people and cool places and let my imagination get even wilder. When I found out that the Pars Caeli family loved taking trips to the local library, I instantly knew about a project that would encourage both their reading and artistic skills: A "real" bookmark designed by your children (with some technical help from you) that they will be proud to use all summer.

*Confession: I'm still a proud bookworm.

Supplies:

Bookmark-supplies

Directions:

1.  Have your children use a jumbo marker to draw a simple image using the majority of the space on the  8.5 x 11 piece of printer paper, leaving a one inch border around the paper. (The marker size is important because it will give the image "weight" that is nice later on.)

2. Scan the image onto your computer and open in up into Photoshop or Photoshop Elements.

(After this step my written directions got a little... janky... so I made a screencast that you can watch where I go through every step.  Click on the link below, press play, and then hit the fullscreen button on the bottom right corner to see me in action!)

 Click on these words Bookmark DIY Screencast to watch the simple DIY!

Screencastbutton

3. Use the Paint Bucket tool and fill in the lines of the scanned image.

4. Crop the image so that the scanned edges are cut off.

5. Save this image.

6. Click the Edit button at the top of the screen and then click "define brush".

It will ask you to name and save the brush.

7. Create a new document that is 3x8.5 inches.

8. Choose the brush tool and select the brush that you just created.

9. When you first select the brush it will be the original size, but, with your child's help, decide how big the shape should be using the size tool to the right of the brush selector. Also, choose a color for the shape.

10. Use your new brush as you would any other to create a pattern or random design to create the background.

*As someone who only has six months of Photoshop experience it took me forever to realize that most brushes aren't supposed to be used as a "click and drag" motion but with a single click instead. Check out these tutorials (

here

and

here

) from

Creature Comforts

for more information on how to use brushes.

11. Use steps 1-7 to create a crush using your child's hand-written name

12. Use the rectangle tool to make a white square at the top of the bookmark.

13. Follow steps 8-10 to choose, adjust and use this second brush to fit into the white square.

14. Print out your bookmark (in color!!) on the white card stock.

15. Punch a hole at the top of your book mark.

16. Thread embroidery floss of similiar colors to your bookmark into the hole.

Ta-da!!!

A brand new personalized bookmark for your kids that will be a keepsake (with both their creativity and their handwriting) for you.

{MJ here. Looovvve it! And, as Paige's friend who's never met her in person (funny how the blogospheres work), I treasure hearing her describe it all. She's a belle from Arkansas, can you tell? So charming. Looks like we're making some bookmarks this weekend!!}

DIY: Turn your child's art into fabulous home decor

It's Thursday and usually we'd have bookclub today to talk about Happiness. Meet me back here next Thursday and we'll catch up. on what we've missed. Instead I have two great days of DIYs to round off the week, wonderful readers!! After I get done with this monster workload, I'm looking forward to creating and crafting...and I'm inspired by Claire's awesome idea!! Check out more from Claire here.

>>>>>>>>>>>>

Hi again from Ireland! Today I'd like to show you a great way to showcase the art masterpieces (that are whipped up by the tiny hands in your life) with the help of some printable fabric sheets. I'm sure that like me, you have a whole folder of lovely artwork by a variety of mini-Picassos which shouldn't be hidden away, so this project will show you how to make one into a cushion so you can display their brilliance in a practical way.

Here is the original rainbow painting by Niamh, aged 3, which I scanned into my computer.

I asked her to paint it for the room in my beach house which is decorated with rainbows such as this one, which I took at Iguassu Falls in Brazil.

Next step is to print it on to fabric (non-shiny) side of a printable sheet such as these from EQ Printables which you can get

here

. I get great results just using my normal inkjet printer.

Let it dry for about 15 minutes and then peel off the plastic backing before soaking the sheet in room-temperature water for about 10 minutes to set the picture and then gently rinse the fabric painting.

The next step is to lay it flat to dry and you can use this time to choose how you will use your new fabric masterpiece. Purses, memory quilts, appliqué onto tshirts, bags, the possibilities are endless. I decided to make a cushion, so I measured the pillow insert I had chosen and then selected a matching fabric, which is a bright rainbow coloured polkadot.

If you are very proficient with a sewing machine then now is your moment to shine with zips, buttons and bows. I decided on the simplest option which was to cut four strips of matching fabric to sew to the sides of the picture, two shorter strips at the top of the picture. I think if you use a random patterned fabric this is much easier, as you then you aren't trying to match up patterns with the four sides!

Then sew two longer strips to the sides to make a square, or as close to a square as you can get! It doesn't matter at this stage anyway, as the real square will take shape when you attach it to the backing material.

You can then sew this completed cushion front to a backing material, right sides together and finish it however you want. Zips are good, and simpler than you think; however, I used a simple foldover finish by making one side of the backing square longer and folding it over, sewing the extra piece inside the backing to hold the cushion insert.

And there you go... kid's artwork beautifully decorating your room.

Here's another which demonstrates a 4-year old's explanation for how the dinosaurs became extinct!

This would be great for a children's bedroom, or a brilliant present for a doting grandparent. You could get the mini-artist to draw a picture of them and their grandparents, or them and their Daddy for fathers' day or with their Mummy for mother's day. I've also been making kid's travel art kits recently and one of their pictures would be perfect to sew on to the front to personalise them.

Now to choose the next picture from the folder to immortalise in home décor!

Thanks for checking out my rainbow cushion.     Claire

{MJ here. Uhm, can I get a rainbow room and a beach house, too? I promise to put cute kiddo pillows all over it!)

A tote with a touch of neon/chevron + DIY

I go through phases with patterns. When my eye is attracted to one, it subconsciously finds its way into a lot of my design at home and work.

I've got a bad case of chevron brain lately. The energy of the geometry and boldness of line makes me want to run - jumping - into summer.

Here's a DIY on how to make your own chevron goodness.

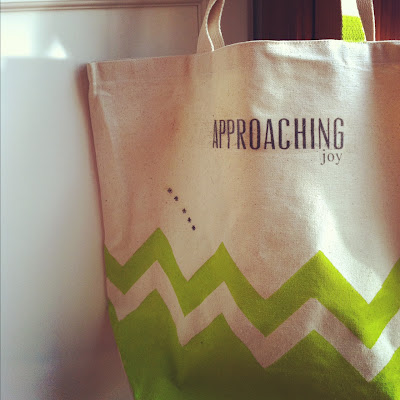
You'll need a canvas tote, masking/blue tape, fabric paint, paintbrush, iron, and your design on iron-on paper*. Iron-ons are so fun, and you can transfer any image/text onto fabric with them. The style of paper I used required me to reverse the image before printing. Just follow the instructions on whatever style paper you use (some need mirror image, some do not).

Make your chevron with masking tape (remember that the paint will go in the space not covered with tape). I learned the hard way that I need to cut clean edges for each piece to keep the paint lines crisp.

Iron on your design, using your hottest, no-steam setting.

**As a first-time fancy crafter (I am usually such a mess), it took me a few tries to get photos that made sense. And I, of course, ironed the letters on the wrong side, making the entire graphic melt onto my iron. Oops. Thank goodness for nearby hotpads to clean the surface pronto.

It felt so good to see the paper peeling away to reveal JOY underneath.

Using the foam brush, I painted on the lime green being careful along the tape edges. Oh, the satisfaction of removing the masking tape and seeing the grand reveal of a crisp, clean line.

And, that's it.

I use totes for everything...grocery store, library, farmer's market, storage, soccer gear, swimming equipment...you name it. And with this crafty addition you can brand away.

Happy creating, friends.

XOXO, MJ