Posts tagged banner
Watercolor Resist Banner
The grand reveal of a resist technique make them a lot of fun for kid creations. Try this process to create a letter banner from washi tape and watercolors.

The grand reveal of a resist technique make them a lot of fun for kid creations. Try this process to create a letter banner from washi tape and watercolors.

We've been out enjoying the weather as much as we can this week, but we've had a lot of rain mixed with warm temperatures so we had some great time indoors working on summer reading and this fun watercolor resist banner for Father's Day.

I'd seen some of the incredible posts that Jean from The Artful Parent has created with resists. We decided to give it a try, making our own letters from washi tape and then applying them to watercolor paper.

The grand reveal of a resist technique make them a lot of fun for kid creations. Try this process to create a letter banner from washi tape and watercolors.

The grand reveal of a resist technique make them a lot of fun for kid creations. Try this process to create a letter banner from washi tape and watercolors.

Any image or shape can be used. We decided to make our own letterforms to spell out Happy Father's Day. Using parchment paper as backing, we created the letters with tape. Once they were the shape we wanted (good practice for my 5-year old as he solidifies his formation of letters), we trimmed and embellished the edges to add some flair.

Next we stuck each letter to its own piece of watercolor paper. The children decided that they wanted each letter to be one color, and we practiced using the watercolor paints. It was a tough adjustment for some since our usual painting process involves putting a blob of paint on and smoothing it around. Watercolor is much more fluid, and the brushstrokes can be a lovely part of the finished product. We're still working on our technique.

In the meantime, we created a colorful banner, which was a lot of fun to peel and reveal. I holepunched the top corners of each letter, trimmed them into a slightly more angular shape, and tied them together for celebrating.

The kids were pretty proud to see their teamwork adding joy and color to our space, and they're ready to paint some more.

Have you tried watercolor resist before? With your children?

xoxo, MJ

P.S. If you're following along with the 18 Summers Challenge, we're making classic balloon rockets tomorrow. Join us!

Summer Banner Printable: Endless Summer Projects

I can hardly believe it! It's that time of year again?! Bring on the Endless Summer Projects! Jen, Alexandra, Melissa, Amy, and I have been working for months to put together a fun, creative collection of projects. Well, it wasn't all work...there was a fair amount of laughter, sharing, and good old-fashioned sarcasm thrown around to get us to today.

Over these next 15 Wednesdays, stretching us long into August, we'll be sharing some fabulous ways to spend time with your children this summer and soak up all the sun-kissed joy of summer!

Most of us are not yet into the official summer schedule. We have 19 days left of school (but who's counting, right?), and I'm always looking for memorable ways to celebrate the close of another year. Our typical tradition includes stopping by teacher's classrooms to thank them for a good year and enjoying a lunch out all together, since the last day is typically a half day.

Jen of Classic Play has a great printable banner ready for all of us to celebrate! Imagine the joy of your children breaking through the streamers as they run out for the bus or into the car.

Click on over to Classic Play to get the downloadable pdf and get it ready for your end-of-the-year party. I want to put one on our minivan and maybe one on their bedroom doorframe the morning of the last day.

What are your year-end traditions?

xoxo, MJ

P.S. I'm hosting next Wednesday's project, thanks to our friends at Wayfair. Grab a large canvas and some washi tape...


Gilded Popsicle Stick Garland
PC_popsicle_icon.jpg

Ever since my craft date with Renee, I've been thinking about a fall banner to hang in our home. Homemade pom poms, something catchy in paper? In an attempt to be resourceful, I took a look-see in our craft cabinet to assess: modeling clay, glitter pipe cleaners, some beads...

Bingo: Mini popsicle sticks.

Now before you give up on me, let's look past the camp frames and pencil holder possibilities of the past and consider these magic sticks like small scale wooden pallets. Stacked together, they make a great flat canvas.

Painted with a gold leafing marker? These canvases might even sparkle.

PC_popsicle_1.jpg

To make your own, pull out your pack of Woodsies mini sticks, some cardboard, twine, glue or Modge Podge, and a gold paint marker.

Stack your popsicle sticks on a narrow piece of cardboard. Glue them in place, making sure to cover the edges of the cardboard.

PC_popsicles_2.jpg

Draw or stencil letters or symbols on your squares. Paint the remainder with your gorgeous gold marker. If you're really into highlights, add some with white chalk.

PC_popsicles_4.jpg

Bend the top portion of your cardboard rectangle.

PC_popsicles_3.jpg

And glue the twine (I braided mine for a bit more heft) to the back, folding the cardboard over it.

PC_popsicles.5.jpg

 The effect of the gold on the natural wood makes the sheen an interactive element in the banner.

PC_popsicles_8.jpg
PC_popsicles_10.jpg
PC_popsicles_7.jpg

I decided practicing gratitude was a mantra we could all use for fall and all year through. :)

PC_popsicles_9.jpg

This little project has me thinking of other banners, runner, placecards, and signs I can make using these super inexpensive and super easy to paint popsicle sticks.

What do you have hiding in your craft cabinet that can be reworked into something gilded?

xoxo, MJ

A Spectacular Look for your Blog


  • Pleasing hierarchy of organization through color or font
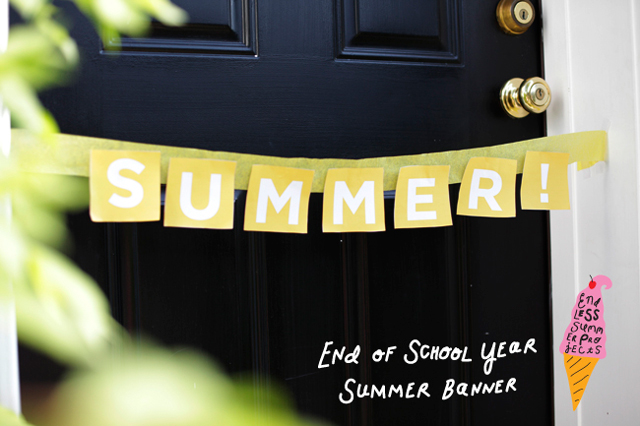
  • Strong, clean banner or heading
  • Crisp, colorful photos

These are the top three design elements that draw me into a website or blog. How about you? Have you ever thought about what keeps you coming back, besides content, to certain sites for news, ideas, or inspiration?

the original banner for this webhome

Through the great people of Alt Summit, I had the opportunity to learn from the talented Laurie Smithwick, cofounder of Kirtsy and owner of a design studio in Charlotte called LEAP design. I learned a ton, and I adored how she moved us from fine art examples to blog designs - a great recap of art history connected to our modern-day experience of art through computer screen.

Laurie had example upon example to illustrate her points, and already I know I'm not going to do her fabulous skills justice, but here are five simple, doable, put-it-in-your-purse takeaways for your own designs. And, if you can, sign up (for just $15) to take a class with her. You will be delighted you did. Seriously, delight.

1. Use your hotspots

Our literate brains are patterned to follow a certain path, and we transfer that information when "reading" the web. Generally we are drawn to the upper left corner, and then to the right top and then left side bar. Using eye-tracking heat maps (fancy pants technology), researchers have learned our routines so use this natural flow to your advantage (eg: set up your space to have focal points in these three areas). Or, if you choose not to have this flow (and Laurie gave us a lot of great designs that don't), think about the focus areas that you want your readers to follow. 

I like to think of it as a hierarchy of dot to dots. Where should the reader begin, continue, and end?

2. Become friends with white space


Did that emptiness there bother you? Did I lose you in the vast wasteland of white?

And there's an example of white space not helping.

But most of the time, white or empty space can allow your readers to enter into the space. If there's too much happening within the design of the page, there's no place for the eye to go. 

Laurie quoted Channel’s stupendous advice, "Look in the mirror before you leave, and take something away." I was inspired and went right to Blogger to add some easy, breezy white space to Pars Caeli. It feels like a great welcome mat to me.

3. "Your fonts are talking behind your back."

Direct quote from Miss Laurie. 

And, I knew they were. Fonts communicate the mood and style on your blog. Choose them carefully and choose them minimally, like 1 or 2, and at most 3. 

A classic serif font makes happy friends with a strong sans serif. For Pars Caeli, I decided that Didot (serif) and Bebas (sans serif) should be best friends forever. Sometimes we invite other whimsical fonts over for a playdate (like Learning Curve over on the right), just to make sure we're staying social and meeting new font friends.

Need to get out and meet some new fonts? Try some of these Laurie recommends:

FontSquirrel.com
Typekit
Google.com/webfonts
Dafont.com

4. Color, the short list

Color is powerful. Use the force wisely. Colors are not there to merely decorate your web space, but they can also play a unique function in guiding your reader through a site.  Are all your post titles in the same color? Does that connect to your menu or to your Instagram feed?

Readers want a way to organize their time in your space. Help them through the use of 1-5 consistent, beautiful colors.

I was torn on this one, and actually asked Laurie, "what if your banner has more than five colors, could that still work?" Funny enough, she took the time after class to come on over to Pars Caeli.

Here's one of my favorite tweets: "And your site is so lovely. I especially like your favicon! Beautiful work." 

I love my little cloud.


5. Look no further than your lunch for color inspiration

Seriously, she had made the most beautiful lunch. Greens, purples, earthy browns. And she used

Genopal.com/pic2color to make color palettes from a photo

Other great places for color palettes?


I found this color scheme through Design Seeds after salivating and daydreaming through 100s of great choices. I really have to set a time limit on myself when I hop over there to Design Seeds.


So there you have it, my friends. Ready to recreate and subtract? Even if you're not a blogger or web guru, consider how your fashion, stationery, magazine, and interior design choices follow many of these same guidelines. 

Put it in your purse and take it away.

Thanks for stopping over. It's been really wonderful to have you here.
XOXO,
MJ