Posts tagged kids craft
Crayon Scratch Off Fireworks
Do you remember making crayon scratch offs as a child? Enjoy the same fun with your children with firework art.

Do you remember making crayon scratch offs as a child? Enjoy the same fun with your children with firework art.

Crayon scratch off art is a fun project that shows off the bright colors that lie just below the dark, top layer. The contrast of the bright and dark make a great backdrop for firework art!

Did you make these as a child? I remember pressing so hard against a piece of white paper with my crayons, covering every last bit of white space. And then grabbing the black crayon to cover over it all. 

For this firework art, you'll need:

  • Posterboard or heavy paper
  • Crayons or oil pastels
  • Black tempera or acrylic paint
  • Paintbrush
  • A scratching tool like broken tip pencil or dull pen

Begin by covering your entire paper with color. We wanted to create a firework sky perfect for the fourth of July so we made a spiral of blue and red. Be sure to go all the way to the edges.

PC_crayonscratchoff_firework.jpg

Next, paint on an even coat of the black. Let it dry completely. To be sure that the black is a solid, deep tone, add on another coat of black paint and let it dry. This whole process took less than an hour.

Once dry, take your scraping tool and draw fireworks of various shapes and sizes. Be sure to leave enough black on the paper to illustrate the night sky. Add in bits of sparkle and stars that shine through the shapes that you create.

Keep in mind that sometimes the paint will require a few strokes to remove completely. And some will remain on the poster board, making a scattered fizzle like we all love in our favorite fireworks!

These would be a great craft to set up for the kids at your July 4th celebrations! Fireworks before it even gets dark!

XOXO, MJ

P.S. If you're joining in the 18 Summers Challenge, and making the most out of this summer with your children, join us tomorrow as we make some marbelized paper from shaving cream and food coloring.

Watercolor Resist Banner
The grand reveal of a resist technique make them a lot of fun for kid creations. Try this process to create a letter banner from washi tape and watercolors.

The grand reveal of a resist technique make them a lot of fun for kid creations. Try this process to create a letter banner from washi tape and watercolors.

We've been out enjoying the weather as much as we can this week, but we've had a lot of rain mixed with warm temperatures so we had some great time indoors working on summer reading and this fun watercolor resist banner for Father's Day.

I'd seen some of the incredible posts that Jean from The Artful Parent has created with resists. We decided to give it a try, making our own letters from washi tape and then applying them to watercolor paper.

The grand reveal of a resist technique make them a lot of fun for kid creations. Try this process to create a letter banner from washi tape and watercolors.

The grand reveal of a resist technique make them a lot of fun for kid creations. Try this process to create a letter banner from washi tape and watercolors.

Any image or shape can be used. We decided to make our own letterforms to spell out Happy Father's Day. Using parchment paper as backing, we created the letters with tape. Once they were the shape we wanted (good practice for my 5-year old as he solidifies his formation of letters), we trimmed and embellished the edges to add some flair.

Next we stuck each letter to its own piece of watercolor paper. The children decided that they wanted each letter to be one color, and we practiced using the watercolor paints. It was a tough adjustment for some since our usual painting process involves putting a blob of paint on and smoothing it around. Watercolor is much more fluid, and the brushstrokes can be a lovely part of the finished product. We're still working on our technique.

In the meantime, we created a colorful banner, which was a lot of fun to peel and reveal. I holepunched the top corners of each letter, trimmed them into a slightly more angular shape, and tied them together for celebrating.

The kids were pretty proud to see their teamwork adding joy and color to our space, and they're ready to paint some more.

Have you tried watercolor resist before? With your children?

xoxo, MJ

P.S. If you're following along with the 18 Summers Challenge, we're making classic balloon rockets tomorrow. Join us!

Rainbow Water Music
A quick and fun way to bring music into your summer! Create a scale with water and food coloring and let your children try out their own music.

A quick and fun way to bring music into your summer! Create a scale with water and food coloring and let your children try out their own music.

Water makes beautiful music! And through this simple activity with food coloring, eight identical glasses, and water, you can discover an entire musical scale.

In our home, we always have music playing (or are playing music) so when I saw this graphic on E is for Explore, I knew our kids would enjoy creating their own color-infused instrument. The beauty of this activity is that it's great for any time of year, uses what you already have, and clean up is super fast, too. It also teaches measurement and fractions, pitch, color mixing, and so much more!

We used 8, 8-oz. glasses and filled them in with measurements of 8 oz., 7 oz., 6 oz., 5 oz., 4 oz., 3 oz., 2 oz., and 1 oz.. Once the glasses were full, we began the color process. Everyone was able to mix their favorite color with a wooden skewer until we have a spectrum of eight colors.

We used our silverware as the mallet for the water xylophone. At first, the kids just wanted to hit the full run of notes, up and down, along the sides. But the more they hit the glasses, the more they began to recognize music within the collection of sounds.

Can you name the tune we're playing?

We tried recreating simple songs that we all know. And as we did so, we adjusted the amount of water in each glass. Did that note sound too sharp? Or too flat? And we'd add or pour out water accordingly.

A quick and fun way to bring music into your summer! Create a scale with water and food coloring and let your children try out their own music.

A quick and fun way to bring music into your summer! Create a scale with water and food coloring and let your children try out their own music.

Have you ever tried this out for yourself? The food coloring is not necessary, but it definitely adds to the fun!! And perfect for a sunny day.

XOXO, MJ

P.S. Don't forget to check out all the ideas for the 18 Summers Challenge by searching for #18SummersChallenge. We're continuing with explosions and transformations tomorrow with our own volcanoes and soda pops!

We're Going on a Leaf Hunt Wreath with Classic Play
PC_fallwreath_1.jpg

Celebrating fall for all the right reasons - the smells and the flavors, the sounds and the feel. I created this easy Leaf Hunt Wreath with my youngest last week, and I'm delighted to be over at Classic Play sharing a group of mini projects that ended in this.

We're still working out the kinks in the back-to-school schedule, trying to fit in all that we'd like to do without becoming totally exhausted. Sometimes a group of smaller projects works best for us... like this one. Over a series of days, we went on a hunt for fresh fallen leaves, we sorted and pressed them, we admired and painted them, and then we created the indoor fall wreath to show off all of our work and time together.

PC_leafwreath.jpg

The final creation is a colorful addition to your home's fall decor, and your little ones can feel good about their time spent, over many days, hanging out with you!

Happy fall!

xoxo, MJ

If you're looking for more great ideas, check out this easy pumpkin decoration and follow our board for all your fall and Halloween brainstorms!

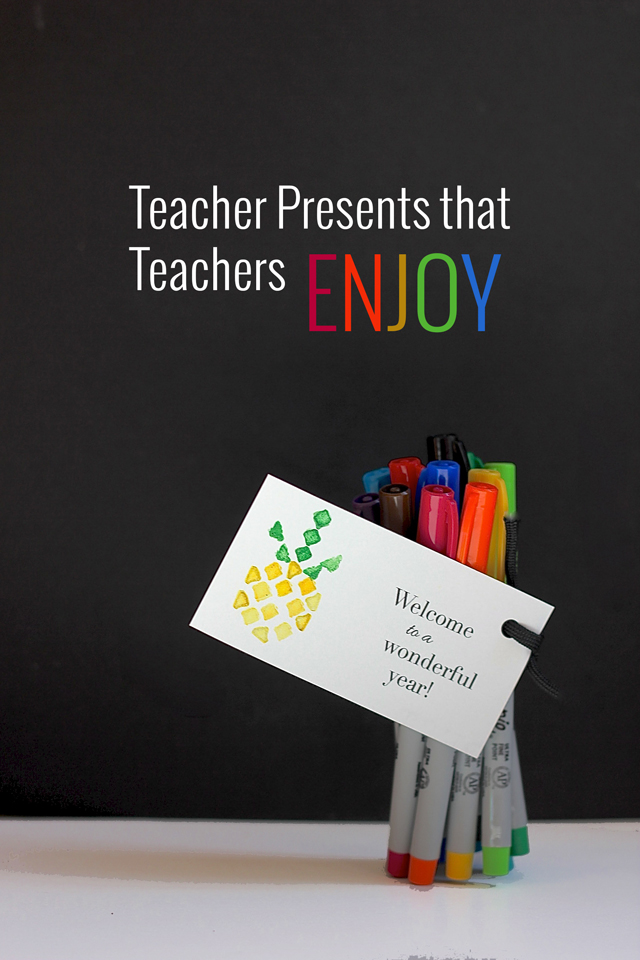
Welcome to a Wonderful Year Teacher Presents & Free Printable

This shop is part of a social shopper marketing insight campaign with Pollinate Media Group® and Office Depot, but all my opinions are my own. #pmedia #inspirestudents http://my-disclosur.es/OBsstV

Pineapples are all over the place these days. They're trendy now, and during colonial times, the pineapple symbolized the warmest welcome you could extend to a guest. It has continued to evoke a sense of hospitality and sweet goodness throughout the generations.

Extending welcome is a primary job for a teacher in the first month of the school. Around here, we're already in the third week of school, and the newness is beginning to wear off...which means... it's the perfect time to give your children's teachers a present that they want.

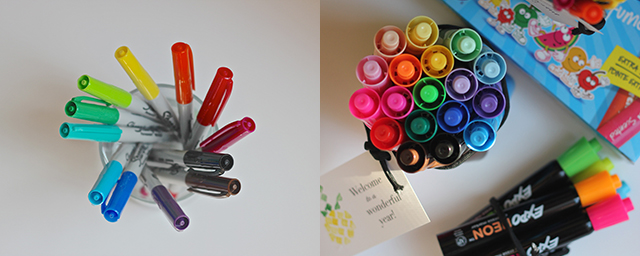
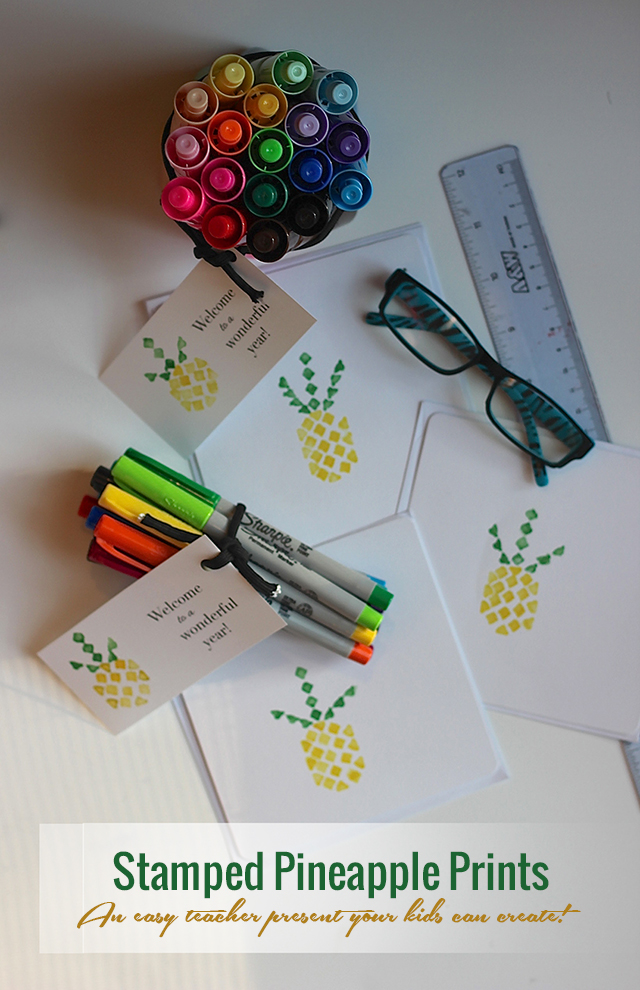
Sharpies! Smelly markers! Window markers! Great pens! The list of fantastic school supplies is a long one. Children aren't the only ones who love these colorful tools. Show the teachers in your life that you look forward to what the next months hold with a Welcome to a Wonderful Year present. You and/or your children can create these gift tags or notecards using pencil erasers and stamping pads. 


We bought fun school supplies at Office Max. Right now, you can save $5 off your purchase of $20 or more on select Newell Rubbermaid brands which include all of our favorites (PaperMate, Expo Neon Window Markers, Sharpie, Uni-Ball, & Mr. Sketch) And, you can cash in on Office Depot Rewards for shopping at Office Max as they are owned by the same company! It's kind of hard to resist...Head over to your Office Max or Office Depot and take advantage of the deal while supplies last.

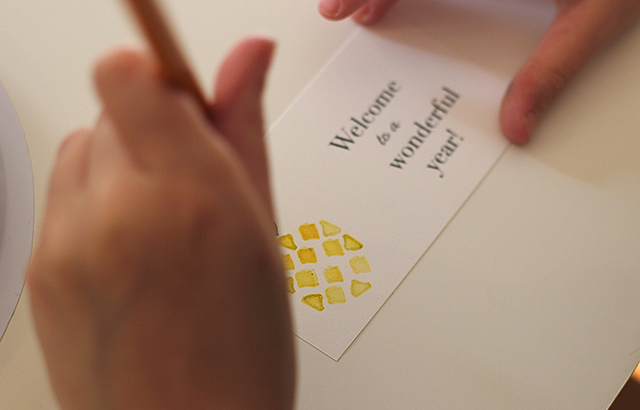
You'll need some pencils with fresh erasers, an inkpad, and some paper to make these pineapple prints. Draw simple shapes on your erasers, like the ones shown above. With an X-acto knife, cut around these shapes. We made two sets of these shapes so that one of each could go into the yellow and green.

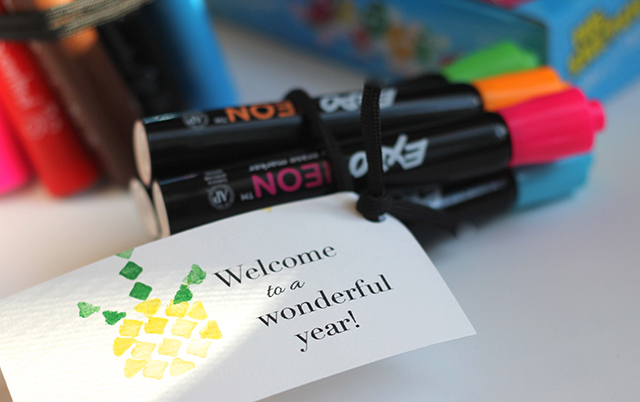
The pineapple shape is a breeze once you get the hang of it. Using a combination of diamonds and triangles, you can create a charming geometric design.

Or, if you aren't ready to take the project right now, click here to download your own pineapple printables.

Wrapping up a bundle of these fun supplies with a parachute cord or ribbon and a tag, lets our teachers know that we appreciate them, and we're looking forward to working together!

My oldest (9) and I created these together in less than an hour. Holding her back from using all the colorful markers was the hardest part....

Happy making!

XOXO, MJ

Back to School Geometric Initial Totes

This shop is part of a social shopper marketing insight campaign with Pollinate Media Group® Elmer’s and Wet Ones, but all my opinions are my own. #pmedia #CraftandCleanUp http://my-disclosur.es/OBsstV

PC_geometricmonogramtote_pin.jpg

We are getting excited for school around here, and, to celebrate, we created geometric initial tote bags to hold the after-school supplies. Backpacks, lunchbags, and school shoes of all sorts are filling the store shelves and catalogs in our mailbox. Ready or not, summer is coming to a close and a new school year is about to begin. Quite honestly, it's one of my favorite times of year. The beginning of school is like New Year's, with better Midwestern weather. So much potential bundled up into fresh pencils and new notebooks.

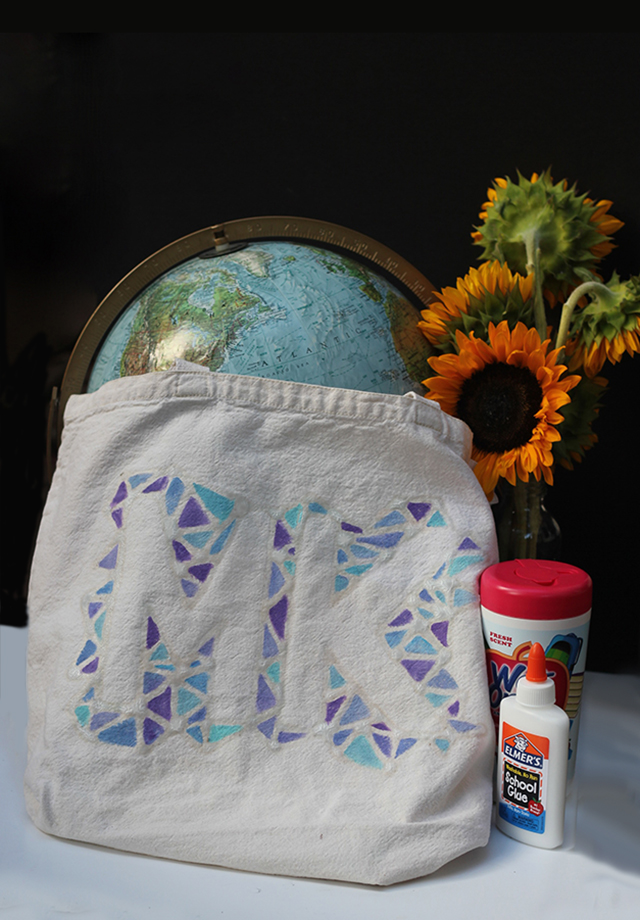
For once, we're ready with school supply purchases. I like to hit Target early to see the entire landscape of what they're offering. I grabbed up this Elmer's and Wet Ones combo pack in the Back to School section. The pairing of these two is genius.

PC_geometricmonogramtote_8.jpg

This year my girls, now in second and fourth grade, are involved in a full schedule of after school activities. We purchased some awesome backpacks, but we were still in need of something to hold the piano books, soccer balls, Daisy folders, choir schedules, and more. Little hands tire quickly at the end of the day and carrying all of the other equipment in their arms just isn't practical anymore.

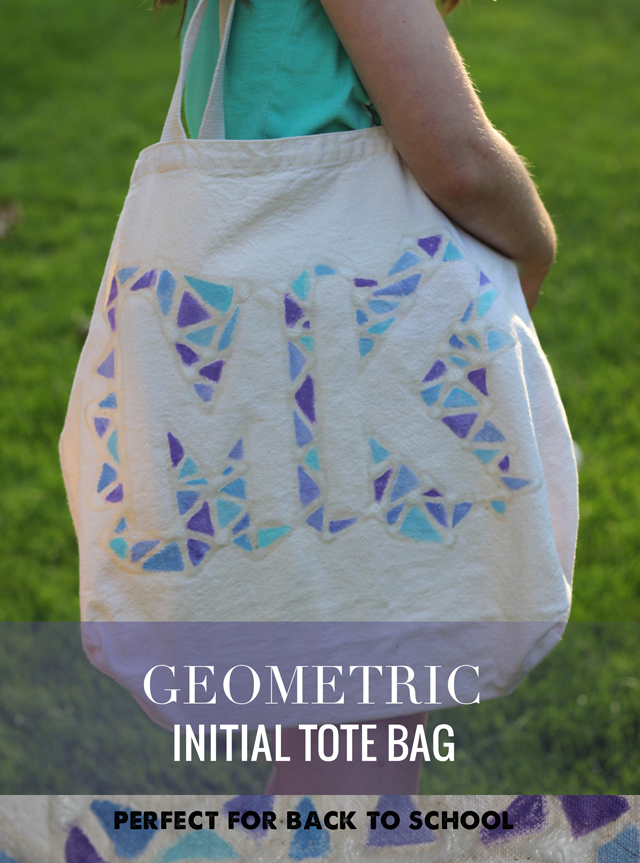
So, with the help of some Elmer's glue and a pack of Wet Ones to clean up our smudges and messes, we got crafty and transformed some plain tote bags into geometric initial totes that the girls can use every day.

PC_geometricmonogramtote.jpg

We purchased durable canvas tote and drawstring bags, found some acrylic paints in colors that the girls loved, grabbed our Elmer's glue and a paint brush and went to work.

To begin, I drew in a very light pencil, each girl's initials on the bag. I freehanded ours, but you could easily transfer on a large letter image from your favorite font. I'd recommend something simple and bold since the detail of this craft comes through in the geometric shapes.

PC_geometricmonogramtote_1.jpg

Next, trace over your lines with glue, trying to maintain the same thickness in each line. Sometimes you'll catch an air bubble or make your own goober so be sure to keep a Wet One wipe close by to clean up your mistake in no time.

PC_geometricmonogramtote_2.jpg

Once you have your initial outlined, the fun begins! From the edge of a letter, draw a small triangle and then another and connect them. Be silly, go geo-crazy, and surround your letters with shapes. Be sure to leave the inside of the letters clear of any glue. Make sure that the layer of glue you paint is thick and dimensional.

Let glue dry for a good 2-4 hours.

Grab your paints. We chose just two colors for each bag and mixed different shades together to create an analogous palette. Paint each shape right up to the glue, allowing the glue to act as a barrier to the next shape.

PC_geometricmonogramtote_7.jpg

My ladies were quite happy with their new, personalized bags. Fingers crossed for a cleaner minivan.

PC_geometricmonogramtote_6.jpg
PC_geometricmonogramtote_3.jpg

These bags are getting a workout already with soccer practices nearing and piano lessons every Monday. I love that my ladies are so well rounded and involved, and I'm happy they have some place to keep all of their stuff for these busy times as well!

PC_geometricmonogramtote_4.jpg
PC_geometricmonogramtote_5.jpg

So many possibilities with this technique! Find a bottle of Elmer's gel glue to create a washable design for your bags that might need more laundering.

We're on the countdown to school with just over three weeks to go. How about you?

xoxo, MJ