Posts in Kids
Parent Helper: Audio books for kids

Friends, I have been waiting to share this new nugget of goodness that has transformed our witching hour around here. You know what I mean by witching hour, yes? I think it hits everyone's house at slightly different times, but ours hits almost exactly from 4-5 PM every day. At this point, the kids have had their snacks, finished homework, and are not quite motivated enough to find something to entertain themselves (or one another). And so usually, they'd turn to me to play or to suggest a way for them to enjoy the next hour, and by that point, I'm frantically trying to wrap up work, get dinner on the table, and handle any other household chores that have been waiting on me. The combination of parent and child patience levels at their lowest is a recipe for disaster.

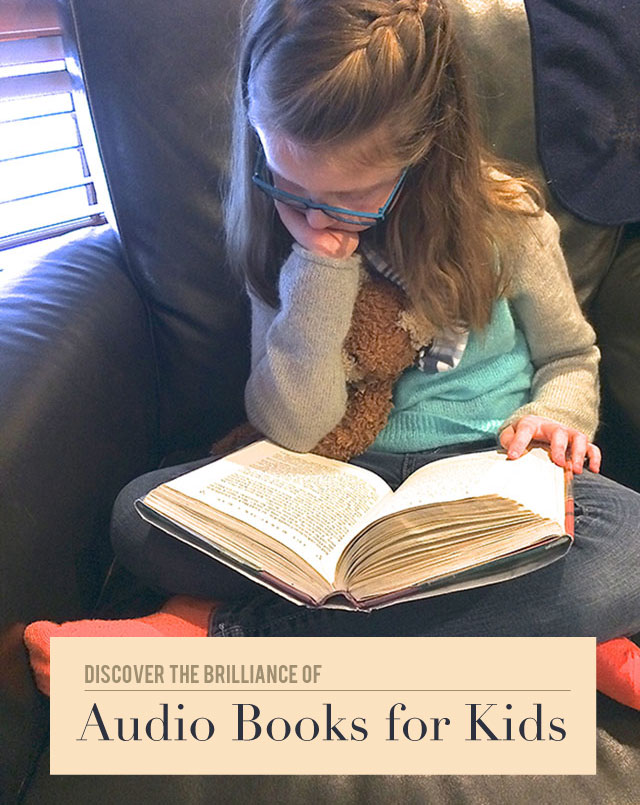
In our last visit to the library, we spent some time in the audio book section, or the "read-alongs" as my kids call them. My youngest, L, at four, checks out quite a few of these because it's an easy way for me to have him attentive to books even when I can't be the one reading along with him. He loves the musical backgrounds and bonus songs that some of the books feature. His big sisters were reminiscing about their own experience of these picture books with audio and lamenting that they don't have the fun of these any more.

Seeing that I had a teachable moment right in my hands, I walked with them to the audio books for kids section. Right away, they recognized titles that they had read and some that were on their wish lists. C, our newly confident reader, was happily surprised to find Mr. Popper's Penguins, one of her older sister's books that she'd been eyeing for a while. She hasn't quite had the gumption to pick it up on her own, but knowing that she could be read to and follow along broke down her fear.

Through their elementary school, M and C are required to read or be read to a certain number of minutes per week. I have seen C's confidence grow as she listens along to the British narrator of the story tackle the complicated words and phrases with her. She's able to sink into the story a bit more and use her imagination to make the scenes come to life. This is not a substitute for her independent reading time but a nice addition to her learning.

L memorizes his books through the great use of pattern, repetition, and song that professionals can provide.

M loves the opportunity to put in headphones and be given permission to tune out to dive into a book. Since I have no audio learners (save my husband) in the house, this exercise has been a helpful way for them to expand their learning styles, too.

Last week at 4:15, a moment I typically dread, I looked around to see all three of my children engaged in audio books - content, learning, and completely occupied. It was like a mini-retreat for me and dinner prep and dishes became an enjoyable experience. And we all came to dinner calmer.

Have you tried audio books with your children? Do you utilize them for your own reading? Check out Paige's recommendations for some great audio books.

xoxo, MJ

P.S. Thanks to Ileana for this helpful suggestion: "I used audiobooks all throughout my daughters childhoods. The youngest would drift off to sleep with a "story tape" after we finished with bedtime reading. She is now addicted and still listens to audiobooks as a young woman. I credit the good vocabulary of my children with this habit. I wanted to pass on these two resources of great audiobooks, one the D'Aulaires Book of Greek Myths read by Paul Newman, Sidney Poitier, Kathleen Turner and others. The other is a collection of tales and fables for children by Jim Weiss (he has a very soothing voice)." 


Mini Cooks: A healthy snack
Minicooks_red.png

It's time for another great recipe to enjoy with your Mini Cooks! Big thanks to Joy and Sheri for this awesome series. Today Sheri takes on snacks!

We keep our snacks, sorted sweet or savory, in our pantry on the low shelves and on the bottom shelf of the fridge so that the kids can help themselves as they'd like. I am all about independence and knowing when you feel hungry. I also want my children to make good choices.

Honestly, I have a love/hate relationship with snacks and my kids. Sometimes snacks can supplement our meals so well and other times they devolve into another dose of sugar. I'm always on the hunt for a healthy snack that will appeal to them. I think Sheri heard my silent plea to the world and created these yummy granola bars with her son, Noah.

I've never made granola, and I'm ready to dig in.

I love their circular nature, and they're sized just right for little hands (and stomachs). Hop on over to see adorableness meet healthy. Thanks Sheri and Noah!

Guess what? We have a great collaborative Pinterest board for Mini Cooks that you should check out for new ideas on fun recipes and tips for cooking with children.

Catch up on the series with the intro of “5 ideas for getting started with Mini Cooks” and don't miss Joy’s yummy breakfast of “Egg in a Basket”

xoxo, MJ

Paperclip Shamrocks

I'm more than a little bit Irish, and I'm ready to celebrate with lots of green and good cheer when St. Patrick's Day hits us in a few days. The kids and I decided that we needed to add a few lucky touches to our home in honor of the special day.

And guess what inspired me? Excess. What do we have a ton of? Yes, you guessed it paper clips! Let's use these to make our wire sculptures. Grab your pile of paper clips, a green permanent marker (Sharpies are awesome for this), and some lightweight wire.

Spread the inner loop of the paperclip out to one side. Your clip will now resemble a spread V or a checkmark.

Spread the two ends until they meet each other in a petal-like formation. Continue this process with the two other clips.

Grab light wire and wind it back and forth at the connecting point in the center of your shamrock. Use the excess wire to function as your shamrock stem.

Color the clip with your marker, painting both sides and the wire as much as possible.

Wind the stem wire around a pencil for a St. Patrick's Day topper. Tie the shamrock around a green ribbon and put it atop a special package. Stick in your lapel for a festive touch to your outfit! We planted ours with the lucky jade plant to wish our guests the luck of the Irish!

Happy St. Patty's, friends!

xoxo, MJ

Squeeze in Time for Play

How can you can tell which games you or your family love the most? As I discovered, they are the least photogenic. I adore board games; marathon monopoly weekends are a favorite part of my childhood memories. As a tween, my room was right next to the game closet (formerly known as the linen closet that was taken over by puzzles and family games). And Saturday evenings were meant for a tough match of Win, Lose, or Draw or a casual hand of pinochle with my parents.


Playing games as a family is not only fun and a sweet stress reliever, it allows families to get to know each other on new levels. Watching teamwork develop and competition rise and fall... even the teasing and antics all become a part of who we are as sisters, mothers, brothers.


I'm sharing our top board games for kids 10 & Under over on my Squeeze Time spot at Classic Play! Have I mentioned how much I love contributing to such a vibrant community? Thanks for having me back, Jen. Come check out our picks and argue with me over the quintessential board game...


Have a bright weekend, friends!


xoxo, MJ
Mini Cooks: Time for breakfast

Breakfast is our all-time favorite around here. We could have pancakes in the morning, cereal and toast for lunch, and dine over a stack of French toast with a side of eggs. Our diets would lack balance but, hey, we'd be happy for quite a while! Breakfast is also such a wonderful meal to invite kids to cook! Think of all the Hollywood portrayals of the red-faced, smiley children, thoughtfully carrying the tray of morning treats for Mom and Dad to enjoy in bed.

Well, that hasn't quite happened around here, but we do make it a practice to cook breakfast together on the weekends. Sundays are the best time to gather around the kitchen island and grab a mixing spoon. We bring the griddle out for small eyes to watch as bubbles appear in the circles of batter. We snack on chocolate chips (one for every year of your life and extras for every person in the family who loves you!) as we take in the rich smells of the bacon crisping and popping.

I think it's important for my children to understand the process of food preparation. The act of stirring to smoothness, ladeling an even portion, waiting and watching are all part of the amazing observation of life, and I find becoming a part of this work has made them more interested in food and independence more generally.

Joy has a fun and easy breakfast meal with eggs (and gorgeous photography) that I can't wait to try with my kids. Guess what's for dinner tonight? More on Egg in a Basket.

And if you're wondering how to make your kitchen a great space for your mini cook, check out last week's ideas on inviting them into the kitchen!

Have you made an egg in the basket before?

xoxo, MJ


Pinners to follow: Learning activities & crafts

Oh, Pinterest, how I love thee. I use my account as the cutest filing cabinet ever to store my ideas for all areas of life. But sometimes the seas of Pinterland are too much, and I need a compass to find my way to just the right place. I'm launching a fun new mini-series to help us find the best of the best in areas that interest.

First up on the list: Pinners to follow for learning activities and crafts

Late February, amidst the sub-zero temps and gray sludge, is my favorite time to plan out summer learning for my three kiddos. I think I need the mental transport to warm and sunny moments. We also have our own Mommy and Daddy school in the summers, but not only that, I also love to throw in learning whenever I can.

Pinterest is a fabulous resource for teachers and parents to connect joy to education. But where to begin? Check out these three pinners and some of my favorite boards.

Melissa of ImaginationSoup.net

Melissa is a Pinterest expert. In addition to her keen knowledge of the platform, she is a dedicated teacher, writer/blogger, and an involved mom. Her boards have specific information on learning apps, literacy activities, and fabulous gifts for kids.

My favorite pins are her book list picks for very specific audiences, including Halloween books, great series, baseball reads, comic and graphic novels, and "Can't put them down" guides.

Emily of Second Story Window

Emily fancies the celebrations and joy of life with children, and she's a gal after my own heart. She's also a teacher and momma who creates educational materials over on her site.

My favorite pins are her 21 "little" boards. If you are looking to engage with your toddler to preschooler, there is a virtual plethora of goodies to be found in these well-categorized boards. She is also a collaborative soul so check her mega boards like the Kid Blogger Network Activities and Crafts and the New Teachers boards in particular.

Allison of No Time for Flash Cards

Allison is dedicated to the enjoyment of learning (bring it!). She focuses on early learning and play, and every time I visit her site, I'm inspired to get down on the floor and create something with my kids.

My favorite boards are her subject specific ones covering science, math, and children's book related crafts. Also check out her board just for boys that has so much good messiness and learning to offer.


Do you have favorite pinners to suggest? I'm always looking for the best finds.

And if we're not pinning buds yet, find me over there at MJ | Pars Caeli.

xoxo, MJ


Mini Cooks: A recipe for success

Every Wednesday for the next six weeks join in for a fresh collaborative series called Mini Cooks. I'm teaming up with Sheri of Donuts, Dresses, and Dirt and Joy of Frock Files to explore the culinary world through the lens of children! We'll be offering you simple recipes and cooking adventures that you can do with your children, nieces/nephews, neighbors, and more.

We've been cooking up (pun intended) a fabulous series to give you practical recipes as well as helpful ways that children in your kitchen can get involved, learn important skills, and grow to love the foods they create. I'm delighted to kick us off with five ideas on how to enjoy time in the kitchen with your mini cooks!


Cooking is more comfortable when the tools of the trade fit your size. Take a look at your drawer or canister of kitchen gadgets and see what might work best for little hands. Utensils need not be used as they were originally intended... a brightly colored measuring spoon can work to mix ingredients and playful plastic cups can be a great substitute for larger adult measuring cups. Or maybe make a splurge for a magenta spatula or little egg whisk to let your littles know that they were thought of, too, in the process of food preparation.

Be sure they have a safe and secure way to reach countertops or consider taking the cooking process down to their height at a kitchen table or play table.

Dress up is always fun so consider if mini aprons and chef hats might be your thing!

Perhaps the aspect that keeps our children out of the kitchen more than any other is safety. Ovens, ranges, knives, and processors present very real concerns. Our job as the big chefs, if you will, is to make sure the space is set up for success and that we monitor mini cooks in the kitchen at all times.

First, be sure to alert children of possible dangers and help them understand safety zones. Model good locations to stand when cooking by the range, opening the oven door, or flipping on the griddle. Where are hot spots? What is breakable?

Remember to teach clean habits during the prep and clean up processes.

Of course, certain processes are not child appropriate, and mini cooks need to understand this, too. Children can still be engaged while adults take on the more risky elements.

This one I love. When my children are really involved and enjoying our food prep, it's a direct result of the pre-planning I did to make it a success. Having all of the pots, pans, bowls and tools washed and ready to use; thinking through the preparation process and what ages can handle what skills; talking with my children about what recipes they want to try.

In our house, it's a rite of passage to be able to use the hand-held mixer. And from the point that someone can stand on their own, my children know that they are welcome to hold the measuring cup over the bowl. My oldest, M, now 9 is excited to have the cutting board and dicing responsibilities now. Think early and often invitations to participate!

Forgive this former teacher, but I cannot pass up the amazing teachable moments found in the kitchen. From the history of recipes to the geography of the people who created them to the mathematics of measurement. From nutrition and agricultural learning to business and art lessons, the kitchen can become the most fertile learning ground in your house. Let it be!

Every child has her or his own limit on the messy they are willing to do. My younger daughter, C,  embraces and wears all things sloppy as she bakes. My son wants his hands clean as soon as they get wet. And neither perspective is good or bad. Try to expose your children to both sides. Engage in the messiness of goopy recipes that require hands on and use the tongs and scoops that can keep hands clean.

And remember that floors, sinks, counters, ovens, and even ponytails can be cleaned so that your mini cook can feel good making the necessary messes for his or her masterpiece!

Join us next Wednesday as Joy brings us a simple breakfast treat to entice your mini cooks into the kitchen.

Big thanks to Joy and Sheri for your incredible creative touch!

xoxo, MJ

The best kind of heart attack

Happy Valentine's Day, lovelies!! Have I told you lately that I love you? Today is the day to do it. And I do! Thank you for all your love, commenting, faithful reading, and support. How are you spending your day and/or weekend to celebrate? We have small plans to go out to a movie together and enjoy a heart-shaped pizza, but I'm mostly looking forward to the warmth of the fire and snuggles on the couch as we tune into the Olympics.

Valentine's day with all the color and emotion is one of my faves! I can't help it; what can I say? I always wanted to work for Hallmark as a child.

The great people of Cricut sent me (and many other talented folks) a gift of crafting goodies including stacks of hearts in all shapes, sizes, and colors and encouraged us to give someone we love - a heart attack. This is only the best kind, of course... so I decided my daughters needed some extra lovin' in their lunchboxes. AND, I can't resist an opportunity to make a pop up heart.

Grab your crafting wire, spin it around your finger to create a coil, and washi tape it to the lunchbox. Ta da - a surprise I love you pops out as you open your lunch!

These hearts came pre-cut and ready to string for the perfect drawbridge banner!

And who says your mesh pouch can't double as a banner hanger to send some extra hugs and kisses?

That intricate cut Valentine? All thanks to the fabulous Cricut Explore. Thanks for making me look like a rockstar mom!!

Why not go over the top a little today? Or reach out to everyone you love? Let's LOVE BIG.

Happy Valentine's Day!

xoxo, MJ


Valentine (no sew) t-shirt bag
Every now and again, I add features or links to posts from companies that sponsor the blog. When I do this, I'll let you know right at the top of the post. Sponsor companies are ones that I select and shop myself. Products are theirs, but opinions are mine. Today's valentines were selected by me and provided by Minted.
PC_valentine.jpg

Happy (almost) Valentine's Day, friends! We are in full-on Valentine prep around here with classroom parties galore. The great folks at Minted offered us classroom valentines of our choice (and, oh, the choices!), and I'm pretty sure these are the nicest valentines we've ever sent. They came personalized with my daughter's names, too, so we've had fun adding special touches to the envelopes (hello ring pops) since the hard work was already done!

Since our cards are stepping it up this year, we decided to take our valentine container up to the next level, too. Did you decorate shoe boxes to collect your valentines as a kid? Or make a heart complete with doilies and ribbon to hold your cards? I did, and I loved the creation of the container almost as much as the cutesy notes themselves.

Well, times have not changed, but instead of gluing my box or envelope, my kids and I crafted some sassy t-shirt bags to tote our love notes. These bags are super easy, upcycled, and take less time than construction paper and glue (no...really). I have a sewing machine that loves dark corners of my basement, and I wasn't ready to change its mind for this project so I found this idea and made it valentine.

PC_valentine_1.jpg

(And also, I love that my daughters were most excited to send their teachers cards!)

STEP ONE:

Dig to the bottom of the drawer, or for us the bag of giveaway clothes. We found a pink and a red t-shirt that were too small to wear but in awesome shape, ready to be remade. *Just a note, if you're making a bag suitable for kids, use a kids t-shirt so that the bag won't be too large for their size.

STEP TWO:

We wanted a blank canvas so we turned the shirt inside out. Trim off the tag as well as the sleeves (with a little extra for the handles). Next trim a rounded or squared shape from the neckline to create the handles of your bag.

PC_valentine_3.jpg

STEP THREE:

We made our bag with three holes in the bottom and therefore we cut three slits at the bottom of the shirt, about equi-distant from one another.

STEP FOUR:

With the sleeves that you trimmed, cut 1/2 inch strips the entire length of the sleeve width. Pull on the strip to make it curl on the edges (neat-o trick).

STEP FIVE:

Grab one of the strips, pin it with a safety pin on the end and feed it through the seam allowance at the bottom of the shirt. Thread it through two sections of the shirt, pull the cord, and tie a knot. Continue to do this with the two other strips and the remaining seam sections. Tie all ends into one large knot at the bottom of the bag.

PC_valentine_4.jpg

STEP SIX:

Grab your freezer paper and cut a heart stencil. Apply paint evenly with the brush or sponge of your choice. We chose a metallic paint to add some shimmer to the bag and stamped simple hearts on the front and back.

PC_valentine_6.jpg

That's all there is to it! Our first shirt took us 20 minutes with painting included, and we whipped up the second in under 10.

PC_valentine_11.jpg

My 9-yo could craft these on her own, and they'd make great party favor bags for a sleepover or to go bags from a crafternoon.

PC_valentine_7.jpg
PC_valetine8.jpg

Maybe gift wrap for a galentine's day present?Or make one for yourself to show that you love Love Day!

PC_valentine_10.png

Happy Valentine's, dear readers. You all are the sweetest!

xoxo, MJ

Host a You Paint Party

Birthday parties!! They have become bigger and pricier since my sweet days of paper crowns and kids meals at Burger King. My daughter, M, and I were dreaming up what would fit her personality and passion for a 9-year old sleepover party with friends. Locally we've had all sorts of group painting stores and party places open up. These are fabulous for unique get togethers, and they are also a little more than we could afford so we decided -- Let's do our own You Paint Party.

PC_youpaintparty.jpg

It began with the 2 inch canvases that M painted for invitations. She embraced the abstract and each one became its own masterpiece. We glued event details to the back and mailed them out.

PC_youpaint_invites.PNG

M also loves donuts so we decided that the girls would paint canvases of sprinkled donuts on them. We kept our eyes open for great sales on canvases, and we were able to grab a bundle from Michael's for a steal. We chose 12" squares to accommodate our studio space (also known as our kitchen) as well as ease in transporting after the party.

To convert our home into a studio, we prepped the kitchen. Covering the table with freezer paper and removing the chairs was the first step. Creating make-shift easels from canvases propped on coffee mugs worked out perfectly!

PC_youpaint_setup.jpg
PC_youpaint_cup.jpg

Each painter received a thin and thick brush as well as a mini palette of paints. We created our palettes from cardboard sheets, and each artists had her own array to choose from.

PC_youpaint_palette.jpg

To make our guests of every skill and comfort level feel ready to dive into the project, we decided to offer some easy guidelines. Paper plates made a handy outline for the outer edge, and the bottom of paper cups become our stencil for the donut hole.

PC_youpaint_circle.jpg

We began with the background color(s) first to set the stage, and already personality came through!

PC_youpaint_first.jpg

We then moved onto glaze followed by the cake of the donut. The best part was all the giggling and compliments they lavished on one another. Such a supportive group of painters!

PC_youpaint_second.jpg
PC_youpaint_finished.jpg
PC_youpaint_final_pin.jpg

The form of a donut is such a beautifully simple one that painters from all backgrounds can own their own sense of style to it! I was amazed at how many variations we had on the same theme, and I loved that no one felt frustrated in trying to make their painting look too realistic. There's something fantastical about donuts, no?

xoxo, MJ

Valentines in the Classroom
PC_valentinesclassroom.jpg

Hey lovelies! Valentine's Day is but a week away, and we are stamping, sticking, and stuffing some gorgeous classroom valentines from Minted at our house. Check back next week for a super cute bag we'll be making to tote all the love notes!

Have I mentioned that I'm a classroom mom? I have resisted and avoided for five years until this year, my oldest daughter's teacher asked me (!) to be the stewardship parent. And I said, only if my husband and I can do it together. So we are. We are the parents for the class which means we get to organize their service projects (which is really why I jumped in) and plan their parties (which is really why I ran away at any notion of assisting in the past).

The third graders will have a simple yet fun-filled celebration of friendship and love, rotating from center to center. I've been scouring the interwebs and pinboards to find crafts that are hip enough for this tween age and easy enough to accomplish in 15 minutes.

Here are my top five picks for a Rad Classroom Valentines:

1. Paper heart chain: Easy supplies, great results. Make one for your doorway even if you don't have kids!

2. Orgami hug: Two hand prints and an accordion fold and kids can declare their love.

3. Arrows through my heart: Free printable for these beauties. And don't forget about the red velvet.

4. Chocolate covered strawberries: Slice, coat, drizzle. Repeat. And save some for the class.

5. Awesome sauce!: Love this simple addition to store bought sauce.

Any fabulous ideas you want to share?

xoxo, MJ

A letter to M on her 9th birthday

My oldest turns nine today, and I'm kinda emo. I'm dedicating today's post to her. She's an avid supporter of Pars Caeli so I hope she likes it! Forgive the gush.

Dear M,

Happy birthday to you, sweets, and congratulations on nine amazing years of life!

I write this to you from the cozy couches in the art room, looking over at our Christmas tree that every year transforms into your birthday tree. We used to decorate your birthday tree with princess lights and pink and purple gingham ribbon, and now the handmade paper snowflakes and sparkling tinsel feel more like your beautiful girl self. I love looking through all the photos of you that we add to the tree, even the one from the first "trip" you and I took in the wheelchair out of the hospital.

One day you might experience that feeling I had when I carried you to our new home together - just a few pounds old, all wrapped up tight in your yellow blanket - wondering how I could have been chosen to receive such beauty. Moments like that are sheer gifts of grace. I did nothing to deserve, but God richly blessed.

And I've been so blessed every moment since that day, with the keen, imaginative, and kind gift of your love. You are rare find, sweet girl; the combination of compassion with curiosity, sincerity with humor, and talent with generosity.

I see new sparks of you growing each day as you learn the world and take only what feels right to you. You are strong, more than you know, and you have such a mind - that challenges and pushes, and imagines and creates. You gobble up new knowledge and reinvent for all of us to enjoy.

But it is your heart that's won me over, the exuberance in your eyes, the softness of your smile.

Stay tender as the lessons get harder and you want to get angry with yourself. You are perfectly made, I saw it from the first time I met you.

Enjoy nine - you're going to add more to this year than I could ever imagine!!

I'm so blessed to be your mom.

I love you. Always, Mom


xoxo, MJ


Classic Play and Jen:12 Blogger Christmas

Sing it with me now:

On the first day of Christmas, Pars Caeli gave to me Lulu the Baker.

On the second day of Christmas, Pars Caeli gave to me Trouvé Magazine.

On the third day of Christmas, Pars Caeli gave to me Design Stitch Go.

On the fourth day of Christmas, Pars Caeli gave to me Design + Life + Kids.

On the fifth day of Christmas, Pars Caeli gave to me Donuts, Dresses, and Dirt.

On the sixth day of Christmas, Pars Caeli gave to me Minnow + Co.

On the seventh day of Christmas, Pars Caeli gave to me Bring Joy.

On the eighth day of Christmas, Pars Caeli gave to me Design Improvised.

On the ninth day of Christmas, Pars Caeli gave to me Frock Files.

On the tenth day of Christmas, Pars Caeli gave to me Raincoast Creative Salon.

On the eleventh day of Christmas, Pars Caeli gave to me Alexandra Hedin.

And, can I get a drumroll, pleeeeassse....

On the twelfth day of Christmas, Pars Caeli gave to me Classic Play!

First off, I can't believe that this series has come to an end, but nevertheless I am so excited to have Jen here to talk about her fabulous blog (so so much good stuff over their parents) and (hello...) new PBS series, Adventures in Learning.

Classic Play is the place where "having kids is cool" and in order for all that to happen you have to have one amazing mastermind behind it all. Jen has the wit and sincerity we parents need when transitioning children to the next stage of learning or getting into a project with your family. Cooking, playtime, crafts, reading - it's all infused with fun, and Jen's spirited illustrations are the cherry on top!

I guess it started when I had a toy/children's dress up line years ago and thought a blog would be a good promotional tool for it. Along the way, I fell in love with blogging—the conversations, the different skills it required, the friends I made. Eventually, we closed up our shop and I went all in for online publishing. 

What keeps me blogging?

The creative outlet, the opportunities that have arisen from the blog (even if the blog doesn't bring in revenue), the amazing contributors I work with, the pride I feel when I scroll through my site. I know it probably sounds vain, but it just makes me happy to look at and read it. 

Classic Play is a family lifestyle blog for creative types of parents or those who are looking for some creative ideas. I like to say it's always stylish, never fussy. As far as other places to find me? I host a pretty kickin' online series for PBS Parents called Adventures in Learning. It's one of the best parenting shows around. And I'm tooootally not biased at all ;) 

Hmm… this is a tough one!

I think this one, even though it's not a shiny happy piece, because it was the first time I ever tackled criticism. I wanted to ignore it, but I decided to be brave and tackle it head on. I've never done that before.

CORRECTIONS + CRITICISMS

This one was just plain ol' fun and helped me realize what type of parent I wanted to be—the kind who was cool with her kids being themselves

A CLONE TROOPER GOES GROCERY SHOPPING

And this one because I think it was the first time I felt brave enough to share my illustrations with people:


I'm going to be honest, I get nervous when I make big wishes; my family is wildly superstitious. But, I'm going to put on my big girl pants and make a wish. *deep breath* I would love to redesign the site to make it more functional. There is SO much fantastic content on there that gets lost in the shuffle. Other than that? I think I'll be happy with continuing to loosen up and experiment more. Blogging has allowed me to grow in so many ways. Hopefully 2014 will bring more of that growth even if it's uncomfortable (eek! I should probably be more careful what I wish for, yeah?)

Jen's energy for life and for motherhood is such an inspiration to me! She embraces everyday learning with ease, and injects a little something extra into every post. Whether you're a parent or not, you'll find inspiration on the overflow over at Classic Play.

Thanks all you beautiful bloggers for letting me feature your writing, your photography, your illustrations, your collages, and your hours and hours of sweat and tears. Blogging is an entire creative process, and I learn so much from ladies like these...

So here's to a wonderful 2014! My bloggy resolution for this year is to read more blogs. And comment more. Blog commenting has become akin to handwriting a personal letter. So I'm bringing it back with a gusto for 2014.

Watch out.

xoxo, MJ

P.S. You just have to come back tomorrow because I have a beautiful story to share with you and one biggo announcement.

P.P.S. #30sketch Day 5, for my middle school self


Design + Life + Kids and Kim: 12 Bloggers Christmas

Happy Sunday, dears! It's delightful to be here with you on a Sunday...maybe a first! I had to pull myself away from our family gatherings to bring you this goodness. We are a quarter of the way along this festive journey on the fourth day of Christmas in the 12 Blogger Christmas.

Today we celebrate Kim of Design + Life + Kids!
Honestly, I needed to feel a little independent from being a stay-at-home mother. I love being home with my daughters and getting to experience every moment with them, but I wanted a creative outlet that was just for me. Does that sound selfish? 
Keeps me blogging?
Ironically... my kids. While not everything I write involves them, many posts do. I probably would never have started DLK if it wasn't for them! I love putting together a great collage, reading about a wonderful design and sharing our experience in the kitchen. There's a great sense of accomplishment when a post goes live.
DESIGN + LIFE + KIDS (DLK) is about looking around and really appreciating what surrounds us. Whether it's a package design, a blanket's detail or an elaborate skyscraper, someone designed it and that's awesome. They're like little dreams that have come to life and we're surrounded by them everywhere.
I'm on most social media as @designlifekids and my favorite spot to share is Instagram!
I've also opened up a new shop on Etsy. Come on over to DLKmarket.
Summer road trip to Nova Scotia. It was a memorable experience in an amazing home: 
Our DIY kitchen renovation... this one is special to me since it is our first major project that I love and get to use everyday:
My husband's favorite mac and cheese recipe... His mother used to make for him and now we share the recipe with our kids. It's so good!
Growth. I did a lot of growing this year within myself and DLK and hope I can encourage that even more this year. I will be contributing on a two great blogs soon and I'm super excited about it! I hope to work with others for contributor posts on DLK as well. I'd love to share new opinions and topics on DLK! 

Kim has a great eye for all things design and delightful! Following along with her DIY kitchen makeover has been crazy good, and I love the clean lines and modern feel she and her husband have created in their new space!! And if you don't know Maya and Senna, her daughters, you are missing out on some adorableness!!

Check in to see her latest travel, her collages on great design, her recipes!! And hop on over to the new Etsy shop, too!! Kim and I collaborated on the idea of the hypertufa pots, and hers turned out so edgy and fabulous.


On the fourth day of Christmas, Pars Caeli gave to me Design + Life + Kids.

On the third day of Christmas, Pars Caeli gave to me Design Stitch Go.

On the second day of Christmas, Pars Caeli gave to me Trouvé Magazine.

And Lulu the Baker !

Happy Sunday, friends! Let's have a great week - I have more presents starting tomorrow with one of the most charming, talented, and real bloggers. You're guaranteed to learn something stunning every time you visit.

Craft Date: Paper snowflakes
PC_craftdate.jpg
PC_papersnowflakes_4.JPG

Winter craft date? It's the perfect time of year to gather inside, in the warmth, with a coffee or cocoa and a good friend and make something awesome. My friend, Renee, and I were determined to add to our repetoire of seasonal crafts after the burlap placemat success.

We decided to go simple, or so we thought, and make the paper snowflakes.

As a little girl, I remember attempting paper snowflakes, trimming off the wrong edges instead of the right ones, and ending up with a heap of trimmed pieces of flakes. Determined not to repeat this, Renee and I made six-point snowflakes following this process:

PC_papersnowflakefolds.jpg
PC_papersnowflakes_2.jpg

We had a variety of papers, and I ended up using a looseleaf pack that I've had for a very long time because of the thin, durable weight to the paper. And, the white tone was just a bit softer than our other choices.

So grab a stack of paper, sharp scissors, good lighting, and a pal.

Lots of great patterns around the interwebs will surprise and delight you, like the ones we used as inspiration: Wee Birdy, these great ideas, and you can even find paper snowflake patterns based on the new movie, Frozen (pinned for my girls).

PC_papersnowflakes.jpg

Folding the six-point pattern takes a little practice to get all the segments equal, but it it amazing the variety of snowflake you can create.

Originally Renee and I were thinking that we'd put these together in a chandelier-type arrangement. Can you imagine cascades of intricate snowflakes floating down?

Renee opted to display her snowflakes against her gorgeous red walls in the dining room. Fabulous contrasts!

Honestly, mine sat in a pile for a while, waiting for me to have time and inspiration to make something. And then I started making more and more of them of various sizes.

We have two trees in our house - our freshly cut and our (now duct-taped) artificial. The fresh tree has balls and ribbon and my favorite loose tinsel.

It needed a little something extra.

*Lightbulb.

Spread throughout the limbs now are dozens of paper snowflakes.

PC_papersnowflakes_1.jpg

If you want a simple craft that will make you feel way more talented than you might be feeling on any particular day, cut some snowflakes.

They can be used in wrapping, garlands, chandeliers, and in my opinion as awesome ornaments.

Big hugs and thanks for Renee for the motivation to make these! Can't wait to see what we'll work up for spring.

Also, Kim of Design Life Kids and I will be showing off our long-distance Craft Date soon!

If you wanna make something and need a buddy, let me know. It's always more fun to do create with a pal.

Happy weekend, lovelies! I'll be writing my arm off and sending Christmas cards! Best to you and yours. 

xoxo, MJ

PC_papersnowflakes_5.jpg
PC_papersnowflakes_6.jpg
Fresh Holiday Traditions: Pepparkakor


Voila and ta da! Today is the very last in our series of Fresh Holiday Traditions. Big thanks go to all of you for following along in the fun and also to our creative ladies who added more fun and shazaam into this Thanksgiving and Christmas holiday. Big hugs to Alexandra, Jen, and Melissa.

Alexandra baked some pepparkakor for us today!! And until today, I had never heard of pepparkakor...I love when friends allow me to learn something new. And Alexandra sandwiched eggnog ice cream between two of them which makes it all sound that much more delicious.

Based on my advanced searching on the interwebs, pepperkakor is a rolled Swedish ginger cookie. And based on my reading of Alexandra's recipe, she's simplified the process to make these much more approachable to us first-timers.

Over at our house, we have yet to make our Santa cookies. Typically we do some peanut butter blossoms and sugar cookies. What do you bake up this holiday season?

Head on over to see Alexandra's Pepparkakor. Happy baking!

xoxo, MJ


Don't miss all the other great projects in the Fresh Holiday Traditions series:

5 Minute Gratitude Journal 
Pumpkin Pancakes for Thanksgiving Morning
Gratitude Star Garland
Hand Stamped Thank You Cards

A December 1st Party
Painted Wrapping Paper
Party Hat Christmas Trees

Pepparkakor


A Holiday Baby Shower

In my first pregnancy, with our oldest daughter, I was showered with showers. Generous friends, coworkers and relatives hosted a handful of celebrations and provided everything that we could need for Sweet Baby K (as she was known to them since we had not found out the sex of the baby during ultrasounds).

Due at the end of December, I decided that late fall was the best time to cut off extensive travel. One of the last trips I took was to Pittsburgh to celebrate a shower hosted by my mom and sister. These ladies invited family, young and old, men and women, immediate and distant to come for an afternoon of laughs and congratulatory gestures.

Unbeknownst to me, my mother and sister had contacted all of the guests prior to the celebration to ask them to send wishes for Sweet Baby K. My mom then turned those wishes into ornaments and presented my husband and me with a truly heartfelt Christmas tree.

I'm sharing more about our very special holiday gift of at Unexpectant, a great blog published by my friend, Meagan, for pregnant, new, and long-time moms. I'm delighted to be over there - come check it out!

Have a lovely weekend, friends! Off to some Christmas parties and one very special date!!

xoxo, MJ

Fresh Holiday Traditions: Party Hat Christmas Trees
PC_partyhattrees_1.jpg

"Perhaps I had a wicked childhood, perhaps I had a miserable youth, but somewhere in my youth or childhood, I must have done something good."

Whether those words are sung from Carrie Underwood or from Julie Andrews, they resonate with me here today, friends. We're coming to the near close - one more week - of another great series of projects and posts from my ladies who collaborate on the Fresh Holiday Traditions series. I feel blessed to have been asked to work alongside these minds and spirits, and I feel pretty lucky that they were willing to do it one more time!!

To recap our creations thus far:

And today, we're adding Party Hat Christmas Trees - fun for the kids table at holiday meals (or the adult table), or to set around the office or house in seasonal decor.

PC_partyhattrees.jpg

Inspired by the clever craftings of Kelly from Studio DIY, we over here at Pars Caeli decided to convert our old party hats into Christmas trees! These cute cones make a great head toppers as well as darling Christmas decor.

Imagine setting up the kids table with party hats, some felt (precut depending on the ages), some pipe cleaners, sequins, pom poms, and see what kind of hats they can create before Christmas Eve dinner!

Here are the suspects, no-longer-used princess party hats:

IMG_3165.JPG

Grab some felt (about two rectangles per tree), some craft glue or hot glue, chalk, and other crafty notions.

First, unfold one of your party hats to trace the size for your C-shaped ring of felt. I used chalk to trace my outline. It makes a nifty double as snow!

IMG_3172.JPG

We selected a variety of colors for a traditional and more modern tree. I'm kind of a felt softie. I can always find a reason to get a few sheets every time I swing by the craft store.

PC_partyhattrees_3.JPG
IMG_3173.JPG

Ring by ring, beginning on the bottom, glue the felt onto the hat! Varying colors adds some texture and life to your creation.

IMG_3192.JPG

You can imagine these as all white with silver and/or gold accents, too! Hello holiday photo booth!

IMG_3181.jpg
IMG_3186.jpg

Little elves find them quite funny.

Imagine whole forests!! Or entire family photos with everyone in tree-d hats!!

Enjoy these and don't forget to share if you make 'em! Thanks gals for the fun. :)

xoxo, MJ

#DeckingYourHalls

Is it finished yet? Please tell me some merry elves snuck into my house last night and hung that last set of lights and put away the final box of Christmas decor for us. I so enjoy decorating for the season, but, man, I am taking soooo long to get to it and through it all this year!

Nevertheless, I've managed to put up all of my favorites, and I'd thought I'd share them with you.

I loooove seeing other people's holiday decor, learning new traditions, sharing great ideas so I'm hoping that if I show you some of mine... well, you'll show me yours, too! Hence the hashtag #deckingyourhalls. Our decorations are simple and mostly homemade so this hashtag is far from showing off a glorious masterpiece display (but if you have one, share that, too!), and it's the longtime treasured objects or sweet new items that I'm hoping to highlight and reshare with all of you. So join in!! I'll be sharing photographs next Tuesday right here!

If you follow Pars Caeli on Instagram (we are friends over there, too, right? @parscaeli), you noticed that my children put up their trees this weekend, and each one reflects a different spirit and joy! My oldest daughter, M, in particular has a special story behind her Christmas tree that I'll be sharing tomorrow here and other places so stay tuned.

Here are some of the holiday delights in my home:

This simple nativity scene that my daughter, C, made at preschool when she was four. Preschool teachers, you do not get enough credit for the innovative projects you develop and complete for little hands. These terra cotta pots and bases, painted and assembled by C are a charming reminder to us of the simplicity of the season.

The Santa Pole is standing proudly in our dining room. A friend made this for us many years ago from lumber, caulking, a Santa hat, and clever painting. We turned it into our Santa Pole, and we use it every Christmas season to measure the height of each child. I love hearing them talk amongst themselves about how "little" they used to be!

Decking the halls big and small, each child adds holiday cheer to their rooms. My grandmother-in-law is a whiz with plastic canvas, and she's made us nearly 100 ornaments. We strung them into a garland for my son's firehouse decorations.

We are a house of many Nativity sets, and this year our largest is right by the front door. It fits with how we interact with the scene. I once learned from one of my fifth grade students an activity leading up to Christmas. When family members were helpful and especially kind to one another, they put a string in Jesus's manger to keep him warm and soften his rest. We began this tradition when the children were toddlers and have kept it up. Next to the Holy Family we keep a carved, heart-shaped bowl, filled with red and green string for our children to use to make a cozy manger. Sweet and simple.

More to share with you!! I hope you'll let us take a look into how you make the season bright at home. Don't forget to add #deckingyourhalls to your photos and tweets!

xoxo, MJ

More Holiday Traditions: Jesse Trees and Painted Wrappings

Happy Wednesday, good people! Two fun things to share with you today: an easy Fresh Holiday Tradition and an Advent tradition to begin.

First off, a little Advent. You all have seen some amazing Advent calendars going around, have you not? Do a quick search on Pinterest to see just how creative people can get with countdowns! I am amazed.

Have you heard of a Jesse Tree before? It's an Advent calendar of sorts, that takes you through the days leading up to Christmas and uses the words from the Old Testament stories to do so. I posted all the details last November, but I've received so many questions about it, that I wanted to post it again for new readers.

PC_jesse1.jpg

Wanna make one? Here's what you need:

  • 1 yard of purple felt (it's a traditional Advent color)
  • 1 yard of brown felt for the limbs and trunk
  • Printed or drawn symbol ornaments
  • Velcro to attach
  • Dowel and ribbon/twine to hang.
  • Fabric glue or hot glue
PC_jesse4.jpg

Head over here to get the full details including printable symbols, a reflection book to follow, and some more Advent ideas.

And as we get our homes and gifts ready for Christmas, I'm excited to share with you this great kiddo project from Jen over at Classic Play! I know that I've been looking for a few ways to contain, errrr focus, my children's holiday energy in good directions. This is a perfect project. And I love Jen's first reminder to keep it simple! Click over to see Painted Wrapping Paper!

Only two more projects in our Fresh Holiday Traditions series! Here's what we've seen so far:

What holiday traditions are you bringing out these days? Cookie baking? Christmas-book reading?

Check out these great traditions from my pal, Janae, over at Bring Joy.

xoxo, MJ